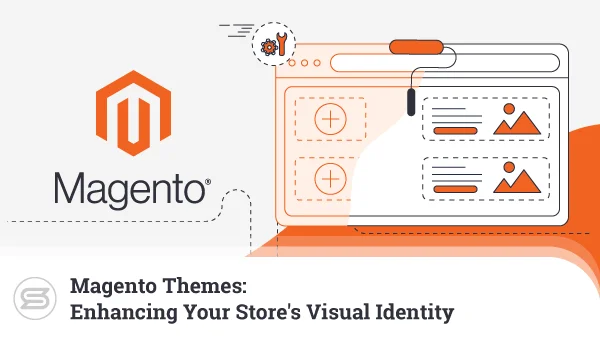
Magento 2 Theme Settings: Customizing the Look of Your Magento Store
There are close to 270 thousand Magento websites out there.
On the face of it, not all of them are direct competitors. For example, the owner of a Magento store selling car parts won’t be too bothered about how a cosmetics online shop built with the same technology works or looks.
However, imagine for a moment that you’re looking for a present for your significant other’s birthday. You find a Magento-based perfume-selling website that has what you need, so you’re considering placing the order.
While you’re at it, however, you remember your car needs a new set of floor mats, so you fire up Google again and end up on an auto part retailer also powered by Magento. Pictures of fancy bottles have been replaced by brake pads, but apart from that, the store looks exactly the same.
Will this deter you from buying the items from the two shops?
Let’s put it this way – it’s hardly an incentive to proceed to the checkout page. It leaves the user with the impression that the owners of the two Magento stores didn’t put enough effort into customizing their sites’ look and feel. They just picked a generic theme and decided it would have to do.
In this day and age, this isn’t enough. A successful ecommerce business has to provide users with a unique shopping experience, and to create it, you need to better understand how your Magento 2 theme works and what you can do to make the most of it.
Today, we’ll help you with that.
What’s a Magento Theme?

If Magento is good enough for global business operations like Coca-Cola and Land Rover (and it is because they’ve used it for their websites), it should be good enough for you.
However, starting your new ecommerce project with Magento isn’t as simple as installing the platform on your hosting account and adding some products. It requires a few carefully planned steps, and choosing a Magento theme is among the first and most important ones.
On the face of it, the theme is just a skin that determines your store layout and color scheme. However, in reality, it’s a major building block of your brand identity. In addition to forming the site’s overall look and feel, it creates an image in your potential customers’ minds that they will associate with your business.
It also determines the exact steps people will take when placing their orders, so it’s a critical user experience factor.
But how does it work?
In essence, a Magento theme is a collection of files. It comes either as a Composer package or as an archive.
In both cases, a theme consists of several key components:
- Layouts: A Magento page comprises two main components: containers and blocks. The containers are the header, footer, and sidebars that form the store’s overall skeletal design structure, and blocks fill the space between them, arranging the individual elements on the screen. The layouts in a Magento theme are the XML files that determine how all these are situated.
- Templates: For each design block, there is a template file full of HTML and PHP code that determines what’s inside it. The XML layout associates each template file with its block.
- Static files: These include the CSS stylesheets, JavaScript files, images, and fonts that arrive with your theme. The template files determine how they’re used in the individual design blocks.
Installing a Magento 2 Theme

You could say that installing a Magento theme isn’t as easy as changing the design of a WordPress or Joomla website. However, if you know what you’re doing, you should have no problems completing the task.
The exact steps depend on whether your theme arrives as an archive file or a Composer package.
Installing a Theme from an Archive
- Back up your Magento website
You can never be too careful when tackling tasks like setting up a theme. A working backup will eliminate the risk of data loss.
- Upload your theme files
Extract the theme files from the archive on your computer and use an FTP client to upload them to your server. The folder structure for any working theme is as follows:
app/design/frontend/[theme vendor]/[theme name]
- Install and activate the new theme
Installing the theme requires a couple of steps. First, run the setup upgrade command:
php bin/magento setup:upgrade
Next, it’s the command for deploying static content:
php bin/magento setup:staticcontent:deploy
Finally, it’s time to clean the cache:
php bin/magento cache:clean
All the commands must be executed from the site’s document root directory.
Your theme should now be visible in Magento’s admin panel. Go to Content > Design > Configuration, select your store view, and edit it. Pick the new theme from the Applied Theme drop-down menu and save your changes.
Installing a Theme Using Composer
- Back up your Magento store
Yet again, it’s vital to ensure you have a working copy of your online store that you can restore if something goes wrong.
- Use Composer to install the theme
You’ll need the theme’s name, its version, and the name of its vendor. The command has to be executed from your store’s document root folder, and it looks like this:
composer require [vendor]/[name]:[version]
- Finish the setup
Upgrading the setup, deploying the static content, and cleaning the cache concludes the installation:
php bin/magento setup:upgrade
php bin/magento setup:staticcontent:deploy
php bin/magento cache:clean
The theme should now be available under Content > Design > Themes in Magento’s admin panel.
Building Your Design and Customizing Your Magento Theme

Before you install the theme, you need to review the default design and make a list of changes you’d like to make to bring it closer to the look you have in mind. It will likely include some of the following tasks:
- Changing the logo: Log in to Magento’s admin panel and go to Content > Design > Configuration. Click Edit next to your store view. In the header section, you can upload your logo. Specify the dimensions and alt text and save the configuration to apply the changes.
- Modifying theme-specific settings: Many themes allow you to tweak the design through Magento’s admin panel. After installing the new theme, go to Content > Design > Configuration and see what modifications you can make through the interface. In some cases, the options are somewhat limited. In others, you can change anything from fonts to entire homepage elements.
- Modifying the color scheme and other CSS-related elements: If the settings you need aren’t available in Magento’s Admin Panel, you can change them by editing the theme’s CSS stylesheets. They can be found in app/design/frontend/[vendor]/[theme name]/web/css/.
After that, you may proceed with changing the page layout and templates. The XML files governing your store’s design layout are situated in
/app/design/frontend/[vendor]/[theme name]/Magento_Theme/layout
Editing them requires a deeper understanding of how the theme works, and some web development skills and experience definitely wouldn’t go amiss.
Design Customization and Magento 2 Child Themes
Editing layout and template files and stylesheets makes sense if you’re making relatively minor changes to the default design of your chosen theme. However, problems could occur later if the theme vendor releases an update. In such cases, the files will be overwritten, and your changes will be lost.
To avoid this, Magento’s developers have implemented theme inheritance functionality into the application. Just like in WordPress, you can use one design as a parent and create a child theme you can customize more easily.
You’ll retain the functionality that is already there, and you’ll be able to make more significant changes to the default design without worrying that they may be overwritten. Furthermore, your parent theme will act as a fallback mechanism in case something goes wrong with your modified files.
Let’s go through the steps below:
- Set up the correct directory structure
Magento theme files are located in:
app/design/frontend/[vendor name]/[theme name]
You have to keep the same structure for the new child template and locate its files in the vendor folder of the parent theme.
In other words, the child theme will be located in:
add/design/frontend/[parent theme vendor]/[child theme’s name]
Inside it, you need to create the following folders:
Magento_Theme/layout
web/css
web/images
web/js
- Set up the theme.xml file
Create a new file called theme.xml inside the child theme’s folder and open it with a text editor. Paste the following:
<theme xmlns:xsi=”http://www.w3.org/2001/XMLSchema-instance” xsi:noNamespaceSchemaLocation=”urn:magento:framework:Config/etc/theme.xsd”>
<title>[the name of your child theme]</title>
<parent>[the parent theme’s folder]</parent>
<media>
<preview_image>media/preview.jpg</preview_image> [A preview image URL (optional)]
</media>
</theme>
- Set up the registration.php file
In the child theme’s folder, you need a file with the name registration.php and the following content inside it:
<?php
\Magento\Framework\Component\ComponentRegistrar::register(
\Magento\Framework\Component\ComponentRegistrar::THEME,
‘frontend/[vendor name]/[child theme name]’,
__DIR__
);
- Create the composer.json file
The composer.json file is essential for any Magento-related software. It contains all the project dependencies and their versions. In basic terms, it tells Magento that your child theme is installed and ready to use.
To complete the installation, you need to enter the following in it:
{
“name”: “vendor/childtheme”,
“description”: “Magento 2 Child Theme”,
“require”: {
“php”: “~7.4.0||~8.0.0”,
“magento/framework”: “*”,
“magento/theme-frontend-blank”: “*”
},
“type”: “magento2-theme”,
“version”: “1.0.0”,
“license”: [
“OSL-3.0”,
“AFL-3.0”
],
“autoload”: {
“files”: [
“registration.php”
]
}
}
NOTE: Don’t forget to enter the correct information in the placeholders.
With that, your theme’s structure is in place, and you can start customizing. The exact approach depends on how different your new design needs to be from the default one. You can copy and edit files from the parent theme or create new CSS stylesheets, XML layouts, and templates. Just don’t forget to stick to the original file and folder structure.
ScalaHosting and Magento

Picking your theme and customizing it is vital for building a Magento online store that stands out. However, all these efforts will be in vain if your site is slow or unresponsive.
This means that before you even start to think about its design, you must ensure it’s deployed on a fast, reliable hosting platform. At ScalaHosting, it is our job to ensure our customers get just that.
We used all our experience to turn our Magento VPS hosting solutions into the perfect launchpad for your online business.
Let’s have a look at some of the benefits you can get with them.
Scalability and Flexibility With a State-Of-The-Art Cloud Infrastructure
Our virtual servers are deployed in a proper cloud environment. Instead of partitioning a single physical machine into several virtual instances, our experienced system administrators built a network of servers that work together to give our customers the power they need.
This makes our VPS solutions incredibly flexible and suitable for projects of all shapes and sizes. You can start building your Magento store on our Entry Cloud VPS plan, which gives you a stable platform for less than $15 per month. As your business grows, you can easily upgrade it without any downtime or service interruption.
The cloud environment allows you to tweak individual components per your needs, making the service extremely cost-efficient. For example, if your site requires more processing power and memory but has enough storage, you can add CPU cores and memory without touching the VPS’s SSD space. The net result is that you won’t pay for resources you don’t need.
There’s more to it than that, though. You can also downgrade the server’s processor and memory whenever and however you need, which is especially useful for ecommerce businesses.
For example, in the buildup to Black Friday, you’ll want to add more resources to ensure your VPS can serve the influx of new visitors. Then, when the promo period is over, and the traffic levels return to normal, you’ll want to revert to the original configuration to avoid paying for hardware you no longer need. Because your ScalaHosting virtual server is deployed in a proper cloud environment, you can easily do that.
A Fully Managed Service
A bare VPS can provide you with hardware resources but won’t necessarily give you the hosting environment you’re after. You need the server prepped and configured for the best possible speed and security. It’s not just the initial setup, either. If you want consistent and reliable service, your VPS must be regularly updated with the latest security patches and performance tweaks.
This could be a lot of hard work, but with our managed virtual servers, you don’t need to worry about any of it. Our technical experts will take care of all these tasks for you. They will set up and configure the firewall and other security mechanisms, install solutions that help you utilize the hardware resources in the most efficient way possible, and take care of ongoing updates and maintenance tasks.
You can focus 100% of your attention on your project, and rest assured that your server is in the hands of people with decades of experience.
SPanel
The job of the web hosting control panel is to make your life easier. This was our main motivation when we started building SPanel, our proprietary all-in-one server management platform. It offers an intuitive interface with everything you need and lots of cool features that will make launching a new online store a breeze.
For example, using Softaculous, you can install Magento in mere minutes, and SPanel will automatically install a Let’s Encrypt SSL certificate on your domain as soon as you point it to your new server. The unique SSHield security system gives you extra peace of mind when building your site, and mundane tasks like creating an email inbox to communicate with your client take no more than a couple of clicks.
Daily offsite backups come as standard, as do many tools for managing anything from databases to cron jobs, DNS records, and email forwarders and filters. As a ScalaHosting customer, you can enjoy all this and use the platform to host as many projects as you want without paying even a penny in licensing fees.
Free Website Migration
Already have a working Magento website? Our technicians can migrate it to your new ScalaHosting VPS. You don’t need to worry about moving gigabytes of information, exporting and importing databases, and recreating email accounts.
Instead, you open a ticket with our technical support department, give them the credentials for your old hosting account, and schedule the migration for a specific date and time. Our experts will transfer everything for you, ensure it works, and inform you so you can update the domain’s nameservers. This means the whole migration can be completed without even a second of downtime.
Responsive and Knowledgeable Technical Support
We pride ourselves in delivering industry-leading response times when customers try to contact our technical support agents. The first reply to live chats comes within 30 seconds, and one of our experts will be working on your case less than 15 minutes after you post a ticket. Our extensive training and quality control procedures ensure that help is not only quick but also efficient, and the tons of five-star reviews show that our strategy is working.
If you have any more questions regarding our hosting services, don’t hesitate to contact our sales specialists, who will assist you further.

Conclusion
The journey from landing a user on your Magento website to getting them to place an order is longer than you might think. You can implement numerous techniques to ensure they make the purchase. However, none of them will work if they’re not impressed with how your site looks.
That’s why it’s critical to install the right theme and implement the changes necessary to create a truly unique design that people will like. Believe it or not, this is one of the first steps toward creating a successful ecommerce business.
Frequently Asked Questions
Q: Where is my Magento 2 theme stored?
A: Your Magento theme’s files are situated in /app/design/frontend/[vendor]/[theme name]/. If you want to add custom code to them, you can either edit the files directly or create a child theme, inheriting the parent’s functionality and saving you quite a lot of time on building a design from scratch.
Q: How do I edit the CSS files in Magento 2?
A: Your theme’s CSS stylesheets are located in app/design/frontend/[vendor]/[theme name]/web/css/. You can download and edit them locally, use your control panel’s file manager, or do it via the Terminal and a command-line text editing utility like Nano or Vim.
Q: How do I customize my Magento 2 theme?
A: If you want to build a custom theme for Magento 2, first you will need to locate all its customization options. They can be found in Magento’s admin panel. The settings you can tweak depend on the template itself. They could range from changing basic elements like the logo to an extensive swap of the color scheme.