Publishing products in WooCommerce is as straightforward as publishing WordPress posts:
1. Click Products → Add New in the main menu.

2. At the Add New Product screen, enter a product name.

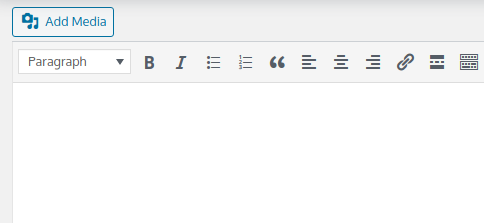
3. Write a detailed description in conversational style using accessible language. Make sure it’s clearly understandable by as many people as possible. Add relevant media as you see fit.
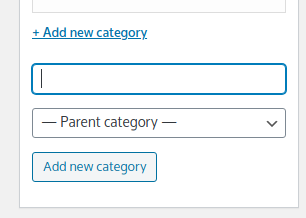
4. To the right of the Product Description field, select or create a Product Category.
Categories are obligatory, and if you don’t select one — the product will be saved to Uncategorized.
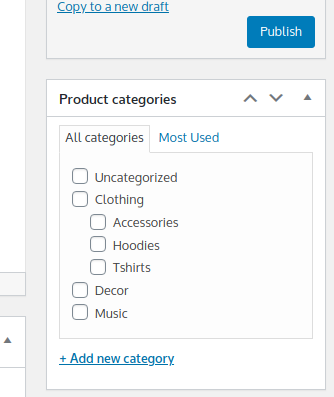
Note: When creating categories, makes sure to make them as distinguishable as possible.
5. Below the Product Categories box is the Product Tags option. Tags are optional, and you can enter as many as you find relevant. These are shown on the product page, under the product description.
Note that this can vary across different WooCommerce themes.
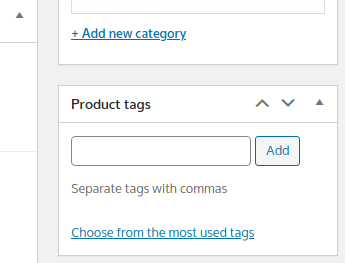
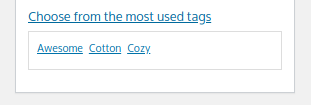
You can click the link Choose from the most used tags and select from a predefined list of product tags, also known as a Tag Cloud.
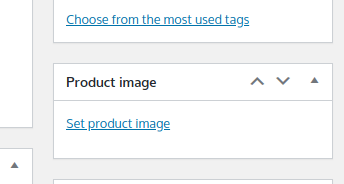
6. Below is the Product Image box. Setting up a primary image for your product is the same as picking a featured image for a post. Simply click the Set Product Image option and use the Media Manager to upload or select the desired photo.
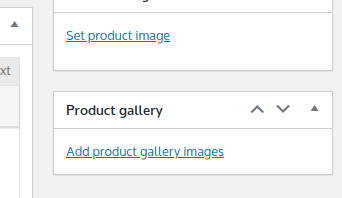
7. Moving on to the Product Gallery box below. In most cases, having 3 to 7 additional product photos is known to influence sales positively. Works just as you would insert a gallery into a regular post.
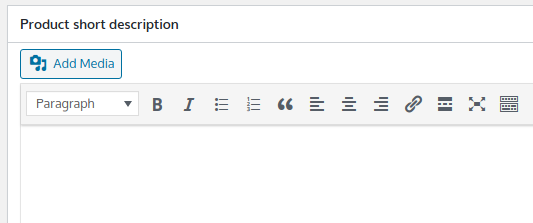
8. Optionally, you can enter a Product Short Description displayed on places such as product category pages. This box is located at the bottom of the page.
Note: Be sure to first test if your theme uses this field on product listings. Just add some example content into this box and see if it displays for this product on your storefront.
The Product Data box is used for defining product types and product characteristics. It’s the most complex part of the Add New Product screen.
We will first see how it works with the backbone of your store and inventory – the simple product. We will cover the alternative product types afterward.
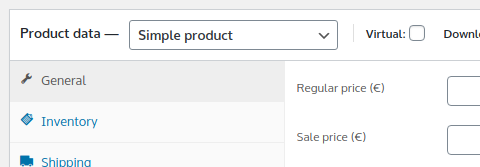
Adding Simple Products
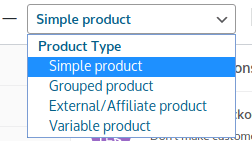
Simple Product is the default option selected in the Product Data drop-down.

The General tab features:
- Regular Price
Sets the Price tag on your product. Enter with the default currency for your store (in case you are using multiple currencies).
Note: When using multi-currency plugins, enter product prices as per your store’s initial currency. If you begin with USD but add support for 11 other currencies, enter everything in dollars and let the plugin handle calculations.
- Sale Price
This is the discounted price that overrides the Regular Price. Click the Schedule link to set a time frame for the sale.
Note: Sale prices are valid until 23:59 of the last day you have specified.
- Tax Status
Set tax classes to apply to either:- Product
- Shipping only
- No taxes (disables tax classes)
- Tax Class
Assigns an existing Tax Class to the product.

The Inventory tab is where you define inventory management rules at the product level.
About Inventory Management in WooCommerce
Inventory management in WooCommerce enables you to define how orders are handled based on your product availability.
Configuring Inventory Management at the Product Level
- SKU
Stands for Stock Keeping Unit and is the unique identifier for each one of your products. - Manage Stock
Toggles stock management for the product. Overrides the global stock management setting set from WooCommerce → Settings → Products → Inventory tab.- Stock quantity
Accepts numerical values, reflecting how many units of the products you have available for purchase. - Allow backorders
Toggles whether customers can order products that are out of stock.
– The default is Do not allow;
– Allow, but notify customers will let customers know when backordering is in place;
– Allow enables backorders without notifying customers.
- Stock quantity
- Low stock threshold
Once stock quantity is reduced below the number entered in this field, a message is displayed on the product page that there are X items left.
Note: What message is displayed may vary from theme to theme.
- Stock status
Displayed when Manage Stock is disabled. Use this to notify customers whether the product is:- In stock
- Out of stock
- Available for backorder
- Sold individually
Use this feature when you want to auction or simply sell a product once. Useful when you are selling unique goods such as boutique items or works of art.

The Shipping tab handles product-specific data used in shipping calculations by the global shipping settings we set earlier.
- Weight
Accepts a numerical value. Displays your store’s metric system in brackets. - Dimensions
Three fields, essential to shipping calculations. Accepts only numerical values. Displays the metric system in brackets. - Shipping Class
Allows for No Shipping Class to be applied to the product. Will list classes you have created from WooCommerce → Settings → Shipping → Shipping Classes.

The Linked Products tab has fields for Upsells and Cross-Sells, which enables your store to display products relevant to the one users are currently viewing. You can fill out both fields in the same manner as you would add tags to a post.
Cross-Sells and Upsells Explained
Upsells are the act of offering customers a product complementary to the one they are shopping for. It’s been statistically proven that people who have already decided to purchase from you are much more likely to be convinced to add a complementary product.
A classic example is “Would you like fries with that?” used in McDonald’s. Fries are a relevant and inexpensive addition to a sandwich. Use this as an example when deciding what products to specify as upsells.
If adding complementary products does not apply to you, try upselling customers with higher-tier versions of the product they are interested in.
Example: If a client is adding an iPhone 6 to their shopping cart, you can suggest they try iPhone 7, 8, or 9 instead.
Cross-sells, often confused with upsells, are actually quite different. Cross-sells are still a suggestive sales technique, but this time you are not offering complementary products. You’re making a guess based on what your customer is shopping for.
Example: If someone orders an iPhone, you want to be displaying iPads as cross-sells, assuming that iPhone users are more likely to purchase other Apple products.
Both techniques have been proven to increase revenue and customer satisfaction. Targeting your existing customer base saves you a lot of time and money compared to winning over new ones. Of course, for your business to be really successful in the long run, orders must be coming from both returning and new customers.
Adding Upsells and Cross-Sells
- Upsells
- The field uses autocomplete. Enter three or more characters to get suggestions.
- Upsells are displayed right below the product description on the product page.
Tip: Add products that are relevant to the main product but lower in price.
- Cross-sells
- Field uses autocomplete.
- Cross-sells are displayed on the cart page below the list of items.
- Cross-sells are displayed in the shopping cart below the list of cart items.
Tip: Make a guess as to what related but non-complementary items your customer might be interested in when buying the product.
Example: If you’re creating a product entry for an MP3 player, add backpacks and bags with an MP3 player compartment.

The Attributes tab manages custom product attributes.
About Product Attributes
Product Attributes are another feature of the Simple Product. Enter product attributes to specify how your product varies in a certain dimension. When product attributes are present for a Variable Product, customers can browse through them and customize their product before placing an order.
Example: If you are selling T-shirts, the size would be a product attribute with values S, M, L, XL, and others. Adding these attributes to your product enables customers to pick the right size using a drop-down menu on the product page.
Product attributes are sets of data that you can activate for all products (global attributes) or create specifically for a single product (custom attributes).
In this section, we’ll go through the process of defining a custom attribute that will be available for use only for the current product.
Global attributes are explained in the chapter Organizing WooCommerce Products – Product Attributes.
Creating a Custom Attribute
1. Back at the Attributes tab in the Product data box, make sure the drop-down menu is set to Custom product attribute and click the Add button.

2. This will create a new set of fields for specifying the custom product attribute.
3. Fill out the Name and Value(s). For our example, they’ll be:
Name: Fabric
Values: Cotton | Synthetic
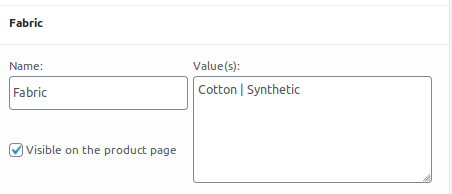
4. Keep the Visible on the product’s page option enabled if you would like to list the attribute in the Additional Information tab on the product page.
Attributes are also used for sorting items on the category pages of your store.

5. Click Save Attributes to confirm the changes.

You will now see the name of the new entry – Fabric, as per our example. Hover the mouse over and notice the items that appear on the right-hand side of the row.
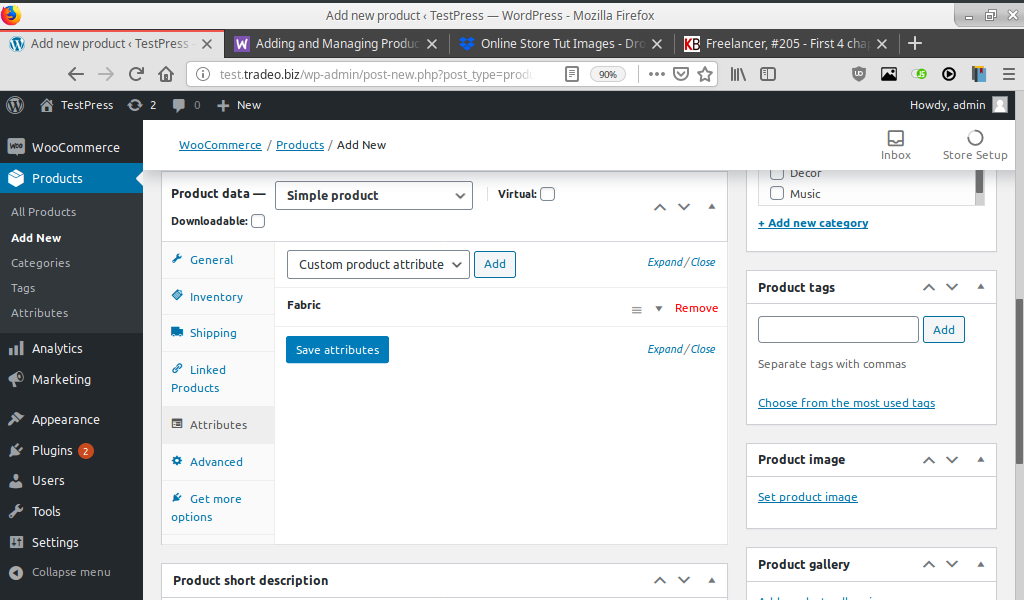
- When multiple attributes are present, you can use the drag handle on each row to change their order. The order in which you arrange the attributes is reflected on the product page.
- Clicking the downward-pointing triangle will expand the attribute settings.
- Clicking Remove will display a confirmation prompt. If confirmed, this will permanently remove the attribute.
Adding Downloadable Components

Clicking the Downloadable checkbox adds another three fields to the General tab, right below the Price fields.
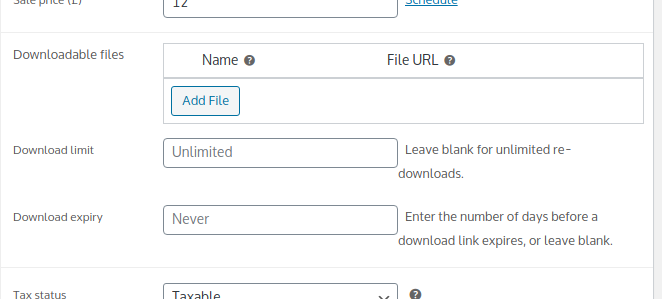
- Downloadable Files is where you add files you want to be included in your outgoing emails.
Note: When choosing a file, bear in mind that email providers impose size limitations for file attachments (ex: max 20MB size for Gmail). - Download Limit accepts numerical values only – use it to specify how many times the file can be downloaded. Leaving it blank means an unlimited number of downloads.
- Download Expiry accepts numerical values only. Enter the number of days to pass before the download link expires. Leave blank if you want to keep it without expiration.
Making the Product Virtual

Ticking the Virtual checkbox makes the product virtual, freeing it from shipping and tax calculations. The Shipping tab actually disappears completely if you enable this option.
Keep in mind that having a product set to Virtual simply removes its physical properties. If you are selling software downloads or other kinds of digital goods, you still need to have the Downloadable checkbox checked as well.
Tip: When selling digital services with limited availability, you can enable Inventory Management alongside having the product set as Virtual. If, for example, you are selling logo design services and each project takes a couple of weeks to complete, you can’t work on more than 4 orders at once. In that case, make use of the stock counter feature by entering product quantity:
- Set Stock Quantity to 4.
- Set Allow Backorders? to Do not allow.
- Set Low Stock Threshold to 1.
Once you complete a web design assignment, increase the Stock Quantity back to its normal values (4 in this case). If your service is out of stock, you can equip WooCommerce with a plugin that prompts customers to subscribe by email for a notification when the product becomes available again.
Adding Grouped Products
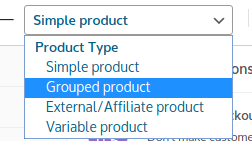
When switching to the product type, tabs are rearranged, with Inventory coming at the top of the list.
Inventory Tab

A Grouped Product consists of multiple Simple Products that we add through the Linked Products tab. Grouped products receive their own SKU number.
Note: Grouped products don’t have inventory options apart from an SKU number. If you see these three fields, it’s because you have enabled Stock Management before switching over from Simple Product. You can switch back to Simple Product to correct this.

Linked Products Tab
Use the Grouped Products field to add products just as we did for Cross-sells and Upsells.
Note: This product type has no Cross-sell field. It has been removed as Grouped Products is basically a tool for grouping items into a cross-sell.
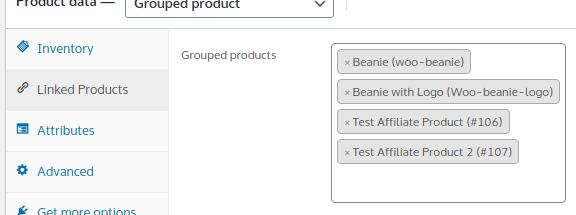
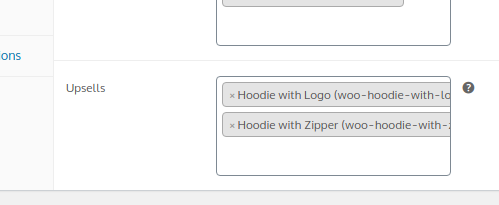
Remember to use the Upsells field for adding relevant products that will display below the product description.
Tip: Create Grouped Products once you have published all Simple Products you will be grouping. You can also save everything as a draft and continue editing it later.
When adding Simple Products to a Grouped Product, decide whether you want these to appear in your catalog as standalone entries or be a part of the grouped product only. If you don’t want them to appear solo — have the products hidden from your catalog:
1. Navigate to the Edit Product screen for the simple product you want to hide.
2. To the right of the product description, click the Edit link located under Catalog Visibility in the Publish box.
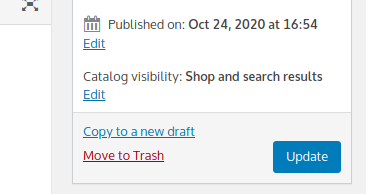
3. Select Hidden from the list of options and click Okay to confirm your choice.
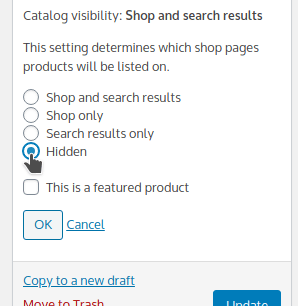
4. Save product changes by clicking Update.
Attributes Tab

Attributes for Grouped Products work the same way as for Simple Products.
If you would like to have your customers switch through available product attributes to configure their order – we will cover Variable Products in a later chapter.
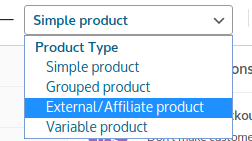
Adding an External/Affiliate Product
General Tab

Switching over to this product type takes us back to the General tab. Apart from this, tabs remain unchanged as in the Grouped Product section.
Having the General tab back marks the addition of two new fields:
- Product URL, where you enter your affiliate link for the product you are promoting.
- Button text, used for labeling the Order Now button. Typical examples would be Order on Amazon or Click here for 15% off.
Inventory Tab

External/Affiliate Products are not handled by your store per se, so they have no inventory management options. At most, you can enter an SKU if you need it for your own reference.
Linked Products Tab

Includes only Upsells that can also be other affiliate products.
Tip: You can complement an external product with your own product line of accessories.
Attributes Tab

Attributes work as with other product types:
- for filtering in the product category pages
- for reference on the product page
Adding a Variable Product
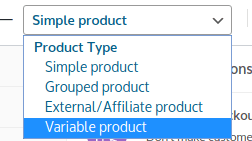
Variable Products enable you to create product alternatives based on attributes you’ve added earlier through the Attributes tab.
This is done through the Variations tab, which helps you create variations out of every attribute. Customers can then use drop-down menus on the product page to pick the variation that works best for them.
In terms of inventory management, variable products and their variations can both have Quantity and SKU set through the Inventory and Variations tabs.
General Tab

The General tab has no price fields because every product variation is a Simple Product with its own Regular and On Sale prices. The cost of the Variable Product inherits the price of the variation the customer selects.
You can toggle Tax Status and pick a Tax Class that will apply to any of the product variations.
Inventory Tab

The SKU field is available again for entering an identifier.
About Stock Management in Variable Products
In the Inventory tab, enabling Manage Stock will make the Stock Quantity field update in accordance with the quantity of all ordered variations.
While having this option enabled, you can also toggle the stock management for each product variation present in the Variations tab. In such cases, the Stock Quantity for the variable product (not the variation) will update only when there’s an order for a variation without stock management enabled.
We can easily illustrate these two overlapping features with two example scenarios:
- Your store has a variable product T-shirt that you’ve entered with the following attributes: size S, blue and black colors. This creates the following variations:
- variation 1: size S, color blue
- variation 2: size S, color black
- Scenario 1: Manage Stock is enabled only in the Inventory tab. Stock Quantity is set to 20. A customer orders T-shirts in both colors, size S. A total of 2 items. Once the order is received, the stock quantity is reduced to 18.
- Scenario 2: Manage Stock is enabled in the Inventory tab. Stock Quantity is set to 20.
This time, however, in the Variations tab, Manage stock is enabled for only one of the variations: size S, color blue. Its stock quantity is set to 10.
Again, the customer orders t-shirts in both colors, size S. A total of 2 items. Once the order is received, Stock Quantity in the Inventory tab is reduced to 19, and Stock Quantity in the Attributes tab is reduced to 9.
To sum it all up, every product variation without Stock Quantity enabled decreases the stock quantity of the variable product. Exceptions to this rule are variations with their own Stock Quantity enabled.
Once you have enabled Stock Management and have set the Stock Quantity, you can configure Allow Backorders and Low Stock Threshold. These two are only available through the Inventory tab.
Sold Individually disables the Quantity field for that product. This way, customers can only add a single item of each variation to their cart.
Example: Selling antiques. You can have a couple of the same item, with a slight variation such as the color. Adding these variations to the variable product and enabling the option Sold individually limits customers to purchasing just a single unit of the product.
Shipping Tab

Fields in this tab are identical to the Simple Product type: Weight, Dimensions, and Shipping class.
Linked Products Tab

Features the Upsells and Cross-sells product fields. Again, identical to Simple Product.
Attributes Tab

The Attributes tab is part of where the variable product magic happens. As discussed, Variable Products consist of variations that are simple products in their core. Product variations can be based on the product attributes you enter here.
Create product attributes as you normally would.
Mark the Used for Variations checkbox when you want this product attribute to be used for creating variations.
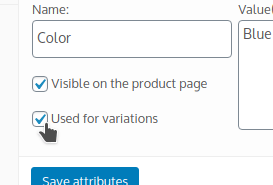
This checkbox is visible below the Name and Values fields for the attribute you are creating.
Remember to use the Visible on the product page checkbox. When active, it displays the product attribute and its values under the Additional Information tab on the product page.
Once you are done creating product attributes, make sure to save them with Save Attributes. To complete the creation of the variables, switch over to the Variations tab.
Variations Tab

Your first point of interest here is the Add Variation drop-down menu.

Use this menu to manually add variations or generate them based on the product attributes we’ve entered earlier.
To have variable products generated based on variations, select Create variations from all Attributes and then click the Go button.
Note 1: Generating variations works only for attributes that have Use in variations checked.
Note 2: Variations are generated at 50 per run to avoid overloading your store. You may need to click Go multiple times until there are no unprocessed attributes.
Now that the product variations have been generated, you will see another menu.
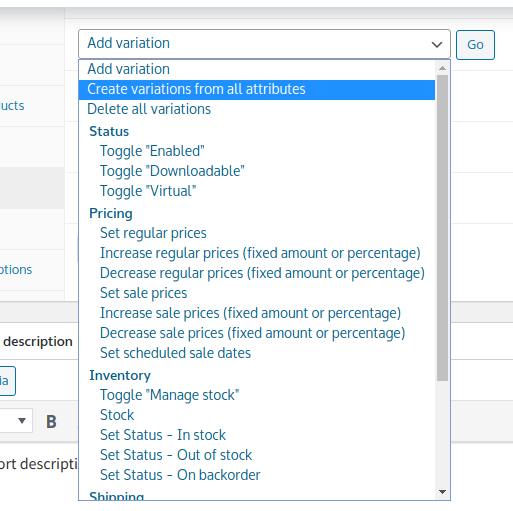
Aside from Create from Attributes, the menu also contains:
1. The Delete all Variations option
This one deletes all product variations you’ve created – generated from attributes and any other manual entries. Features a double confirmation prompt.
2. All other options can be summarized as Bulk Actions
Similar to the Products screen, you can use bulk actions for the variations you’ve created. Just keep in mind that bulk actions apply to all variations.
Bulk Actions Example
To try this feature out, let’s set the base price across all variations. Variations must have prices to be visible to your customers.
1. From the drop-down menu, select Set Regular Prices and click Go.
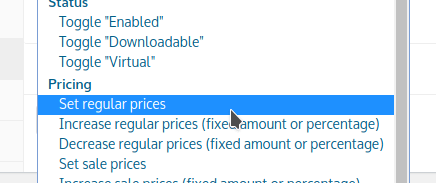
2. A prompt will appear. Enter the desired price, $19.99 for example, and press Enter.
3. Expand any of the product variations to check the Regular Price field.
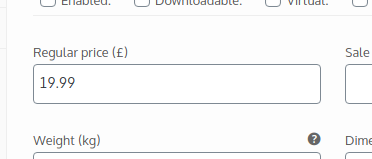
This is how easy it is to manage product variations. The best thing is this applies to a number of other WooCommerce product features. To use Bulk Actions productively, always apply them first and then work through the exceptions.
Note: Changes to product variations need to be confirmed with the Save Changes button at the bottom of the Variations tab.
Importing Products Through a CSV File
Comma-separated value (CSV) files are plain-text files that can load a table through any spreadsheet editor such as Microsoft Excel and LibreOffice Calc.
The values of table cells are separated with commas. Table rows are new lines of text in the file.
Managing products through a spreadsheet can save you a lot of time and errors for two main reasons:
1. Seeing your entire inventory in the compact layout of a table allows you to make edits through unrelated products in a matter of seconds.
2. Web pages need time to load every screen you visit. That’s why it’s a real time-saver to edit products locally on your computer.
Instruction on working with applications such as Microsoft Excel and LibreOffice Calc is beyond the scope of this guide. What we’ll look over is:
- How you can download the CSV files to understand product entries better.
- Basic guidelines for creating CSV product files.
- A brief overview of the CSV import process.
Downloading an Example CSV File
Downloading and importing CSVs is briefly explained in the chapter Testing With Sample Products.
Follow the below link to the sample-data folder, located in the public WooCommerce code repository on GitHub: github.com/woocommerce/woocommerce/tree/master/sample-data
- Click on sample_products.csv
- Click the button Raw
- Save the file to your hard drive.
Opening and Editing the CSV File
Opening the CSV file with your spreadsheet editor will present you with a similar window:
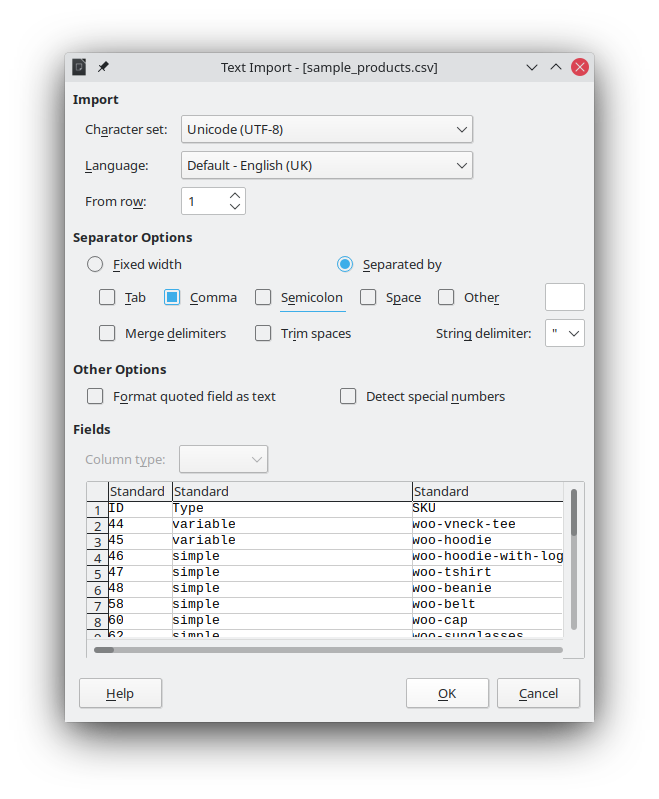
Make sure the following settings apply:
- Character Set is Unicode (UTF-8).
- Separator Options has only Comma selected.
- There are no other separator or display options selected.
This is how the Products table should look like:

The first row is known as the Table Header. WooCommerce uses it to recognize what is the intended usage for the values of every column.
To Start Filling Out Your Products Table:
1. Save a new copy of it (Save as…).
2. Delete all rows and use the original CSV file as a reference.
Things to Note on WooCommerce Reading Your CSV File
You can fill all empty cells with default values according to your store settings.
Leave the ID column empty to create new products or enter existing product IDs to update them.
Tip: Grab the ID of an existing product from the URL of the Product Edit screen. It’s always a numerical value located after: ?post=

- Some columns apply only for specific product attributes and types. Such are Download 1 Name and Download 1 URL. Leave them empty unless you want to use the corresponding product features.
You can check the official WooCommerce Product CSV Import Schema for full reference.
Importing the CSV to WooCommerce
1. Back in the WordPress admin, go to Tools → Import
2. Locate WooCommerce Products (CSV) at the bottom of the list with importers
3. Click the Run Importer link below.
4. Upload your CSV file with the file picker and click Continue.
5. Take note of the Update Existing Products checkbox. Use it when your CSV contains the IDs of existing products.
6. WooCommerce automatically maps CSV columns to their appropriate product counterparts. Making changes at this step is required when handling custom product types and other advanced use cases. Scroll down to the bottom of the page and click Run Importer to continue.
7. The system needs a few minutes to import all your products. Click View Products to switch to the Products screen.
To ensure importing your custom CSV file goes smoothly, make a note to clean up any unnecessary product entries. More on that in the next chapter.


