Email authentication is a process where multiple techniques are used to provide verifiable information about the origin of a message. It confirms whether it was sent from a reliable source. It also helps people avoid malicious messages and, as such, has a pivotal role in ensuring the integrity and security of electronic communication.
This process involves the implementation of various protocols, such as SPF (Sender Policy Framework), DKIM (DomainKeys Identified Mail), and DMARC (Domain-based Message Authentication, Reporting, and Conformance). These three collectively work to verify the legitimacy of the sender and protect recipients from fraudulent content.
The importance of authenticating emails goes beyond mere security concerns; it also directly influences their deliverability. Internet Service Providers (ISPs) and mail services utilize authentication data to gauge the legitimacy of incoming messages, which affects whether they end up in the recipient’s inbox or their spam folder or get rejected altogether.
In short, proper email authentication not only protects users from potential cyber threats but also ensures that legitimate emails reach their intended audience, thereby enhancing deliverability and user trust. In this article, we’ll take a deep dive into the three most widely-used email authentication protocols, show you how to set them up, and more.
Let’s begin!
The Role and Inner Workings of Email Authentication Protocols

In order for the authentication process to be successful, all three protocols we mentioned above must be implemented. That’s because all of them work collectively to contribute to verifying the legitimacy of email senders.
SPF confirms the authorized mail servers, DKIM ensures the integrity of the message’s content through cryptographic signatures, and DMARC provides policies and reporting to manage the outcome of each check.
And since the three provide a thorough verification process, they can also help users battle phishing and email spoofing and boost user trust. Phishing attacks and email spoofing involve malicious actors who are attempting to trick recipients into believing that an email is from a trustworthy source. They’re made with the intent of stealing sensitive information, spreading malware, or initiating fraudulent activities.
Preventing Email Spoofing
Email spoofing is an attack where the hacker forges the sender’s address to make it look as if the message is from a trusted source. SPF and DKIM are very effective in preventing this type of threat.
SPF allows you to specify authorized mail servers. When an email is received, the recipient’s server checks the SPF records to confirm the sender’s legitimacy. DKIM adds a digital signature to the message, providing a cryptographic verification method to ensure that no one has tampered with it during transit.
Mitigating Phishing Attacks
Phishing attacks usually rely on creating emails that mimic real conversations to deceive recipients. Domain holders can set policies that instruct receiving mail servers on how to handle messages that fail SPF and DKIM checks by implementing DMARC. This helps prevent the delivery of suspicious content to peoples’ inboxes and minimizes the risk of falling victim to phishing attacks.
DMARC also enables you to get reports on email authentication results. This allows you to monitor and take action against unauthorized use of your domains.
Enhancing User Trust
A proper verification process can also foster user trust in the email ecosystem. People are more likely to interact via electronic communication without fear of compromising sensitive information if they can trust that a message is genuinely from the claimed sender. This is pivotal for all brands and businesses, especially those who rely heavily on email marketing and networking.
Now that you know more about email authentication protocols in general, let’s explore the three most-used ones in more detail.
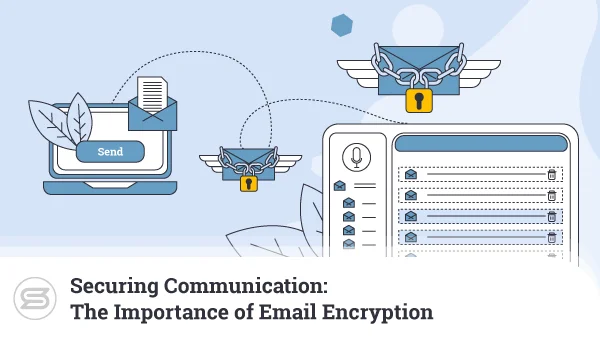
You can include an image here that shows boosting user trust.
Sender Policy Framework (SPF) Explained

Sender Policy Framework (SPF) is a protocol designed to help prevent email spoofing. It does so by identifying the mail servers that are allowed to send messages from a given domain.
SPF allows domain owners to declare which servers are authorized to send emails on their behalf. This is achieved by publishing SPF records in the domain’s DNS (Domain Name System).
An SPF record contains a list of all authorized IP addresses or hostnames that are permitted to send content. When an email is received, the recipient’s mail server can check the SPF record of the sender’s domain to verify if the originating server is included in the list.
For example, let’s say an employee of yours is sending an email to a vendor. The vendor’s mail server can check if the address your employee used is on the list of authorized servers and confirm that the email Is legitimate.
If the SPF check passes, it indicates that the email is most likely trustworthy because it’s coming from a verified server. If it fails, it raises suspicion about the message’s authenticity and could be marked as spam or rejected altogether. The process that this protocol uses to authenticate emails helps greatly in reducing the risk of phishing and email spoofing, as it allows you to check the legitimacy of your incoming messages.
What Does an SPF Check Look Like?
Now you know what SPF does. We’ll explore how it works next, showing you what an SPF check looks like from start to finish.
- Publishing Records: You need to publish SPF records in your domain’s DNS in order to set up your SPF protocol and use it to your advantage. These records contain all the IP addresses and hostnames that are allowed to send emails on your domain’s behalf.
- Recipient’s Server Checks Your SPF Record: You send an email to your intended recipient. Their server then checks the SPF record for your domain in the DNS. If the hostname or IP address you’ve sent a message from is listed as an authorized sender in the record, your email will pass the check.
- Action Based on SPF Results: An email will go through without any issues if it has passed the SPF evaluation. If it hasn’t, it means that the address used to send it may be unauthorized, and the recipient’s server can take actions such as marking the message as spam, quarantining it, or rejecting it.
This is how SPF prevents unauthorized senders from using your domain. They’ll try to send an email from an address that has your domain name but isn’t in your SPF record, and it’ll be rejected or marked as spam as a result.
Publishing an SPF Record in Your DNS
In this section of the article, we’ll show you how you can specify which IP addresses and hostnames can use your domain to send emails.
You’ll need to publish an SPF record in your DNS, which you can do by following the below-given steps:
- Access Your Domain’s DNS Settings: Log into the control panel or dashboard of your registrar or hosting provider.
- Locate DNS Settings or DNS Management: Look for the section that lets you manage your DNS.
- Create a New TXT Record: Find the option to add a new TXT record.
- Enter the SPF Record: Create a new TXT record and enter the SPF information. This typically starts with “v=spf1” (version 1 of SPF). Then, specify the IP addresses, hostnames, or mechanisms allowed to send emails on behalf of your domain. Here’s a simple example:
v=spf1 ip4:192.0.2.1 include:mail.example.com -all
This record allows emails from the IP address 192.0.2.1 and the mail server at mail.example.com to send emails from your domain.
- Save the Changes: Save the changes you’ve made and publish the record. This can be labelled as Save, Update, or Publish.
- Verification: It may take some time for your new SPF record to start working across the DNS. You can use an online record-checking tool to ensure that your SPF record is correctly published and valid.
DomainKeys Identified Mail (DKIM) Explained

DomainKeys Identified Mail (DKIM) is an authentication method that adds a digital signature to emails. Its primary purpose is to verify the integrity of an electronic message and ensure that it has not been altered during transit. Its role in ascertaining the authenticity of emails can be broken down into a few points:
- Digital Signature: DKIM uses asymmetric cryptography to add a signature to the email header or body. The sending mail server generates a unique private key, signs the email with it, and then publishes the corresponding public key in the DNS records of its domain.
- Public Key in DNS: This acts as a reference for recipient servers. They retrieve the public key from the DNS using the domain found in the DKIM signature when an email is received.
- Verification of Signature: The recipient’s email server uses the public key to authenticate the digital signature on the email. It confirms that the message has not been tampered with and that it genuinely came from the claimed sender if the signature is valid.
- Prevention of Impersonation and Tampering: This protocol helps prevent tampering with electronically sent content during transmission. It adds an extra layer of security by ensuring that the email received is the same as the one sent by the original sender. This prevents attackers from modifying content.
- Complementing SPF and DMARC: DKIM is primarily concerned with the integrity of an email’s contents. When used together with SPF and DMARC, it forms a comprehensive authentication framework that addresses both the source and content aspects. This provides a more robust defence against online attacks.
Adding Digital Signatures to Email Headers
Here is a step-by-step explanation of how DKIM adds digital signatures to email headers:
- Generating Key Pairs: The process begins with the sender’s email server generating a unique key pair. The pair consists of a private key, which is kept secure on the sending server, and a corresponding public one, which is published in the DNS records of the sender’s domain.
- Hashing Email Content: The mail server then generates a hash of the email content before sending it. This usually includes the body and certain selected headers. It creates a fixed-length string of characters unique to the content of the message.
- Signing the Hash with the Private Key: The private key is then used to sign the hash of the content. This creates a digital signature specific to that email, which is appended to it as a DKIM-Signature header.
- Inserting a DKIM-Signature Header: The DKIM-Signature header contains various pieces of information, such as the selector, the algorithm used, and the signature itself. The selector is a string that helps the recipient’s email server locate the correct public key in the DNS records. The DKIM-Signature header is inserted into the email header section.
- Sending the Email: The email is now sent to the appropriate address along with the DKIM-Signature header.
- Verification: The recipient’s server retrieves the public key from the DNS using the domain and selector specified in the DKIM-Signature header.
- Decrypting and Comparing: The public key is used to decrypt the digital signature in the header. It reveals the original hash of the email content. The recipient’s server then independently generates a hash of the received content.
- Comparing Hashes: The receiving email server compares its generated hash with the decrypted hash from the DKIM-Singature header. It then confirms that the email has not been tampered with during transit if the two hashes match.
Domain-Based Message Authentication, Reporting, and Conformance (DMARC) Explained

DMARC, or Domain-based Message Authentication, Reporting, and Conformance is an authentication and reporting protocol designed to enhance the security of online communication. It builds upon SPF and DKIM and provides domain owners with a comprehensive approach to email protection.
Its key components include the following:
- Integration with Authentication Protocols: DMARC integrates SPF and DKIM to give a layered defence against email spoofing, phishing, and other similar threats. It ensures a more complex authentication process by doing so and covers both the source IP address and the integrity of email content.
- Policy Framework: This protocol allows domain owners to define policies for how their emails should be handled if verification checks fail.
The policies include:
- “None:” This is a monitoring mode where DMARC provides reporting but does not enforce any actions.
- “Quarantine:” Messages failing authentication may be delivered to the recipient’s spam or quarantine folder.
- “Reject:” Emails that fail checks are rejected outright and not delivered to the recipient.
- Reporting Mechanism: This enables you to receive feedback on the results of authentication checks. The reports provide insights into which servers are sending emails on behalf of the domain and if those messages pass or fail the checks. They help identify potential abuse, phishing attempts, and misconfigurations.
- Public DNS Record: You need to create a DNS record that includes your DMARC policy and information about how to handle emails that fail SPF and DKIM checks in order to implement this protocol. The record also consists of an address where aggregate and forensic reports are sent.
- Incremental Deployment: This protocol is designed for incremental deployment. It allows you to start in monitoring mode (“None”) to assess the impact on your email ecosystem before moving to a more actionable policy.
- Global Standardization: DMARC is widely adopted and supported by major email providers and organizations. Its widespread use allows it to offer a more secure and standardized approach to authentication, which is beneficial to both senders and recipients.
Configuring DMARC Policies
Configuring DMARC policies involves setting up DNS records for your domain.
Here’s a step-by-step guide on how you can do it:
- Understand DMARC Components:
- Policies: Specify what actions should be taken if an email fails authentication (none, quarantine, or reject).
- Alignment: Ensures that the domains used in the “From” header and verification results (SPF/DKIM) match.
- Reporting: Allows you to receive reports on email authentication results.
- Create a DMARC TXT Record: Log into your DNS hosting provider’s website. Create a new TXT record for “_dmarc.yourdomain.com” – replace “yourdomain.com with your actual domain. Set the value to your policy. Here’s an example:
v=DMARC1; p=quarantine; rua=mailto:your@email.com; ruf=mailto:your@email.com;
- v=DMARC1: Indicates DMARC version 1.
- p: Specifies the policy (none, quarantine, or reject).
- rua: Shows the email address to which aggregate reports should be sent.
- ruf: Indicates the address to which forensic (failure) reports should be sent.
- Enable DKIM and SPF: Ensure that your domain has DKIM and SPF records configured because DMARC relies on these mechanisms. They also should be aligned with the “From” domain.
- Gradual Implementation: Start with a “None” policy to monitor authentication results without impacting delivery. Analyze the reports and then adjust your policy accordingly.
- Policy Adjustment: Choose the “Quarantine” or “Reject” policy based on the reports you’ve gathered.
- Test Your Set Up: Use DMARC testing tools to check your configuration.
- Monitor DMARC Reports: Make sure to review your reports regularly to ensure that legitimate emails are passing authentication.
Benefits of Implementing SPF, DKIM, and DMARC
| Benefits | What They Entail |
|---|---|
| Improved Email Deliverability and Reduced Spam Marking | – Accurate sender verification: SPF helps you to specify which mail servers are authorized to send content from your domain, which reduces the likelihood of your messages being marked as spam. The recipient’s server can verify that the sender is legitimate, improving the chances of email delivery. – Reduced false positives: DKIM’s digital signatures help solidify the integrity of email content, which decreases the chances of messages being falsely identified as spam. |
| Enhanced Recipient Trust Due to Verified Sender Identity | – Authentication Assurance: SPF, DKIM, and DMARC collectively enhance sender authentication. They allow recipients to be more confident that emails claiming to be from a specific domain are genuinely sent from it. – Brand Protection: Verified sender identity through these protocols protects brands from email spoofing. |
| Mitigation of Phishing Attacks and Email Spoofing | – Phishing Prevention: DMARC plays a crucial role in preventing phishing attacks by enforcing policies that dictate how unauthorized emails should be handled. If SPF and DKIM checks fail, DMARC can stop phishing emails from going through via the “Reject” and “Quarantine” policies. |
It is highly recommended that you use a secure and robust email hosting provider in line with SPF, DKIM, and DMARC to ensure that your domain and brand are safe from related threats and that your deliverability is the best it can be. One such provider is ScalaHosting, which has excellent business email hosting with advanced spam protection and 24/7 tech support.
Conclusion
All in all, SPF, DKIM, and DMARC are invaluable tools that can protect your online communication and improve its deliverability. All of them play pivotal roles in authenticating email correspondence, and it’s advisable that all businesses and brands use them.
To boost the already powerful services that the three protocols provide, you should make sure that you’re using a reliable and powerful hosting provider, whether it is specifically for your email or your website as a whole. ScalaHosting can help you protect your inbox from spam messages and phishing attacks, as well as boost your deliverability by delivering whitelisted IP addresses only and performing regular optimization checks.

FAQ
Q: What Are Some Best Practices for Email Authentication?
A: Some best practices for email authentication include the following:
- Regularly reviewing and updating records;
- Using a gradual approach when transitioning to strict policies;
- Monitoring authentication status;
- Staying informed about industry changes;
- Keeping your SPF records simple;
- Make sure your DKIM keys are at least 1,024 bits long;
- Ensure you use DMARC’s identifier alignment.
Q: How Do You Interpret DMARC Reports?
A: DMARC provides two types of reports – aggregate and forensic (failure). Start by reviewing the aggregate reports and look for patterns like the percentage of emails that passed or failed checks, their sources, etc. Pay close attention to sources that have failed DMARC evaluation so that you can improve your configuration.
Use the forensic reports to get a more detailed look into specific messages that have failed DMARC checks. You can also utilize these reports to diagnose and resolve issues with the evaluation.
Q: How Do You Craft Effective SPF Records?
A: Some best practices for crafting effective SPF records include the following:
- Begin with a Soft Fail: Start by creating an SPF record with a soft fail mechanism (~all) rather than a hard one (-all);
- Use “Include” for Third-Party Email Services: If you use third-party email services like MailChimp, include their SPF records in yours to ensure that messages sent via these tools are considered legitimate.
- Review and Update Your SPF Record Often: Review your SPF record regularly to make sure it includes all the authorized sending servers and remove the ones that are no longer valid.