Becoming a web hosting service provider or web reseller can be a challenging choice. There are thousands of small things you need to handle on a daily basis. Thankfully, you can automate many of these tasks with nifty tools like WHMCS. Just install the solution on a cPanel VPS, and you’ll be ready to roll.
Before you hit the “Go” button, though, there are some things you need to know about WHMCS configuration.
What is WHMCS?
WHMCS, or Web Host Manager Complete Solution, is a software suite meant to automate the process of running a web hosting business. It helps optimize day-to-day tasks to avoid regular manual interventions.
Matt Pugh, the developer of WHMCS, was running a web hosting business back in 2003. His desire for a more streamlined and efficient business solution has led to the creation of WHMCS.
The software brought back immediate success, and the service was later acquired by industry giants cPanel.
Today, over 2,300 companies use WHMCS. While that number may not sound significant, remember that these are all full-blown web hosting companies – a rather impressive number of niche enterprises.
Why WHMCS?

To better understand the need for WHMCS, put your mind in the role of a web hosting service provider or reseller. Imagine a company that needs to optimize staffing and be as responsive as possible to a multitude of clients.
If you were to do everything manually – the costs would quickly stack up. That’s where software solutions like WHMCS come into play. By allowing users to automate account handling, many hosting-related services can be cheaper, faster, and more efficient for both provider and client.
Even among hosting automation platforms, WHMCS has its unique advantages. It is a highly flexible solution with excellent compatibility with many web hosting control panels and other services.
Some of the most popular integrations include:
- cPanel
- Plesk
- DirectAdmin
- SolusVM
- Cloudflare
Prices for WHMCS start at only $15.95/mo. This will get you the Starter plan, which allows you to handle up to 250 customers, albeit without your unique branding. As your business scales up – you can opt for better plans that support more users and customized branding.
WHMCS Main Features
When it comes to helping out web hosting providers or resellers, WHMCS is a Swiss Army knife. The platform can handle everything from account management and unified communications to built-in customer support.
Some key features include:
Billing Automation
WHMCS can easily automate all customer billing needs.
This starts from the professional invoice and receipt creation in secure formats. Once those are in place, they can be generated on schedule to support recurring billing.
You can also automate reminders for customers who may have missed their first bill. The system allows you to accept payment via credit card processors and third-party payment gateways like PayPal, 2CheckOut, and SecurePay.
Other billing features include:
- Refund and dispute management
- Multi-currency handling
- Custom quotes
- Coupons and promotions
- Tax application
Hosting Account Automation
By facilitating automatic account provisioning, your web hosting business can run on its own 24/7. You won’t have to get involved if customers want to create, suspend, modify, or even cancel their hosting accounts.
You will be surprised at the number and variety of requests that web hosting service providers need to regularly manage. Some of the smaller details may include:
- Password resets
- Account import and synchronization
- Add-on configuration
The best part of WHMCS is that it doesn’t even need to run as a separate application. It integrates with many web hosting control panels and can easily fit into your current setup.
How to install WHMCS in cPanel?
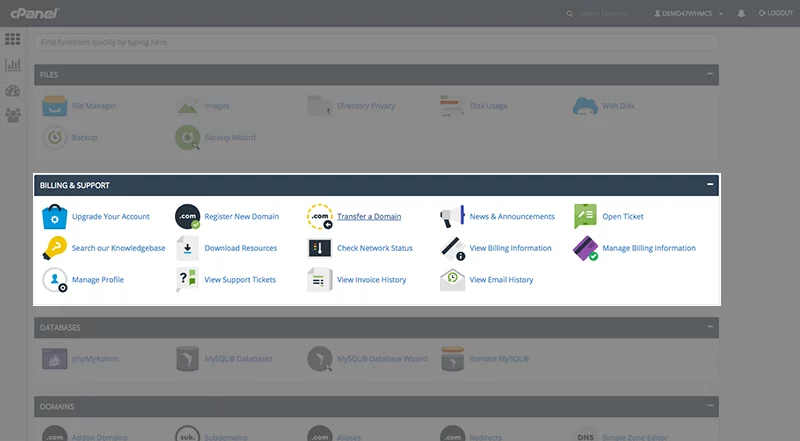
For those of you who may be using cPanel for your reseller hosting, it’s possible to install WHMCS from the control panel (if supported by your primary host).
This simple process shouldn’t take more than a few minutes.
- Step 1. Log in to cPanel, and under Site Software, select the WHMCS option.
- Step 2. Choose which domain to install WHMCS on, then click “Install.”
- Step 3. Once the installation completes, you will be shown a link to the login page and provided with default login details.
Once you’ve logged in to WHMCS for the first time, you will need to accept a licensing agreement. The next thing is to activate your software with a license key. If you don’t already have the WHMCS key, head on to their site to purchase a plan and get your license.
Configuring WHMCS
Having installed WHMCS, the next thing you need to do is set it up for use. This process can be a little time-consuming, depending on which tasks you want the software to handle.
The following is a list of areas we recommend you configure with higher priority.
1. Harden Your WHMCS Security
As with many server-based applications, WHMCS comes installed with basic default settings for the mass market. Since you will be handling customer data and personal information, security needs to be a top priority.
Some of the things to modify and update include:
- Ensure your directory security – This task includes moving all directories with write permission to more non-public accessible locations on your web server. There are three main writable directories to focus on – downloads, attachments, and templates_c.
- Lock your configuration file – The configuration.php file is located in your main directory and is vital to the proper WHMCS operation. To avoid getting its content altered, change the write permissions for this file.
- Restrict access by IP – Whether or not you want to restrict access by a specific IP address depends on your type of connection. If you use a dynamic IP – there is no need to use this option. For those utilizing static IP addresses – you can increase security by restricting access to your IP only.
- Change Admin folder name – Hackers often target default directories, files, and settings. To avoid problems, change the name of your Admin folder. If you do this, make sure to update your configuration.php file to let WHMCS know the new folder name.
For a complete list of advanced security options, check the WHMCS documentation page on the topic.
2. Setting Up Payment Gateways
To allow WHMCS to handle customer payments, you need to let it know what payment gateways will be supported. Individual modules handle different gateways – each of which needs a specific configuration.
This can be set under Configuration -> System Settings -> Payment Gateways.
3. Build Your Product Lineup
To be able to sell web hosting, you will need to establish different service packages. You can create the plans and features included from your WHMCS dashboard under Configuration -> System Settings -> Products/Services.
4. Domain Name Sales
If you intend to sell domain names as well, these must be configured separately from your web hosting packages. The option is under Configuration -> System Settings -> Domains.
You will need to set the prices for domain names, automate registration submissions, transfers, and renewals. Setting the information for client renewal notices is also a good idea.
Manual configuration will be necessary if you intend to sell domain name extensions that are not supported by a registration module. To do this, make use of the email registrar module.
5. Setting Up Support Tickets
Another vital area that needs attention is customer support. Two essential communication methods here are the support ticket system and email process. First, configure the departments you wish to establish (e.g., Sales, Technical Support, etc.) under Configuration -> System Settings -> Support Departments.
Once done, set up the email routes for tickets to reach the correct departments. This option is available under the same menu area and is known as Email Piping.
6. Check Automations

The last step in your core setup should be to check your automation processes. Look under Configuration -> System Settings > Automation Settings to ensure that the WHMCS Cron job is ready to go.
Once you feel that everything is in place, run a few orders through the system to test it for any errors.
ScalaHosting VPS Solutions
ScalaHosting offers a range of Unmanaged and Managed VPS solutions. These plans start at highly competitive rates, which makes them an excellent choice for web hosting resellers.
While basic VPS plans are available, web resellers can also build custom VPS plans of up to 24 CPU cores, 128GB RAM, and 2TB storage.
Even better – you can opt for accounts with our proprietary SPanel control panel. This agile and powerful hosting management solution is 100% cPanel compatible, allowing you to utilize the same applications that work with the industry-leading tool.
SPanel is also license-free, helping you avoid the traps of increasing cPanel fees.
Conclusion
Running a web hosting business can be easy as 1-2-3 with the help of tools like WHMCS. There might be numerous tasks you need to handle as a host, but this platform can automate most of them.
Simply install WHMCS and configure it once – from there on, it’s just a case of tweaking it to reflect your brand vision and goals. The time you save is best put in focusing on how to grow your hosting business.
Frequently Asked Questions
Q: Does WHMCS come with cPanel?
A: WHMCS does not come as part of cPanel by default. Unless your primary web hosting provider includes it in your package, it needs to be installed and configured as a separate add-on. That said, you can utilize the cPanel interface for its configuration.
Q: How do I install a module in WHMCS?
A: WHMCS module installation can be a simple case of uploading the module to your WHMCS /modules/ folder. Once that is done, you can activate and configure the add-on from the Setup menu in your WHMCS admin dashboard.
Q: How do I access WHMCS?
A: WHMCS can be accessed directly from the web admin interface. The URL will typically be your domain name with the /admin suffix. If you are a cPanel user, you can also access the WHCMS admin area from your cPanel dashboard.
What is a VPS – Everything you need to know!


