It doesn’t matter if you’re just starting your ecommerce journey or you already have some experience in online trade. At one point – hopefully – orders will start piling up. That’s when you need to have an efficient strategy to deal with them.
In this step-by-step guide, we’ll discuss the WooCommerce order process management, shipping methods, adding payment gateways, and more. At the end of the article, you should be well-aware of how to optimize your store processes and maximize your sales.
Let’s start:
What is WooCommerce?
WooCommerce is a free, open-source ecommerce plugin that integrates with WordPress. It enables you to sell both physical and digital products, with no limitations on the number of items you can have. That makes it a great option for both small and large-scale online shops.
WooCommere is intuitive and easy to customize. Users can begin building their online shop right after installation as it has most of the functions ready out of the box. However, if something’s missing, there are numerous WooCommerce plugins that can add different functionalities or improve the performance of your store.
The WooCommerce Order Process
Managing WooCommerce orders is an easy, if sometimes lengthy process. But no worries, we’ll take a look at each step, from making a checkout page to adding payment methods.
How to Create and Edit the Checkout Page
Once you install the WooCommerce plugin, it generates a checkout page automatically. So, in terms of creating the actual page, there’s nothing you need to do.
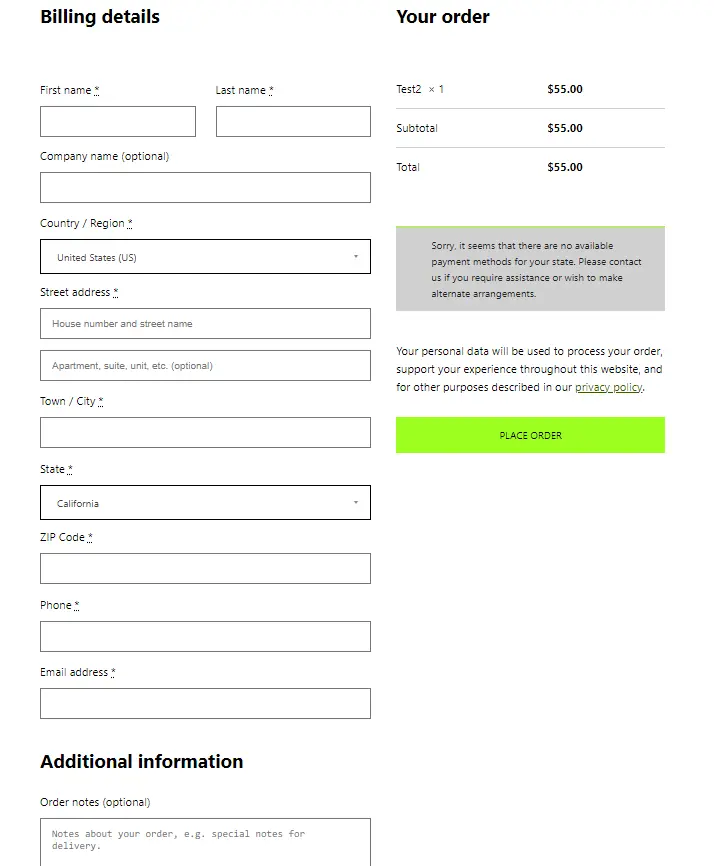
You get the following checkout fields by default:
- First and last name
- Company name
- Country/Region
- Street address
- Town/City
- State
- ZIP
- Phone
- Order notes
However, if this doesn’t work for you, you can create your own WooCommerce checkout page.
To do so, go to Pages > Add New. This will open the WordPress editor. You’ll see a plus sign in the right corner. Click on it and scroll down till you see Checkout.
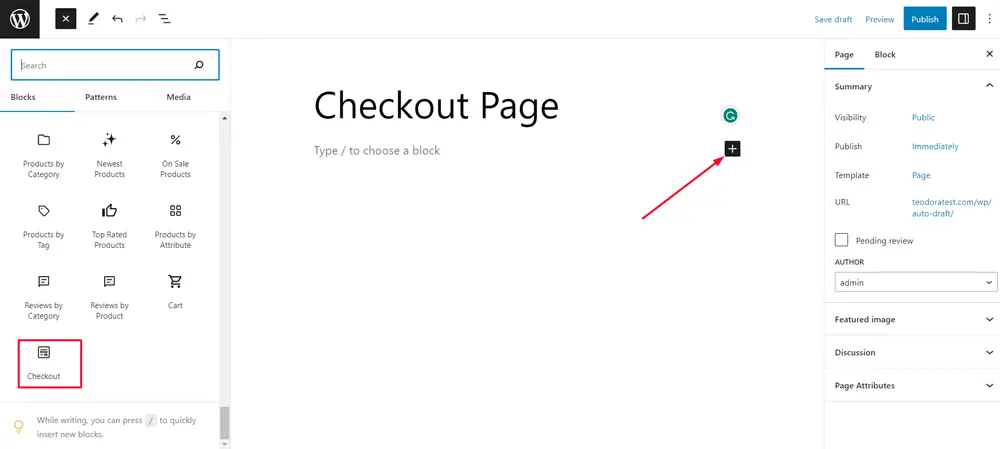
The page will now show fields you can customize to your liking. Once you’re done, save it and go to WooCommerce > Settings > Advanced. You’ll see Checkout page. Click on the drop-down and choose the page you just created.
Alternatively, you can go for a WooCommerce store plugin like Checkout Field Editor.
How to Customize the Order Overview
To customize your order overview, go to WooCommerce and click on Orders. This will open a table, featuring:
- Order info, such as number and customer name
- Date of purchase
- Status
- Billing and shipping addresses
- Total
- Actions
To customize the columns, go to Screen Options at the upper right corner. This will enable you to select the categories you wish to see. You can also select the number of items displayed on a page. Click Apply when you’re done.
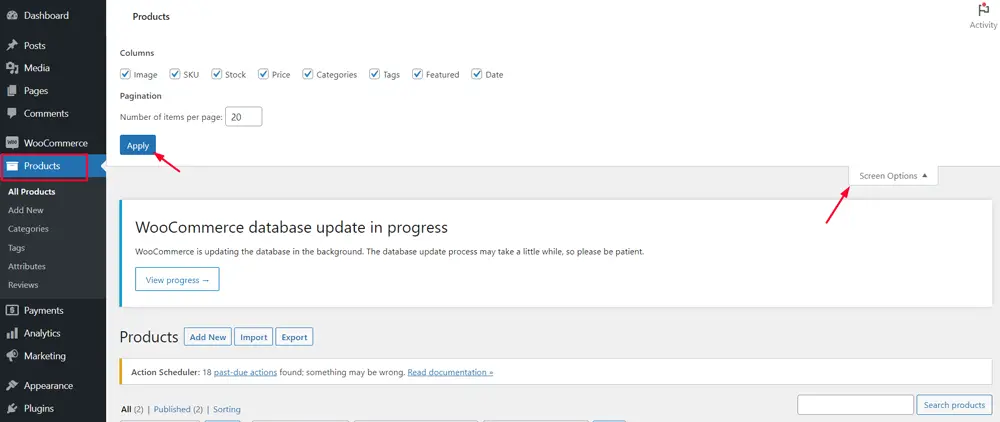
If you want to filter orders, you can do so by Date (month/year) or by Registered Customer. You can also arrange them by Order, Date, or Total in an ascending or descending order. That’s all done via the heading at the top of the list with items.
How to Manage a Single Order
To manage a single order in WooCommerce, you need to go to Orders and click on the one you need. That will open the Edit Order page.
From there, you can:
- edit the details, like billing and shipping
- add custom fields
- set downloadable product permissions
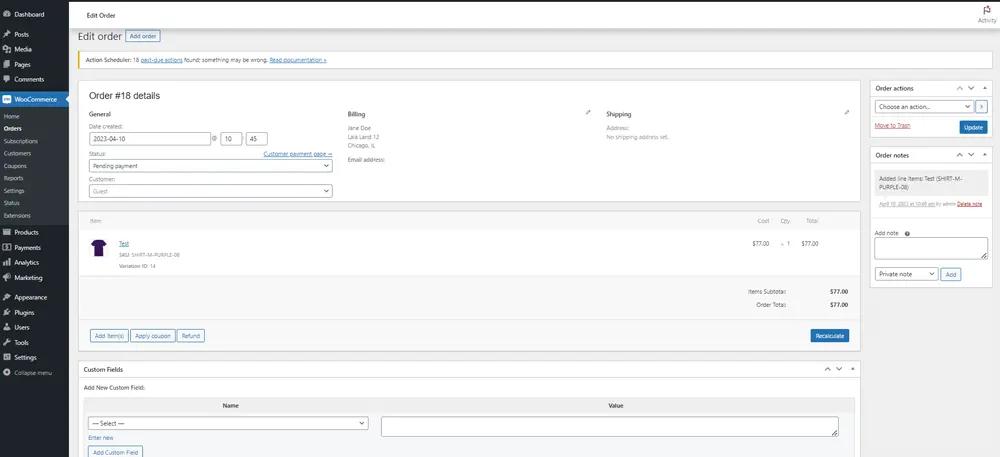
Under the Billing section, you can see and modify the customer’s billing address. You can also change the email, phone number, and payment information.
The shipping address can be modified as well, along with any notes left by the customer.
To change the status of the order, you can click on the drop-down selector. Your options include:
- Pending payment – waiting for payment
- On hold – awaiting payment
- Failed – payment failed/declined/requires authentication
- Processing – payment received, order to be fulfilled
- Completed – order fulfilled
- Canceled – either by admin or customer, no action required
- Refunded – admin took care of the refund
- Draft – customer has began the checkout process
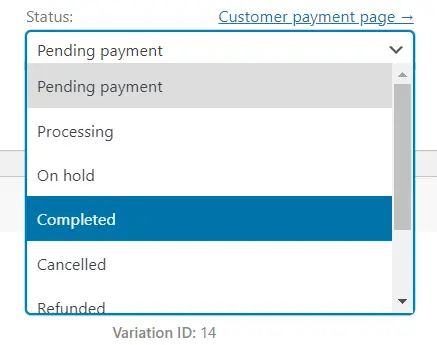
Then, you can email the invoice or the order details to the customer. You can also resend the order notification or regenerate download permissions. It’s all done in the Order Actions section on the right side of the screen.
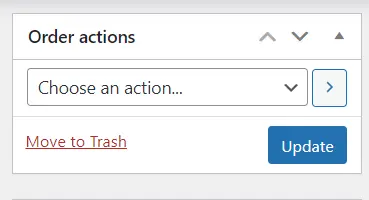
To save the changes, click on Update on the right side of the screen.
How to View and Manage Multiple Orders
To view and manage multiple orders in WooCommerce, you need to open your WordPress admin dashboard and go to WooCommerce > Orders.
The Orders management page will have several rows with recently purchased items. You can filter them by month or customer. You can also arrange them in descending or ascending order, based on number, date, or total.

The information about the orders is separated into columns, which you can change by going to Screen Options in the upper right corner. You can also select how many items are to be displayed on a single page. Click Apply when you’re done.
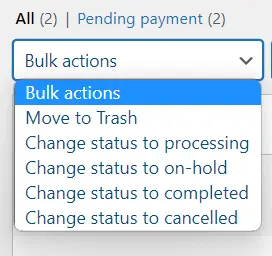
Back on the Order Management page, you can select two or more orders and click on the Bulk Action. You can either move them to trash or change the status to:
- Processing
- On hold
- Completed
- Cancelled
How to Add Order Notes
The WooCommerce Order Notes can be used for event details, such as reducing stock levels. They can also be attached by the customer, containing extra information:
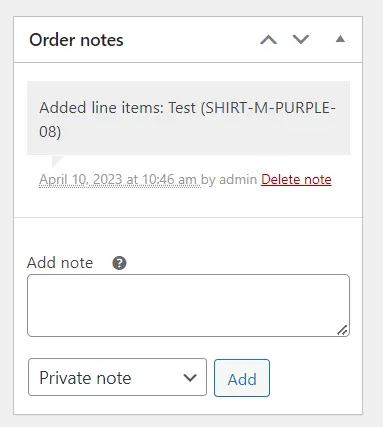
To add a note, use the dedicated text field. Then, set the note as either private or to be seen by the customer. When done, click on Add.
Notes can be distinguished by color:
- Purple – used for system status notices, like payment gateway details.
- Grey – signifying general status updates, not seen by the customer, but they might get notifications, like an order completion email.
- Blue – for notes to the customers.
How to Add Shipping Methods
To add shipping methods in WooCommerce, you first need to set up shipping zones. Go to WooCommerce > Settings > Shipping. Click on Add shipping zone.
Then, set a zone name and choose a region it covers from the drop-down. You can select multiple regions.
Once you’re done, click on Shipping Methods.
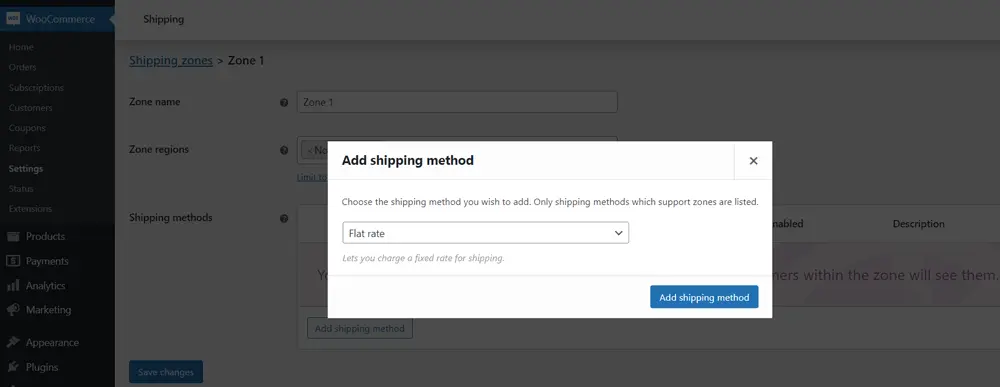
You have three options here:
- Flat rate
- Free shipping
- Local pickup
The Flat rate and Local pickup options can be taxable and you’ll be asked to set a cost. Once you’ve set everything up, click on Save Changes.
How to Manage Payment Methods
In order to manage payment methods in WooCommerce, you need to get a dedicated add-on.
After you’ve downloaded your plugin, you need to go to Plugins > Add New > Upload. Choose the extension’s ZIP file, then click Install now, and Activate. A new Payments tab should appear on the menu on the left.
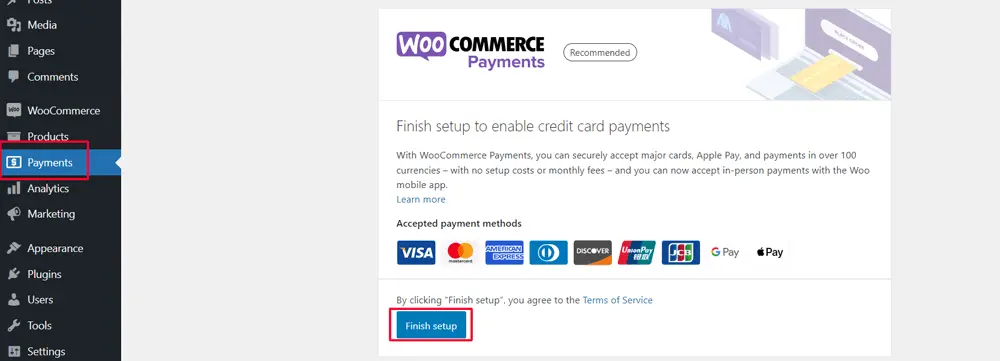
When you click on it, you will be asked to finish the setup to enable payments. The default methods include:
- Visa
- Mastercard
- Apple Pay
- Google Pay
- Union Pay
- giropay
- Sofort
- iDEAL
- P24
- Bancontact
- EPS
You can choose to offer more than one of the above options.
Hosting WooCommerce
To meet the needs of growing ecommerse stores, ScalaHosting came up with a scalable WooCommerce hosting solution.
The service comes with an Advanced Security suite of tools, powered by artificial intelligence to ensure safe shopping. The LiteSpeed Web Server guarantees that you’re saving on server resources while your customers are getting lightning-fast loading speeds.
The cherry on top for WooCommerce/WordPress users is ScalaHosting’s very own SWordPress Manager. It’s a centralized control point, from which you can set automatic updates, change admin passwords and manage multiple websites.
It also provides an additional layer of security for your WooCommerse store.
Contact us today to take your ecommerce store to the next level!


Wrap Up
WooCommerce orders are created every time when a customer completes the checkout process. Then it’s up to admins or shop managers to take users to the final stages.
Learning how to effectively manage the WooCommerce order process will save you a lot of time and will boost customer retention. Our step-by-step guide will help you deal with all of your orders in no time.
FAQ
Q: How do WooCommerce orders work?
A: WooCommerce orders are only visible to users with Admin and Shop Manager roles. They show up under the Orders tab once a customer begins the checkout process, at which stage they’re considered drafts. Once the process is completed, they receive a unique ID and the administrator can change their status (Pending payment, Processed, Completed, etc.).
Q: How do I process an order in WooCommerce?
A: To process an order in WooCommerce, you need to go to your WordPress admin dashboard. Then, go to WooCommerce > Orders. Click on an order, change its status from the drop-down and click on Update.
Q: How do I change the order shipping method in WooCommerce?
A: To change the order shipping method in WooCommerce go to Settings > Shipping > Shipping Zones. Hover over the zone of choice, click on Edit. Go to Shipping methods and choose the one you need.

