Optimizing Email Management with cPanel: A Complete Guide
Communication is essential for businesses in this day and age. One way companies can maintain consistent and reliable contact with their customers, suppliers, partners, and other stakeholders is through email, one of the most popular channels in this digital era.
Efficient email management is paramount, as it allows you to offer timely responses, streamline your workflow and organization, and collaborate productively in and out of your company. This is where cPanel comes in.
cPanel is a web hosting control panel that simplifies the process of mailbox management by providing you with an intuitive interface and powerful features. You can effortlessly create and manage accounts, set up forwarding, and utilize spam filters to ensure a seamless communication experience.
In this article, we’ll show you how you can optimize your mailbox management using cPanel, provide you with some security best practices, and more.
Let’s get into it!


Accessing Email Management Tools in cPanel
Let’s start by logging into your cPanel account and navigating to the email section of your dashboard to access the appropriate management tools.
You’ll notice that cPanel allows you to access a wide range of services, features, and tools, such as
- Spam Protection
- Email Accounts
- Forwarders
- Email Routing
- Autoresponders
- Mailing Lists
- Track Delivery
- Email Filters
- Spam Filters
- Encryption

We’ll start off our guide by showing you how to create new accounts and manage existing ones in cPanel.
Creating and Managing Email Accounts
Click on the Email Accounts button on your cPanel dashboard.

Step-By-Step Guide to Creating New Email Accounts in cPanel
You need to do the following:
- Click on the +Create button that you’ll see on your screen.
- Choose the domain from the drop-down menu.
- Enter the username you want your account to have. For instance, if your domain is “mybusiness.com” and you want your address to be info@mybusiness.com, type “info” in the username field.
- Create a secure password. You can come up with your own or generate one using cPanel.
- Set the storage quota for your mailbox by choosing the desired amount from the drop-down menu or going for the unlimited option.
- Click on the +Create button at the bottom of the page to finish.
Managing Existing Email Accounts in cPanel
You can manage your existing accounts in cPanel by opening the Email Accounts feature again.

Here, you can see and do the following:
- Account @ Domain: Shows your email account and the domain name it is associated with.
- Restrictions: There are also many other restrictions you can put on your accounts, like which one would be able to send/receive emails.
- Storage: User/Allocated/%: Provides information about the storage used or allocated to each of your email accounts.
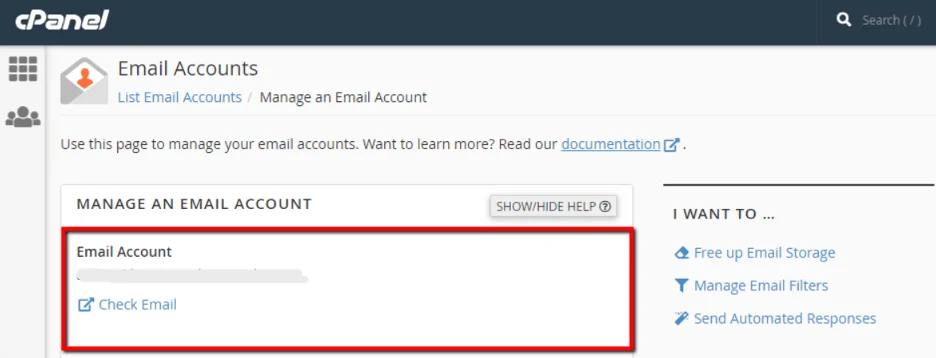
- Check Email: Allows you to check your inbox by using a Webmail client like Horde or Roundcube.
- Manage: Allows you to manage your mailboxes. Once you click on it, you’ll be redirected to a page containing different actions.
- Connect Devices: You can use this to connect devices like phones, laptops, and tablets.
Choose the Manage button next to the account you want to modify, and you’ll be redirected to a page dedicated to your chosen email. You’ll see the following options:
- Manage an Email Account: View your account and check the emails associated with it.
- Security: Change your password by entering the new one you want to use or clicking on Generate to get a suggestion from cPanel.

- Storage: Configure the storage by choosing your desired amount from the drop-down menu.

- Restrictions: Restrict your mailbox by using the following options:
- Receiving Incoming Mail: Set up an address that doesn’t receive any emails.
- Sending Outgoing Emails: Prevent any outgoing messages from being sent.
- Logging In: Prevent login attempts on your account.

- Plus Addressing: Instruct cPanel on what to do when an address with a + sign in its name is detected.

Click on the Update Email Settings button at the bottom of the page to save your changes.
- Delete Email Account: The delete option is right below the Update Email Settings button. You can press it and confirm again by pressing Delete to permanently remove an address.

Configuring Email Clients
In this section, you’ll learn how to set up third-party mail clients via cPanel, as well as configure POP3 and IMAP settings per your preferences.
Setting up Third-Party Email Clients via cPanel
- Open the cPanel Email Accounts option.
- Click on Connect Devices.
- Find the mail client you want to use in the Application section.
- Review the instructions and click on Proceed. The system will now download the script.
- Sign into your email by entering your password and clicking Install.
- Your mail client will open, and you’ll need to log into your email account to finish the process.
Configuring POP3 Settings
Incoming Mail Server:
- Server: mail.domain.com (replace “domain.com” with your real domain)
- Port: 995
- SSL/TLS: Enabled
- Username: Enter your full email address
- Password: Enter your password
Outgoing Mail Server:
- Server: mail.domain.com (replace “domain.com” with your real domain)
- Port: 465
- SSL/TLS: Enabled
- Authentication: Yes, use the same settings as your incoming mail server
- Username: Enter your full email address
- Password: Enter your password
Configuring IMAP Settings
Incoming Mail Server:
- Server: mail.domain.com (replace “domain.com” with your real domain)
- Port: 993
- SSL/TLS: Enabled
- Username: Enter your full email address
- Password: Enter your password
Outgoing Mail Server:
- Server: mail.domain.com (replace “domain.com” with your real domain)
- Port: 465 or 587 (use 587 with the STARTTLS encryption)
- SSL/TLS: Enabled (for port 465)
- STARTTLS: Enabled (for port 587)
- Authentication: Yes, use the same settings as your incoming mail server
- Username: Enter your full email address
- Password: Enter your password
The settings shown for POP3 and IMAP are the standard configurations that you can do. The more specific settings can vary depending on your hosting provider or email service, so make sure to get accurate server details and information before you configure POP3 and IMAP.
You can configure protocol settings in the client that you prefer, such as Outlook, Apple Mail, Thunderbird, etc. You can also set up POP3 and IMAP to allow you access to your email via mobile devices.
Webmail Access and Usage
cPanel further optimizes your email management and experience by offering versatile webmail clients, including Horde, Roundcube, and SquirellMail, which offer user-friendly interfaces to access inboxes directly from a web browser.Horde: Horde is known for its feature-rich environment, which includes advanced functionalities like notes, task management, and file sharing. It also offers a responsive design that ensures accessibility across many devices, allowing you to check your inbox on the go.

Roundcube: Roundcube is a user-friendly webmail client that focuses on providing users with essential management tools, like drag-and-drop functionality and modern design.

SquirrelMail: SquirellMail is a lightweight client that offers more simple services than Horde or Roundcube. It also comes with great speed, compatibility, and all the management features you need.

How to Use cPanel’s Webmail Services
Learn how you can use webmail clients to optimize your email management below.
Accessing Emails Through Webmail
Log into cPanel via your web browser. Navigate to the Email section, open Email Accounts, and click on Check Email next to your account. Click on the webmail client you prefer. You’ll now be able to see your inbox, read and send electronic messages.
Composing Messages Through Webmail
Click on the Compose or New button. Enter the recipient’s address and subject line, and write your message. Click on Send when you’re done.
Managing Folders Through Webmail
cPanel’s webmail clients allow you to create, rename, and manage folders with ease. Access the settings or options menu and navigate to the Folder Management section to do this. You can create new folders for categorizing emails, move messages to specific folders, or delete them altogether.
Managing Spam Filters and Email Filtering
Spam filters and email filtering ensure a clutter-free and organized inbox, enhance productivity, and minimize the security risks associated with malicious online correspondence. cPanel offers robust features for managing spam filters and creating custom ones, so let’s explore them further below.
Spam Filters
Spam filters help identify and divert unwanted messages (spam) away from your inbox. You can use SpamAssassin in cPanel, which is a popular and powerful spam filtering tool.
Go to the Email section and open Spam Filters to turn SpamAssassin on and off. You can also set the spam score threshold and define actions here. For example, you can instruct cPanel to mark or redirect unwanted messages to a separate spam folder.
Setting up Spam Filters in cPanel: Step-By-Step Instructions
- Log into cPanel
- Go to the Email section
- Open Spam Filters
- Enable SpamAssassin
- Configure your spam filter rules
Email Filtering
Email filtering allows you to create custom rules for categorizing and organizing incoming messages. Go to the Email Filters section to define criteria based on recipient, sender, subject, or specific keywords.
When an email matches the criteria you defined, the filter will automatically perform actions such as moving it to a specific folder, forwarding it to another address, marking it as important, and deleting it.
Creating Email Filters in cPanel: Step-By-Step Instructions
- Log into cPanel
- Navigate to the Email section
- Click on Email Filters
- Choose Manage Filter Rules
- Select Create a New Filter
- Define filter criteria
- Specify the actions that should be taken when the criteria are met
- Save the filter
Email Authentication (SPF, DKIM, DMARC)
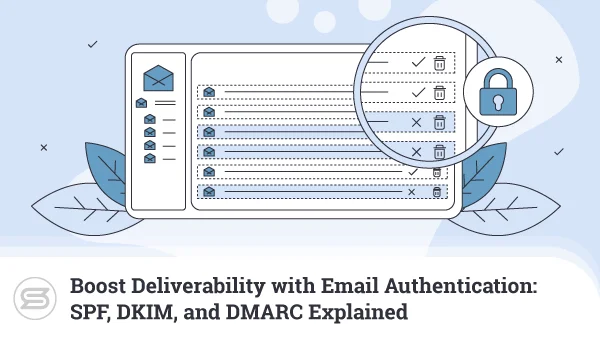
Email authentication protocols like SPF (Sender Policy Framework), DKIM (DomainKeys Identified Mail), and DMARC (Domain-based Message Authentication, Reporting, and Conformance) play a critical role in enhancing security and deliverability. They help prevent spoofing, phishing attacks, and unauthorised use of domain names, ensuring that your mailbox doesn’t get breached.
SPF (Sender Policy Framework)
SPF allows domain owners to specify which email servers are authorized to send messages on behalf of their domains. You’ll be able to prevent spammers from sending fraudulent content using your domain name by configuring SPF records in cPanel, as they list authorized mail servers. If something is sent from an unauthorized sender, it will be marked as spam.
Configuring SPF in cPanel:
- Log into cPanel
- Open the Email section and click on Authentication
- Enable SPF by clicking on the Enable button
- Customize the SPF record (optional) by clicking on Authentication and then SPF Records
DKIM (DomainKeys Identified Mail)
DKIM adds a digital signature to your outgoing emails, allowing recipients to verify that an authorized sender sent them and they haven’t been changed in transit. Configuring DKIM records in cPanel involves generating a unique private key, which signs outgoing messages and publishes the corresponding public key in the domain’s DNS records. This allows the recipient’s mail servers to verify the authenticity of the sender.
Configuring DKIM in cPanel
- Log into cPanel
- Go to Email and then Authentication.
- Enable DKIM by clicking on Enable next to it
- cPanel will provide you with DNS records that you need to add to your domain DNS settings. These records are essential for mail servers to verify your account’s authenticity
DMARC (Domain-based Message Authentication, Reporting, and Conformance)
DMARC is an extension for SPF and DKIM that builds upon them and enables you to have control over how your servers handle unauthenticated emails. Setting up DMARC records in cPanel allows you to instruct receiving servers to deliver, quarantine, or reject messages that fail SPF and DKIM checks. DMARC also provides valuable feedback, allowing you to monitor and analyze mail traffic.
Configuring DMARC in cPanel
- Create a DMARC DNS record manually or by using a DMARC policy generator. The record will specify what actions receiving mail servers should take if an email fails SPF or DKIM checks.
- Add the DMARC record to DNS through your domain registrar’s website or wherever you manage your DNS records.
Overview: Email Security Best Practices
| Best Practices | What They Do |
|---|---|
| Using Strong Passwords | Using strong and complex passwords makes it more difficult for hackers to get into your email. Cybersecurity professionals recommend changing your passwords every three months. |
| Using Authentication Methods | Authentication methods such as two-factor authentication (2FA) should be implemented because they add an extra layer of verification beyond passwords. They require the user to confirm their login through another device. |
| Using End-To-End Encryption | End-to-end encryption ensures that your emails are confidential and unreadable, as the third party who tries to access them doesn’t have the decryption key. |
| Protection From Phishing Attacks | Always scrutinise unexpected messages, avoid clicking on suspicious links, avoid downloading attachments from unknown sources, and educate your employees on how to prevent phishing attacks. |
| Conduct Regular Software Updates | New updates and patches often come with fixes for vulnerabilities. |
You can implement the above-mentioned security best practices yourself or use a reliable email hosting provider, like ScalaHosting, instead.
With ScalaHosting, you’ll get powerful services for your email, as well as access to cPanel and the best cPanel alternative in the market, SPanel. You can also expect all related services – webmail, spam filtering, mail record customization, and more. To further protect your online communication, our managed VPS services also include a free dedicated IP address.
Conclusion
cPanel allows you to easily create, manage, and delete accounts, as well as set up spam filters, custom filters, and authentication protocols. You can also use it to improve your overall security.
If you want to use cPanel to optimize your mailbox management and get reliable email hosting services while you’re at it – ScalaHosting is the ideal solution for you. Our Business Email Hosting is compatible with cPanel and comes with advanced spam protection and other powerful tools that will improve your overall email management.

FAQ
Q: What’s the difference between cPanel and WHM?
A: cPanel is a web hosting control panel that allows you to manage your hosting account, server, and all other services related to it. On the other hand, WHM is an administrative access tool used for the backend of cPanel accounts.
Q: What is email forwarding?
A: Email forwarding is the process of creating a forwarding address so that you can automatically direct incoming messages to it. For instance, you can use forwarding to create an address that will automatically deliver the mail sent to your professional account to your personal one.
Q: What is an autoresponder?
A: An autoresponder is a piece of software that automatically sends pre-determined emails to an account in response to specific triggers. This means you can set a default message that will be sent to anyone trying to reach you while you are away.

