Manually Creating Orders
Manually creating orders is useful when someone contacts you directly for a purchase through phone, instant messenger, email, or another medium. In such cases, it’s a good practice to create the order manually so your store can keep tracking your inventory and sales.
To add an order:
1. Click on WooCommerce → Orders
2. Click on the Add Order button next to the page title.
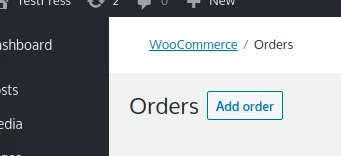
3. This will load the Add New Order screen, and the first thing you’ll see is the order ID.

4. Date Created

To be relevant, every order requires a timestamp. This field is automatically filled once the Add New Order screen loads. You can also edit it manually.
5. Status

Your newly created order always starts with a Pending Payment status.
Note: Once you have added items to your order and created it, the Customer Payment Page link will become available. Use this to send your client a custom payment link. After the payment is confirmed and the order status changes — the link disappears.
6. Customer

Defaults to Guest. If you’re receiving a purchase request from an existing customer, use this field to find them. The search is performed for Names and Email Addresses.
It’s best to use at least three characters for your search to minimize results.
Note: The search goes across all client profiles. Once your store grows, this feature might start functioning slower.
7. Billing and Shipping Fields
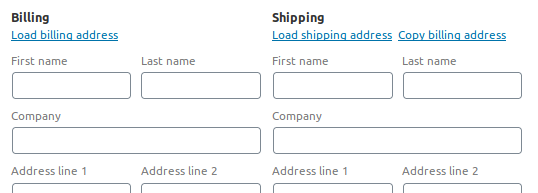
Fill out the Billing and Shipping fields as you would on a regular checkout page.
You can edit those fields later by clicking the pencil icon next to each one.

Use the Load Billing Address, Load Shipping Address, and Copy Billing Address links to automatically fill the billing and shipping fields based on the customer profile you’ve picked.

8. Adding Items to the Order
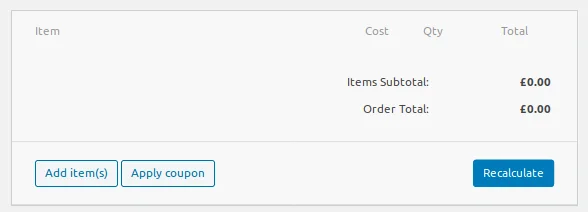
Contains the following buttons:
1. Add Item(s)
Click this button to display a sub-menu for adding products to the order.

2. Add Product(s)
Use the Search for a product drop-down to find existing products. This also searches through Grouped Products.
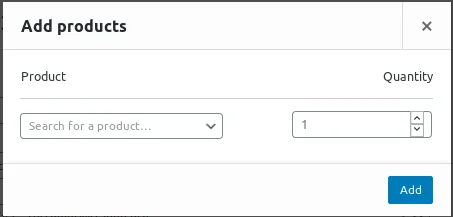
Note: Remember to set an appropriate quantity from the field on the right of the drop-down.
3. Add Fee
Used for adding any custom tax or fees. Pressing it displays a pop-up, containing a field that accepts numerical values.
4. Add Shipping
Choosing this option adds a new row to the order, titled Shipping. Moving the mouse over reveals a pencil icon to the right end. Click on this to add a shipping method. Press the X icon to remove the row.

- Click the Pencil Icon to expand the row of the shipping item.

- Fill out the field labeled Shipping to specify the name of the shipping method for your customer’s reference.
- Use the drop-down below to select the shipping method you want to apply to your WooCommerce store.
- Fill in the shipping price in the text field right-side from Shipping.
5. Use Add Meta to fill in any data that makes sense to you or the shipping plugin you’re using.
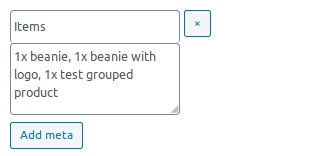
6. Once you are done editing, click the Save button that’s just under the Order Total.

7. An important last step is to click Recalculate to ensure everything is reflected in the order totals correctly.
8. Add Tax
Displays a pop-up with a list of the tax rates in your store to choose from.
9. Cancel
Click if you decide to quit editing any of the items you’ve been adding to the order.
10. Save
Press this button to add the newly configured item to the order’s Item List. Once you click this button, the horizontal menu changes back to its initial state.
Note: The Save button confirms the changes to the cart items only. Refreshing or navigating away from the page will discard any changes made to the order until you press the Create button in the Order Actions box on the top-right of the page.
- Apply coupon
Launches a pop-up with a text field. Note that this field supports an auto-complete function.
Tip: Open Marketing → Coupons in a new tab to copy-paste the coupon name from there.
- Recalculate
When you are done adding items, fees, and coupons, always click Recalculate to ensure all calculations are up to date.
11. Custom fields
Use this box to add meta key-value pairs for your theme or plugin to use.
12. Downloadable Product Permissions

Once you create your order, use this field to set permissions for downloadable products. Learn how to use it in the next chapter: Setting Downloadable Product Permissions
13. Order actions
- Click the Create button to save your data and create the order.
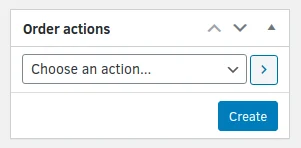
- Use the Choose an action… menu to select an action. Execute the action by clicking the gray [>] button. Clicking the button saves your order as well.

The drop-down menu offers the following options:
- Invoice / Order details to customer
- Resend new order notification
- Regenerate download permissions
Setting Downloadable Product Permissions

When the order status is set to Completed, your customer will receive:
- an email notification confirming the order is completed,
- a second email with a link to the downloadable component of the product you’ve added to the order.
Important: When creating a manual order with downloadable products, you also need to grant access to them using this field. Otherwise, your customer will receive a receipt for their order and no email with download links.
Use this field to specify the products that should include a download link. The product must be both Virtual and Downloadable. The link is sent out once the order’s status changes to Completed.
You can add a downloadable product only after you have created the order with the Create button.
Here are the steps:
1. Enter three or more characters into the text field to load suggestions for the downloadable product in question.
2. Click the Grant Access button. Keep in mind that download access is granted on a per-user basis.
3. This will display options for the download that overwrite the ones you enter while creating the downloadable product itself.

4. Set a numerical value in Downloads Remaining for the total number of downloads allowed before the link expires.
5. Click on Access Expires to launch the date-picker and set an expiration time of the download link. By default, this is set at 24 hours.
6. You can expand and collapse entries in the Downloadable Product Permissions box by clicking on the row with the name of the entry. If you hover over it with your mouse — a downward pointing triangle will appear.

Here are some additional features you can use in this box:

- Copy link – Copies the download link to your clipboard. You can paste it in an email, instant messages, or any electronic medium.
- View report – Redirects you to WooCommerce → Reports displaying a report for the interactions with the corresponding downloadable product permissions. Report displays: timestamp, product, file, order, user, and IP address. Links open in the same window.
- Revoke access – Removes the entry from the list and makes the download link invalid.
Sending a Payment Link
We’ve already covered this action in Manually Creating Orders, but it deserves its own separate section here for the sake of easier reference.

When the order status is set to Pending Payment and items have been attached to the order, you can send a payment link to the billing email for that order. Do this by clicking the “Customer payment page →” link located on the top-right of the Edit Order screen.
Order IDs
By default, orders are not sequential. Suppose you create Order #20 and delete it — that ID will remain free for the next order to take it. WooCommerce assigns the first available ID for each new order. That excludes IDs utilized by Posts, Pages, Products.
If you prefer having sequential orders — we have you covered with a plugin in the chapter Essential WooCommerce Plugins.
Order Statuses
At checkout, once your customer chooses to pay immediately with PayPal or debit card — they will be redirected to the appropriate payment processor. When they submit their payment details with the vendor — they are sent back to your Thank You page.
Along this redirect, a status code passes between the payment processor and your website to update the order status in real-time:
- If the payment was successfully processed — the order status automatically updates to Processing.
- If the payment is undergoing a screening or verification process — the order status remains as Pending Payment.
- If the payment was declined or the payer failed authentication — the order status changes to Failed.
If the status gets to the Pending Payment or Failed phase, it’s a good practice to wait 48-72 hours and contact the customer to offer additional assistance on completing their payment.
Note: The scenarios outlined above are prone to exceptions, depending on your chosen payment plugins.
Here are all the order status codes, their color codes, and the corresponding store mechanics:
- Pending Payment – Gray color
The default order status. Applies to new and unpaid orders. - Processing – Green color
Payment received and stock reduced, ready for order fulfillment. All orders except virtual and downloadable products require manual processing. - On Hold – Orange color
You need to manually confirm the payment and update the order status. - Completed – Blue color
Order fulfilled and completed. Set this final status once you’ve shipped the product. - Canceled – Gray color
Order canceled by an admin or the customer. Stock is increased to its original value — no further action is required. - Refunded – Gray color
Payment refunded by an admin – stock not increased. - Failed – Red color
Payment method declined or the customer failed authentication with their card issuer. May be replaced by Pending Payment for some payment processors, such as PayPal. - Authentication Required – Red color
This order status cannot be manually set. It is utilized by some payment processors when the client fails authentication with their card issuer.
Order Notes
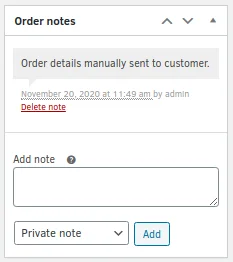
Using Order Notes, you can conveniently:
- Message customers directly
- Keep track of order fulfillment
- Coordinate team members
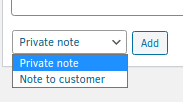
Before clicking the Add button, you can pick whether the note is saved to the order as a Private note or sent as a Note to customer.
Removing Orders
You can remove orders just as any other post type in WordPress. Still, we recommend you avoid this whenever possible. Orders are proof of transactions between you and your customers. You can use them to measure your store performance or settle disputes, among other things.
Unless an order is a duplicate of another — it is best not to remove it. Instead, you can assign a status code that invalidates it, such as Failed or Canceled.
