Categories and Tags
Categories and Tags in WooCommerce work exactly the same way they do for WordPress posts:
- Product Categories are hierarchical, which means you can have a post belonging to a subcategory. These are used for grouping products by Type.
Example: Belts and Hats.
- Product Tags are not hierarchical. There are no sub-tags or parent tags. You can use those to group products together by Feature.
Example: Belts and Hats that feature the image of a bird on them can be tagged as Bird.
Note: Keep tags as an extension of your category navigation. Don’t use them for product features you would like your customers to use as product filters. This is done through Product Attributes.
Product Attributes
Product Attributes are the distinctive product features that customers come searching for. WooCommerce can display a list of attributes in the sidebar of your online store. This enables visitors to quickly sift through your inventory.
There are two types of product attributes in WooCommerce — Global and Custom. When created, Global Product Attributes become available for all products in the store. This means you can access and assign them to any product regardless of the one you are editing.
You can also check the Enable Archives option here. It displays a page in the front end containing products that have this attribute assigned. Categories have this enabled by default.
When you enable the Visible on the product page option, product attributes are displayed in the Additional information section of the selected page.

Creating Global Product Attributes
1. Head on to Products → Attributes
2. To the left side of the screen is the form for adding new attributes. Fill out the Name field with the desired attribute name.
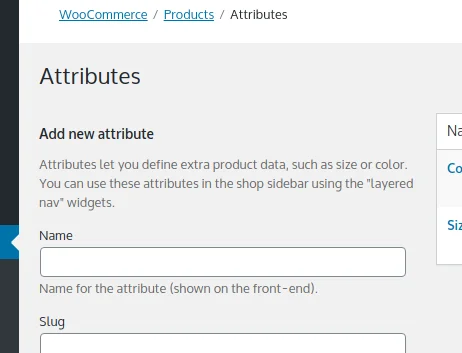
3. You can skip the Slug field as slugs are auto-generated based on the Name you input.
4. Use the Enable Archives? Checkbox if the attribute is a feature important enough that you would want to link an archive page for its products. You can always edit your attribute and switch this feature On or Off later.

5. The Default Sort Order drop-down menu helps you specify what variable your store will use to determine the order in which attribute terms are listed. For now, you can leave it with its default value.

6. Click Add Attribute to finish the creation of this attribute.

Adding Terms to Global Product Attributes
To the right of the form, you will find a list of global product attributes for your store.
1. Locate the attribute you just created and click on the Configure Terms link. For the purpose of this example, we created the Study attribute.

2. You are now viewing the screen for adding terms to the Study attribute. Since Terms are child items of Study, the form is titled Add new Study.

3. Fill out the Name field to get started.
4. The Slug field is optional.
5. You can fill something in the Description only if you have some notes about the attribute variation you are creating.
Example: T-shirt Colors might be self-explanatory, but technical attributes such as Fabric Density are not.

Note: Whether the content of Description is displayed in the front end may vary from theme to theme. Best to first enter some dummy text and see if it displays under the Additional Information tab on the page for a single product.
6. Create the term by clicking the Add new Study button. The last word in the button’s label always corresponds to the name of the attribute you are creating.

Complete the steps a second time to create another term. You will need it for the next exercise.
Attribute Term Ordering
Attribute term ordering is defined through the Default Sort Order drop-down menu, visible when creating or editing a global product attribute.
Custom Ordering enables you to drag attribute terms up and down the list accessible through the Configure Terms link.

Note: When rearranging the terms, list changes are saved automatically.
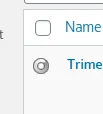
Bear in mind that changing the Default Sort Order to Name or ID does not remove the drag handles from the items in the terms list. They might seem to work, but upon refresh, the page will always display products in your active sort order.
Editing Global Product Attributes
1. Navigate back to the Attributes screen by clicking Products → Attributes
2. Move the mouse over the attribute row previously created
3. Click on the Edit link

Use this screen to edit any of the following: Name, Slug, Archives Display, or Default Sort Order for terms.
Custom Product Attributes
As we discussed in the chapter Adding Products to WooCommerce, you will be managing custom product attributes exclusively at the product level.
If you skipped this chapter, you can navigate back to learn how to work with custom product attributes.


