Nearly 70% of desktop computers run on Windows. A further 20% are based on macOS. In light of this, many of you may be a bit apprehensive when you learn that the server you host your website on is powered by Linux – an operating system traditionally associated with computer geeks and technical specialists.
The truth is, you have nothing to worry about.
The web hosting industry has adapted its services to ensure you don’t need to be a technical wizard to use your hosting account. Modern server management solutions like SPanel give you everything a typical website owner might need in a newbie-friendly point-and-click interface.
However, this isn’t always enough for experienced website developers and administrators. They often find it easier to use SSH commands to perform various tasks. The fact that you landed on this page means you most likely want to learn a bit more about Linux commands as well.
Getting to know them does make sense. It will give you a better understanding of how your server works and level up your technical expertise.
So, let’s get to it.
What Is SSH and How Do You Use It?
Before we get to the commands, we first need to explain how to actually execute them. It’s all facilitated by SSH – a networking protocol that connects your computer to your server and allows you to send commands over the internet. SSH stands for Secure Shell.
To understand SSH’s value, it’s best to explain the two words separately.
Secure
SSH is secure because it uses complex cryptography to fully encrypt the communication channel between you and your server. Before this tool, information between clients and servers was transmitted in plain text, opening the opportunity for eavesdropping, data theft, and even server takeover.
To eliminate this, SSH uses a secure algorithm involving a combination of public and private cryptographic keys to ensure any information exchanged between your computer and your hosting server is inaccessible to third parties.
Shell
In a computing context, a Shell is the interface you use to interact with the operating system. If you use Windows, the shell consists of things like the desktop, taskbar, Start menu, close, restore, and minimize buttons, etc.
When it comes to Unix-based operating systems like Linux, the shell is more often associated with the Terminal – the program that reads the commands you enter and tells the computer what needs to be done.
So, when you use SSH, you establish a secure connection to your server and send commands. The shell interprets them and tells Linux what you want to do.
Establishing an SSH Connection
The easiest way to open an SSH connection to your server is to use your computer’s own command-line interface. Windows users can use PowerShell or Command Prompt, and if you have a Mac or another Unix-based OS – the Terminal is the easiest way forward.
You start with:
ssh [your username]@[your server’s IP or hostname]
Your computer will try to establish a connection on port 22 on your server. Bear in mind that your host may use a different SSH port for security reasons. If that’s the case, you’ll need to add -p followed by the port number to the command above.
The server then asks you for your password, and after successful authentication, it opens the shell so you can start executing commands. Another option is to use a dedicated SSH client.
PuTTy is the most popular one, mainly because it’s lightweight and available for pretty much any platform you can think of. It remembers your session information and login credentials, so you don’t have to enter your password whenever you want to use it. Furthermore, it enables authentication via SSH keys – a more convenient and secure alternative to the regular password.
With the basics explained, it’s time to see what you can do once an SSH connection is established.
Useful SSH Commands for Website Owners and Developers
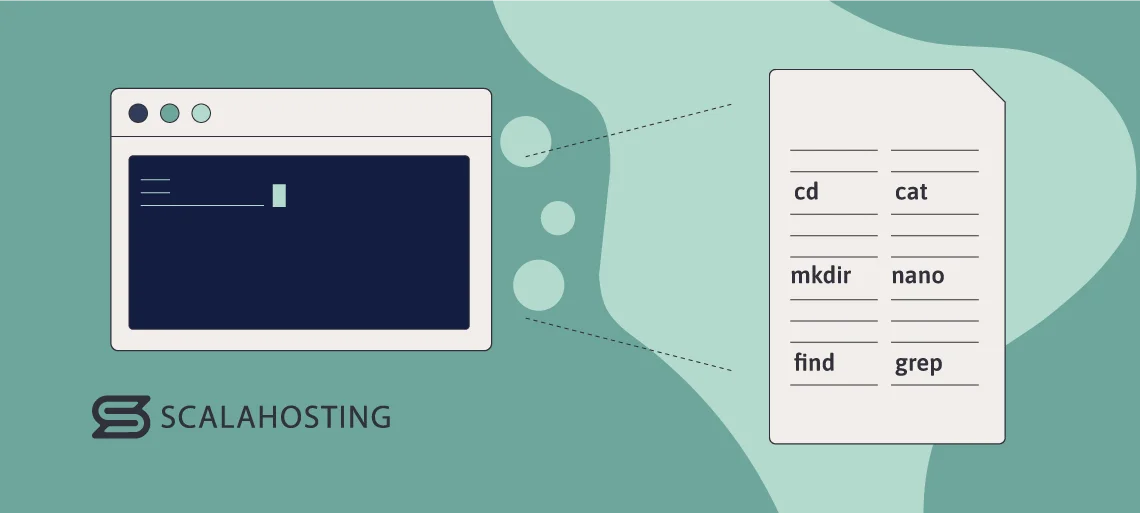
What you do with your server over SSH depends mainly on what sort of access you have. If your host gives you root privileges, you can do whatever you want. You can install new software, apply updates, change core server settings, update configuration files, etc.
However, you don’t need root access for everything. Quite a few commands don’t require full control over the server but can still help you manage your project. Let’s have a look at some of them.
- cd
Unlike most commands on this list, cd also works on many non-Unix operating systems, including Windows. It stands for change directory, and as you may have guessed, it’s used to change the current working directory.
After you start a new SSH session, your current working directory is your account’s home folder (usually, /home/[your account’s username]/). Inside it is the public_html folder – your site’s document root. To go to it, you need to enter:
$ cd public_html
You can also jump straight to a directory within public_html:
$ cd public_html/folder-name
To go back one level, you use:
$ cd ..
And to go straight back to your account’s home directory, you can use:
$ cd ~
- ls
Like cd, ls works on many non-Unix systems. You use it to view the contents of a directory. For example, if you are in public_html and you type just ls, you’ll see the names of the files and folders in the current directory arranged in alphabetical order.
You may notice that the .htaccess file is missing from the list. That’s because it’s hidden.
To include hidden files, you need to use:
$ ls -a
If you want to see the file size, permission, and ownership information, and modification timestamps, you need:
ls -l
- mkdir
The mkdir command creates new directories. If you’re creating the new folder in the current working directory, you just specify its name after the command.
$ mkdir new-folder
However, you can also create subfolders. For example, you are in home/user, and you can set up a new folder inside public_html (a subdirectory) with:
$ mkdir public_html/new-folder
- rm
This is perhaps the command you should be most careful with. It’s short for remove and is used to delete objects from the disk. These could include files, folders, symbolic links (the equivalent of Windows shortcuts), file systems, etc.
Bear in mind that the files and folders you remove with rm aren’t sent to a recycle bin or trash facility that can help you recover them if you make a mistake. They’re removed from the disk, so they’re gone for good.
The syntax is pretty straightforward, especially if you want to delete a file from your current working directory. All you need to do is specify the file’s full name (including the extension). For example:
$ rm file.txt
There are quite a few options, though:
- $ rm -f deletes the specified file or folder forcefully. There’s no prompt asking you whether you’re sure you want to continue.
- $ rm -r is used for recursively removing folders and the objects in them.
- $ rm -v displays a message informing you whether or not the process has been successful.
- df
The dfcommand employs the disk free utility embedded in Linux to show you information on storage space usage for mounted filesystems.
On its own, df displays a table showing all the mounted filesystems on the server, their total size in kilobytes, how much of it is used, how much is available, the percentage usage, and the mounting point.
The command can be used for specific filesystems, and with the -h (short for human readable) flag, the usage data is converted to megabytes and gigabytes, so the output is easier to understand.
- du
The du command prints detailed reports on disk usage for specific files and directories. It lets you manage storage more efficiently, identify directories that take up too much space, and generally improve data management on your server.
By default, it produces a list of all the files, folders, and subfolders in the current working directory, so it’s best to apply it to specific objects.
The syntax is as follows:
$ du [flags] [filepath]
There are a few flags you’ll likely use with the command. With -h, the utility converts the usage stats into kilobytes, megabytes, and gigabytes, making the report easier to read. With the -s flag, the utility only prints the space usage information for the specific directory it’s applied to without detailing every single inode. And if you use –time, you’ll see a timestamp next to each object showing you when it was last modified.
- ps
The ps command stands for process status and gives you an insight into the tasks currently running on your server. When executed on its own, ps prints a table with all the currently active processes, their IDs, the terminal type the user is logged in to, the CPU time, and the command that launched it.
By default, ps displays information about processes associated with the current terminal session. Using the -A option, you can see the processes running on the entire system. The amount of visible information depends on the level of privileges your user has.
- find
The findcommand is one of the most useful tools in the arsenal of any Linux user. It’s a powerful utility that helps you quickly and efficiently find the information you’re looking for within the filesystem on your server.
You can use the following syntax:
$ find [path] [options] [expression]
The path specifies where you want Linux to search. Options let you modify the search conditions, and through the expression, you set the criteria for the search. There are many options and criteria you can learn about as you use the command. To get an idea of how it works, we have a quick example.
Imagine you have multiple WordPress installations scattered in various subfolders of the public_html directory. You want to know how many there are and where they’re located.
Every active WordPress installation has a wp-config.php file, which you can use to your advantage. The command you need is:
$ find /public_html/ -name “wp-config.php”
Linux will scour the contents of the public_html folder and will display the list with the file paths of all your WordPress configuration files.
- cat
The cat command is the easiest way to look at the contents of a file. For example, if you’re in the document root folder of your WordPress website, and you want to see what’s inside the main configuration file, you just enter:
$ cat wp-config.php
Linux prints the file’s contents in the Terminal without opening a text editing application. You can open multiple files at once by adding their names to the command (i.e., $ cat file1 file2), and the -n option adds line numbers to make the output more readable.
You can create new files with cat as well. The syntax is as follows:
$ cat > filename
After you hit Enter, Linux moves you to a new line where you input the file’s content. To save the file, hit Enter again and press Ctrl+D.
You can also merge two files together. The syntax you need to follow is:
$ cat file1.txt file2.txt > file3.txt
To append the contents of one file to the end of another, you can use:
$ cat file1.txt >> file2.txt
If you want to append text to a file, the syntax is:
$ cat >> filename
The console will open a new line where you add your text. Press Enter and Ctrl+D to save the changes.
- less
With the less command, you can view the contents of a file one page at a time. Instead of displaying all the text at once and having to scroll through it, it prints only the information that fits on the screen. You use the spacebar to move to the next page.
This is particularly useful when you need to go through large logs with lots of data. It not only makes it easier to read through them but also helps the server breathe more easily. If you view a large file with cat, the entire document would need to be loaded and displayed. With less, Linux only reads the data visible to the user at any given time, so the file is effectively loaded one small chunk at a time.
If you want to stop reading the document and return to the shell, press q.
- nano
GNU Nano is a text editor pre-installed on most Linux distributions. With it, you can open, view, and modify the contents of any file.
It’s not the only Linux text editor, and some developers argue that Vim is the better choice. However, the general consensus is that Nano is more user-friendly and has enough features for the average website owner.
To open an existing file, you just need to use the nano command and specify which file you want to edit. If it’s in your current working directory, you simply enter its name. If it’s in a different folder – you have to specify the file path. For example:
$ nano /public_html/blog/wp-config.php
The principles are the same if you want to create a new file. You enter the nano command followed by the name of the new file.
Nano may be a command-line tool, but its interface is actually pretty straightforward to get around. It also has plenty of features. You can use your mouse or keyboard to mark, copy, cut, and paste text.
There’s a find-and-replace utility and syntax highlighting for supported languages. When you’re done editing a file, you can press Ctrl+X. Nano will ask you if you want to save the changes before closing the application and returning you back to the shell.
- grep
Grep stands for “global regular expression print.” The command is used for finding text patterns inside files in Linux.
Say, for example, you want to find out the name of the database your WordPress website uses. You know it’s available under the DB_NAME variable in the wp-config.php file.
Instead of opening the file and trying to locate the line with the correct information yourself, you can use the following command:
$ grep “DB_NAME” wp-config.php
The command above will only work if you’re in the same folder as the wp-config file. If you want to perform a recursive search in the current working directory and all its subfolders, you can use the -r option.
By default, all commands and names in Linux are case-sensitive. If you want to ignore case sensitivity when using grep, use the -i option. On the other hand, if you’re going to find exact matches only, you use the -w option.
If you only need a list of the files containing the term you’re looking for, you can use the -l option.
- replace
The replace utility can automatically swap one string of text for another. You just need to specify the file you wish to edit and the object you want to change. The syntax looks like this:
$ replace “original text” “new text” — file.txt
Remember to put the strings in quotes and leave a space between the — and the filename.
- crontab
In Linux, you can specify commands or programs to be executed at a specific time. For example, you can create a script that checks for updates to your site’s CMS and plugins and installs them if available. The script can be scheduled to run every day at midnight when your site isn’t that busy.
The scheduled task is referred to as a cron job. Every cron job you create is stored and managed through your own cron table, and with the crontab command, you can view and edit that table.
To view the cron jobs set for your user, you need the following command:
$ crontab -l
If you want to edit it, you’ll use:
$ crontab -e
Linux opens the default text editor (often GNU Nano, but it could also be Vim) and allows you to modify your cron table.
Server owners can also edit the cron tables of other users. To do that, they need to specify which account they’ll edit using the -u option.
- wget/curl
Both wget and curl are used to download files on your server. The main difference between the two is that wget is considered more user-friendly, and curl is the more versatile tool with a broader range of options and supported protocols.
The syntax with wget is as straightforward as you’d expect. You simply need to add the URL of the file you want to download. For example, if you wish to download an archive with the latest version of WordPress to your server, the command you need is:
$ wget https://wordpress.org/latest.tar.gz
With this, Linux downloads the TAR archive and saves it with the same name in the current working directory. If the process is interrupted before the download is complete, you can use the -c option (placed before the URL) to resume the download instead of starting from scratch – useful when shifting large files.
The syntax curl uses is similar. Here’s the basic command for completing the task we outlined above:
$ curl -O https://wordpress.org/latest.tar.gz
This will save the WordPress archive as latest.tar.gz in your current working directory. If you want to save it with a different name, use the –output option. For example, if we want the archive to be stored as wordpress.tar.gz instead of latest.tar.gz, we’ll use:
$ curl –output wordpress.tar.gz https://wordpress.org/latest.tar.gz
Just like wget, curl supports continuous download with the -c option.
- tar
Tar (sometimes called tarball) is a computer utility that collects multiple files into an archive. The technology was first developed in the 1970s, and its name derives from tape archive because, at the time, some storage devices used magnetic tapes.
This seems like ancient times now, but despite this, tar archives are still widely distributed today, especially on Unix-based systems. If you regularly use the command line, you should familiarize yourself with the tar command.
Let’s start with creating a new archive. Say you’re in your home directory and want to create an archive with the contents of your public_html folder. The command is:
$ tar -vcf new.tar public_html
As you can see, we use three options. The -v flag stands for verbose mode. It means that Linux will print out the name of every file and directory it puts in the archive as it’s doing it. You can create the archive without it, but most server owners prefer to use it as a progress update.
With the -c option, we tell Linux that we’re creating a new archive, and with -f, we indicate we’ll specify its name.
The command above will put the files and folders you want in an archive but won’t use any compression. To enable it, you need to use the -z flag to Linux to compress the data using gzip. You must also save the new archive with a .tar.gz extension.
So, the command above would look like this:
$ tar -vcfz new.tar.gz public_html
To view the contents of an existing archive, you need to swap the -c option for -t. So, if you want to check what’s inside the archive you created minutes ago, you’ll need to enter:
$ tar -vtf new.tar.gz
Finally, when you need to extract the files and folders from your archive, you should use the -x option. To unload all the data from the archive, the command would be:
$ tar -vxf new.tar.gz
You can also extract a single file from the archive simply by adding its file path to the end of the command.
- zip/unzip
The zip and unzip commands are used for managing ZIP archives. Zip is by far the more popular format of the two, mainly because it’s supported out of the box on Windows machines. Although Tar archives are widely used on Linux systems, you’ll likely encounter Zip archives as well, so it’s a good idea to learn how to manage them through the command-line interface.
The syntax is pretty simple. When you want to create a new archive and put files into it, you use the zip command followed by the name of the archive and the file paths of the items you want to add to it.
For example:
$ zip new-zip-archive file1.txt file2.php file3.css
Note that the .zip extension is added to your new archive automatically. You can add only files with specific extensions to your archive. For example, if you only want to archive only the PHP files in your current working directory, you need:
$ zip new-zip–archive *.php
If you want to add a folder to an archive, navigate to its parent directory and use the -r option to create a command that looks like this:
$ zip -r new-zip-archive folder-name
Unlike Tar, Zip uses compression by default. In fact, there are ten levels to choose from, with level 0 meaning no compression at all and level 9 offering the smallest archive file size. Level 6 is used by default, but you can specify a different level using the number as an option.
For example, if you want to use level 3 for the command above, you’ll need:
$ zip -3 -r new-zip-archive folder-name
Unzipping is even more straightforward. The syntax is as follows:
$ unzip archive-name.zip
Linux will automatically extract the data from the archive and place it in the current working directory.
- history
This command is pretty much self-explanatory. It gives you a list of the commands you’ve recently executed on your server. The number of entries you see depends on things like the shell configuration and your usage patterns. What you usually have in the list are the commands you’ve executed since the start of the current session.
The history command can be beneficial if you need to use a complex command multiple times. The entries in the history list are numbered, and Linux gives you a quick option to invoke them from the shell.
For example, if you want to execute the command number 54 on the list, you enter:
$ !54
Linux automatically enters the command in the Terminal and runs it.
The history utility can also be helpful if you’re diagnosing a problem and trying to discover what has happened. For example, if you find a file missing, you can figure out whether you’ve deleted it yourself with rm. You can do that using a combination of the history and grep commands separated by a pipe (|).:
$ history | grep “rm”
This will give you all the rm commands on your history list, helping you see exactly what you have deleted.
SPanel and SSH Commands

Many website owners prefer to run their projects without delving too deep into the command-line interface. That’s why we worked so hard to make SPanel as easy to use as possible.
Even people with no server management experience should have no problems getting used to SPanel and its wide range of tools. However, we also know that some of our customers are seasoned professionals who view the command line as an efficient way of handling everyday website management tasks.
These people need access to the Linux Terminal on their server, but it has to be quick, easy, and secure. That’s why the owner of an SPanel server is the only one who can decide who can open a remote shell and who can’t. In the main menu of SPanel’s Admin Interface, you’ll find a tool labeled Manage SSH Access. When you open it, you’ll see a list of all the accounts on your server with toggle switches next to them.
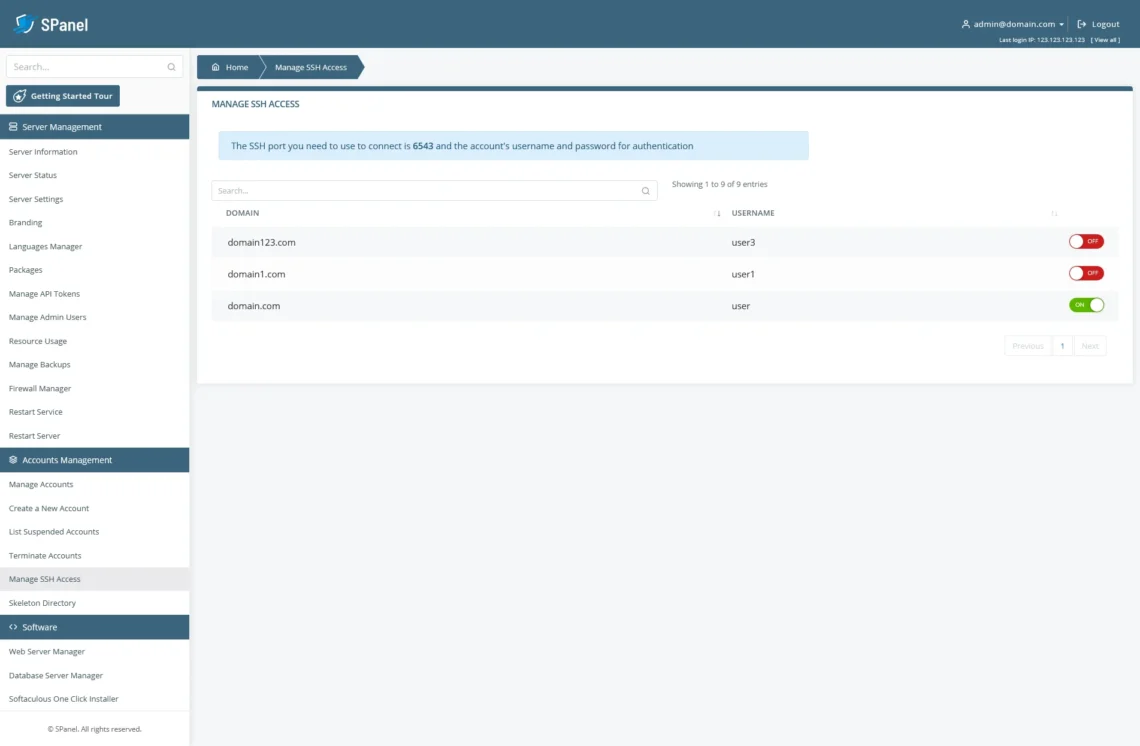
With these, you decide which projects can be managed via the command line. SSH access is disabled by default, but once enabled, users can open a remote shell and use commands to manage the files and folders on their accounts.
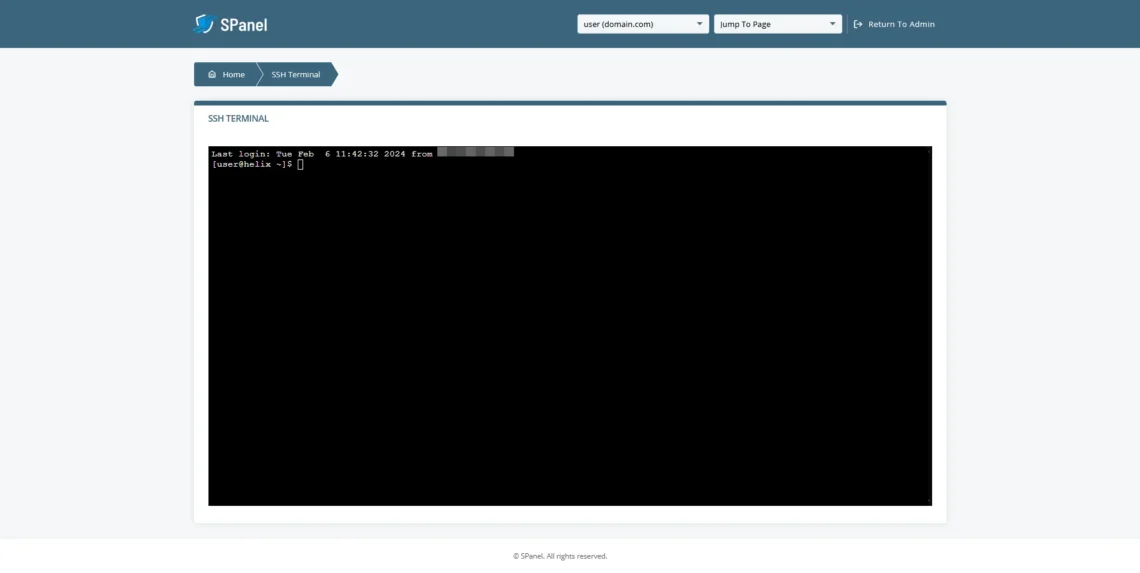
They can do it via a traditional SSH client but can also establish a connection in their browser. Under the Tools section on the homepage of SPanel’s User Interface, you’ll find the SSH Terminal. If SSH access for your account is enabled, it lets you open a shell straight in your browser, and you can start executing commands immediately.
Conclusion
Managing a website through the command line is not for everyone, especially now when many novice-friendly alternatives with a point-and-click interface exist. However, many of the more experienced administrators find commands quicker and more efficient.
The truth is, getting to know the command-line interface isn’t a bad idea. It may not be a requirement for running a website these days, but it’s an insight into the inner workings of your server, and it could help you gain technical knowledge that will streamline your workflow and make your life easier.


FAQ
Q: What is the most widely used command in Linux?
A: There are no concrete statistics on the most widely used Linux command. However, logic dictates that it should be ls. The command line interface doesn’t show you the contents of your current working directory by default, so admins need to use the ls command to see what they’re working with.
Q: Does SSH support GUI?
A: SSH is strictly a command-line protocol. You can theoretically use SSH to launch a GUI-based application remotely and encrypt the data flow during SFTP sessions with a regular FTP client. However, it’s completely different from fully GUI-based sessions like those set up through the Remote Desktop Protocol for Windows, for example.
Q: Does SSH require root access?
A: The level of privilege you have depends on your hosting package. Some plans give you full root access to your server, allowing you to install additional software, manage core server settings, etc. With others, account owners can still open a remote shell, but their rights are limited to managing the files, folders, and databases and usingpre-installed tools to run their websites.


