Time to work on your WooCommerce storefront and make sure everything is nice and cozy for visitors to enjoy!
The Customizer
Aside from the numerous settings screens in the admin area, you can customize the front-end of your Woo store with the Customizer. You can access this feature through Appearance → Customize.
Switching Through Mobile and Desktop View
Switch between Mobile and Desktop view to preview changes you are doing to the front-end. Sometimes differences between screens are significant, and you want everything to look perfect on all devices.


Customizer Menu Layout
Usually, Customizer menu items are arranged in the following order:
- Default WordPress settings, such as Site Identity.
- All other theme settings — Background, Typography, and Buttons.
- Plugin settings usually occupy the bottom of the list.
Scroll down and click on WooCommerce.

Store Notice
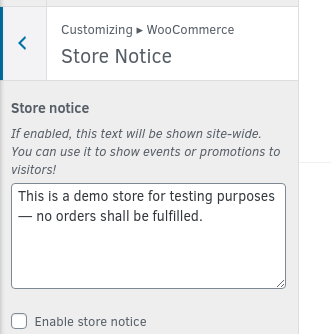
The Store Notice appears on both the WooCommerce and WordPress parts of your store. It’s commonly used to notify customers of important changes to your business.
An example use case would be notifying users you are temporarily handling orders by phone. You can also use it to notify customers of an ongoing promotion, including a Coupon Code.
Product Catalog
- Shop Page Display is the first option on the Product Catalog list. It refers to the front page of your WooCommerce store. You can set it to:
- Show Products for stores with less than 30 products;
- Show Categories & Products for stores with 100 or so products;
- Show Categories for drastically bigger inventories.
- Category Display is for category pages of your store.
- Show Products is best when you are starting out with a smaller inventory
- Show Subcategories & Products is recommended for larger inventories
- Show Subcategories can be used when you want to drive attention to smaller subcategories.
Default Product Sorting is an important option as it defines which products are pushed to the top of every category page. Such products always receive the most attention.
The available options here are:
- Sort by price (asc) displays your most affordable products first.
- Sort by most recent for showing off your newest arrivals.
- Sort by average rating for online shops with lots of user ratings.
- Popularity (sales) for focusing your product listings on best-sellers.
Products per Row is often set to 3 or 4. Note that this setting can make product category pages on some themes look broken or distorted.
When defining the Rows per Page, it’s worth considering how many products will appear on each page. Additionally, mobile view (smartphone width) should always collapse product listings to a single column — 3 to 5 is most common.
Example: Displaying 4 products per row and 5 rows per page makes mobile view display a single column with 20 products.
Product Page
Settings in this section always concern a single product page but can vary from theme to theme. For Storefront, these include whether the Add to Cart button sticks on the screen and if product pages should feature the Previous/Next Product button navigation.
Product Images
Use this section to set the aspect ratio of your product thumbnails. The default is 1:1 (square).
Tip: After changing these, you will need to recreate the product thumbnails currently present. Use a plugin such as Regenerate Thumbnails. It’s free and available in the WordPress plugin repository.
Checkout
The Checkout page can have its fields toggled On or Off to fit your business model better. Use this section to set any of the following fields to Hidden, Optional, or Required:
- Company Name – visible and optional by default
- Address Line 2 – visible and optional by default
- Phone – required by default
Use the drop-down menus below these options to assign pages to the Privacy Policy and Terms and Conditions links on the checkout page.
