A staging site is a testbed where you can check whether any changes you’ve planned for your website work as expected.
For example, if you’re thinking of installing a plugin on a WordPress project, you’ll likely want to confirm that it doesn’t create any compatibility issues with other themes and add-ons. With a staging site, you have an identical environment as your main project, so you can test if everything works fine before pushing the new plugin to production.
Let’s have a look at the different options for creating a staging environment.
Creating a Staging Site via the WordPress Manager
IMPORTANT: Before creating a staging area, make sure to back up your entire website data. This is essential to avoid any possible issues.
If you use one of ScalaHosting’s SPanel managed VPS plans, you have an easy way of creating a staging environment for your WordPress project. The unique WordPress Мanager is equipped with this sort of functionality, and we’ll now show you just how easy it is to take advantage of it.
Here are the steps:
- Access your SPanel control panel
- Navigate to the WordPress Manager under the Software section.
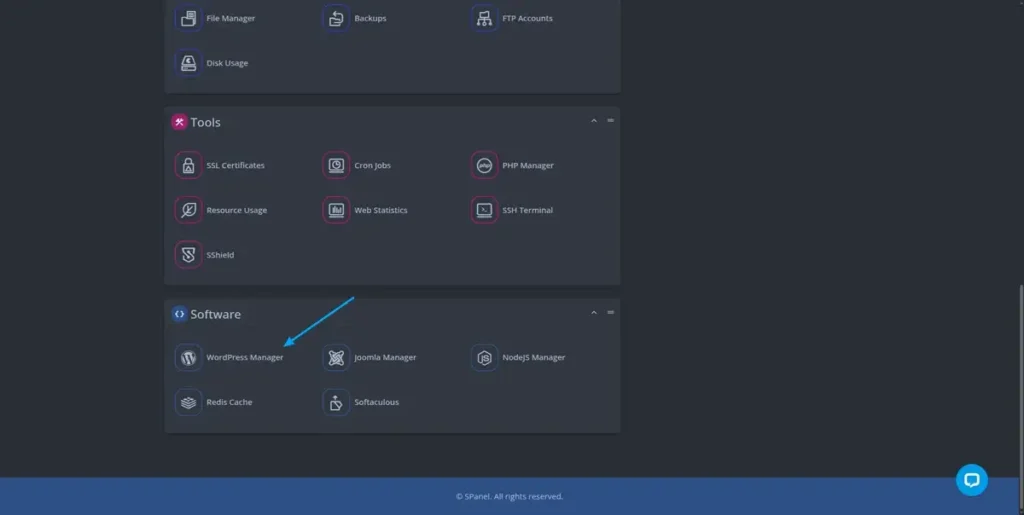
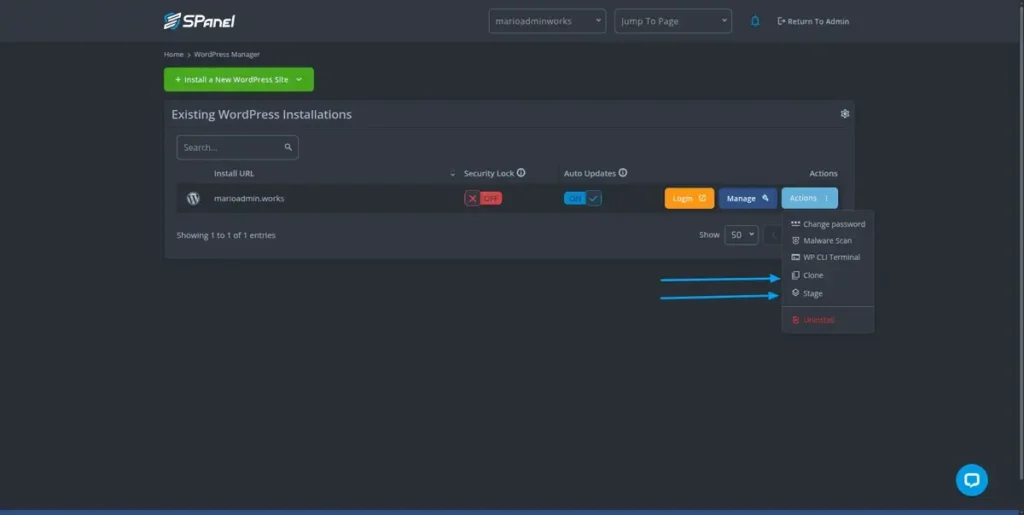
- All of your WordPress installations under the specific account, will be listed there.
- Click on the Actions button.
- Select the Stage option.
- A pop-up window will be shown from which you might select either:
– The stage environment can be generated in a pre-selected subdomain name like ‘wordpress.domain.com’
or
– Create a new subdomain with the desired name.
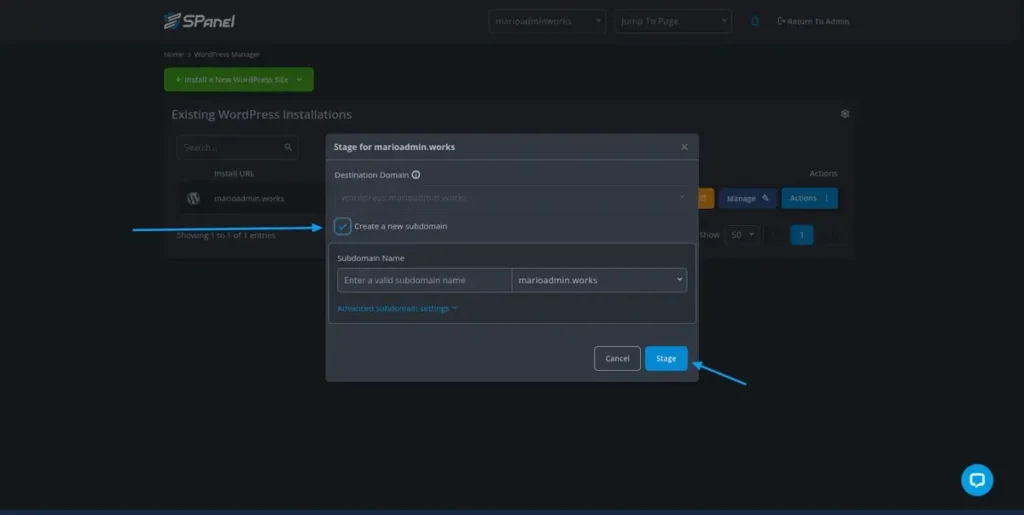
- Click on Stage to finish the installation.
Now that you have a staging area, you can test any changes without disrupting the operation of your live site.
Creating a Staging Environment for a Non-WP Site
Cloning a WordPress site is easy because you’ve got plenty of tools that can automate the process for you. However, if you have a custom website or use another CMS, these tools may not be at your disposal. If that’s the case, you’ll need to manually clone your website.
It’s nowhere near as easy as using a plugin or another automated tool, but it’s not exactly difficult, either. Here’s what you need to do.
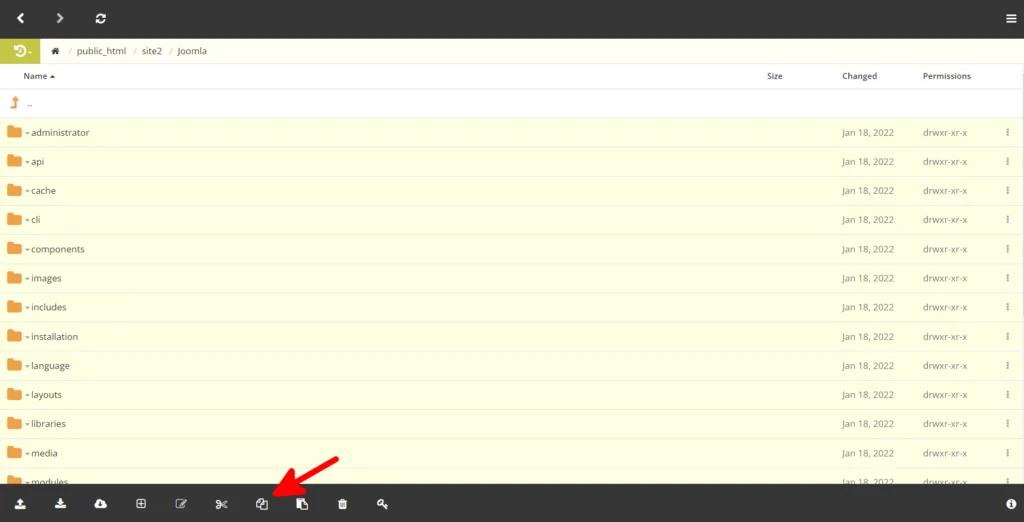
1. Copy your site’s files and paste them in the clone site’s location.
Because FTP clients like FileZilla present some limitations when it comes to copying files on the server, it’s best to use your web hosting control panel’s File Manager. Navigate to your site’s files, select all files and folders, and use the Copy button to save them in the server’s clipboard.
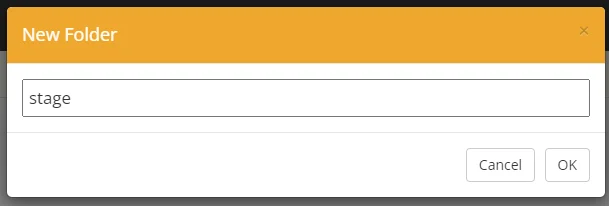
2. Create the staging folder.
You’ll need to paste the files in the staging directory. If you’re going to use a subfolder (e.g., yourdomain.com/stage), you can create the folder from the file manager. If you want to host the clone under a subdomain (e.g., dev.yourdomain.com), you need to set up a subdomain and keep note of its document root.
3. Paste the files and folders into the new folder.
The time you’ll need to wait for the transfer to complete depends on your site’s size and the server’s hardware resources.
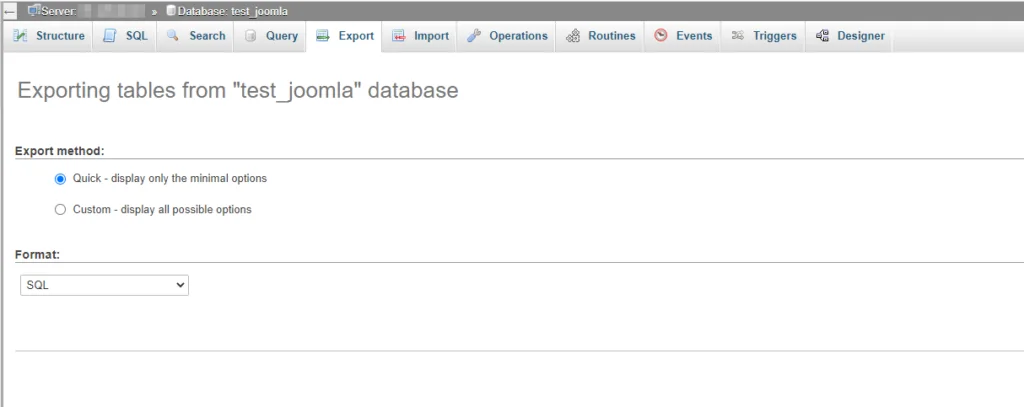
4. Export your site’s data.
With the files copied, it’s time to clone your site’s database as well. It’s important to create a separate database for the clone site, as that way, you’ll ensure that any changes you make to the staging site won’t affect the production environment.
To export your site’s database, you need to open phpMyAdmin, select the correct database, and go to Export. You can use the quick settings and save the data to your local computer as an SQL file.
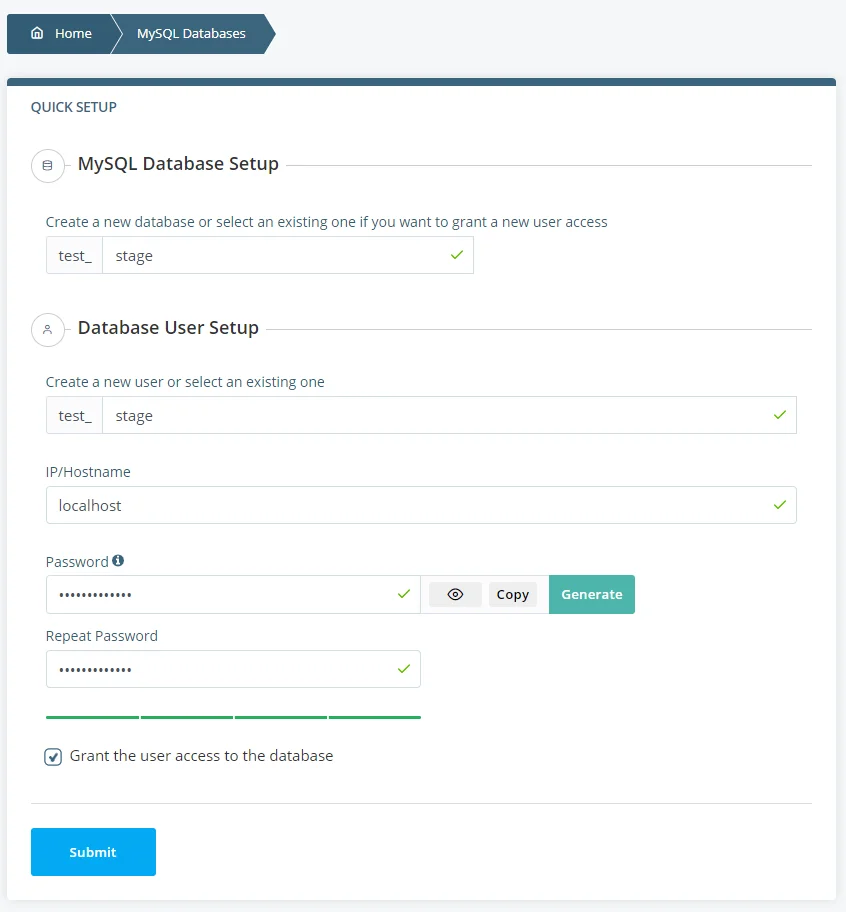
5. Create a new MySQL database and user.
You next need to create an empty database into which you’ll import your site’s data. A MySQL user is also required so your staging website can communicate with it.
SPanel users can create a database and user via the MySQL databases tool available on the User Interface’s homepage.
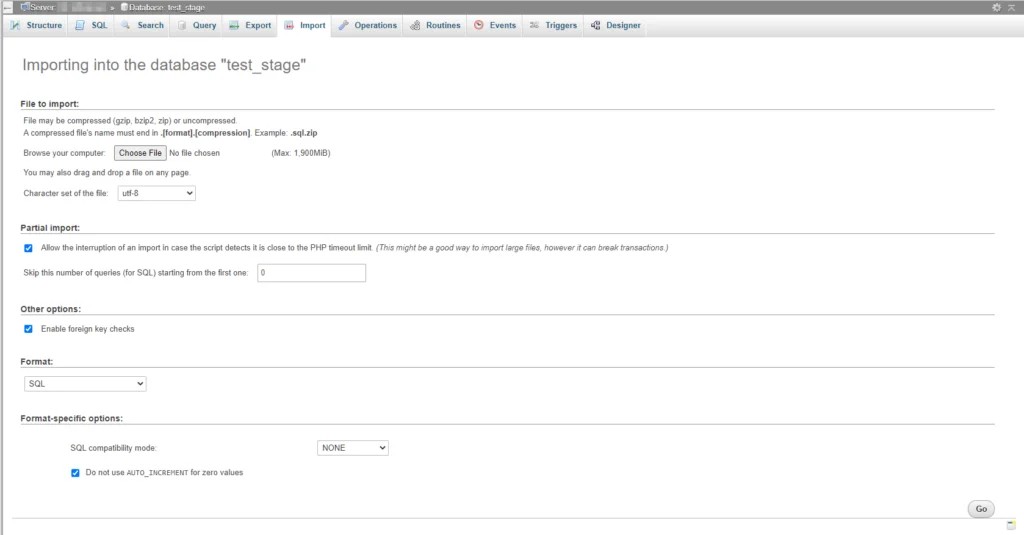
6. Import your site’s data into the new database.
You now need to go back to phpMyAdmin, select the new database, and go to the Import tab. The interface shows you a variety of different options and explains in detail what each of them works. In most cases, however, you simply need to click the Choose File button and select the SQL file you exported earlier.
7. Configure the staging site to work with your new database.
Finally, you need to tell the clone site which database to work with. How you’re going to go about this depends on how your website is built. Most likely, you’ll need to edit a configuration file, though in some cases, you might also need to modify some entries in the database to make the clone site work with its URL.