In a previous article, we talked about Filezilla being the go-to FTP tool if you’re looking to transfer large files to your web hosting server. We also mentioned that it’s an easy-to-use, widely used, and free-to-download FTP client that provides a multipurpose solution for transferring files remotely.
With Filezilla, users can upload, delete, move, download, copy and rename files on a remote server. If you are new to Filezilla and would like to get a full scoop of that article, you can check it out here.
This article takes our knowledge about Filezilla a step further by discussing how to establish an SFTP connection to your hosting account using the Filezilla application.
What is SFTP?
SFTP stands for Secure File Transfer Protocol. It is a more secure way of transferring files built up from FTP, only that SFTP has an additional Secured Shell component giving it that extra secured layer.
The extra layer of security that comes with SFTP provides encryption for the files transferred from the FTP client and web server. This security ensures that hackers cannot maliciously intercept files that you transfer. An SFTP connection requires dedicated SFTP clients as FTP clients cannot use SFTP servers.
A basic SFTP authentication requires a user ID and password to connect to the SFTP server. On the other hand, the Secured Shell (SSH) authentication requires the generation of an SSH key. The SSH private key and a matching public key are what validates an SFTP connection.
With this level of security, it is difficult for web hackers to gain entry into your server.
SFTP over FTP
Both SFTP and FTP have similar features, but they also differ in a few ways. Their differences also influence how and when we use both protocols.
One major advantage of SFTP over FTP is that SFTP uses a secured layer to transfer files while FTP does not.
SFTP is also a protocol that we use when authentication and firewalls are required during transferring files. In contrast, we use FTP when we require only certificates (TSL and SSL) for authentication.
SFTP uses the server’s SSH port. By default, servers listen for SSH and SFTP connections on port 22, but many providers change the default port for security reasons. Before you try to establish an SFTP connection, get in touch with your host and ask them which SSH port they use on their servers.
SFTP also supports key-based authentication, which is not provided by an FTP connection.
How to establish an SFTP connection to your hosting account with FileZilla?
Now that we have understood what an SFTP is and how it differs from FTP, lets walk through the step-by-step process of establishing an SFTP connection to your hosting account with FileZilla.
If you are ready, let’s dive right in
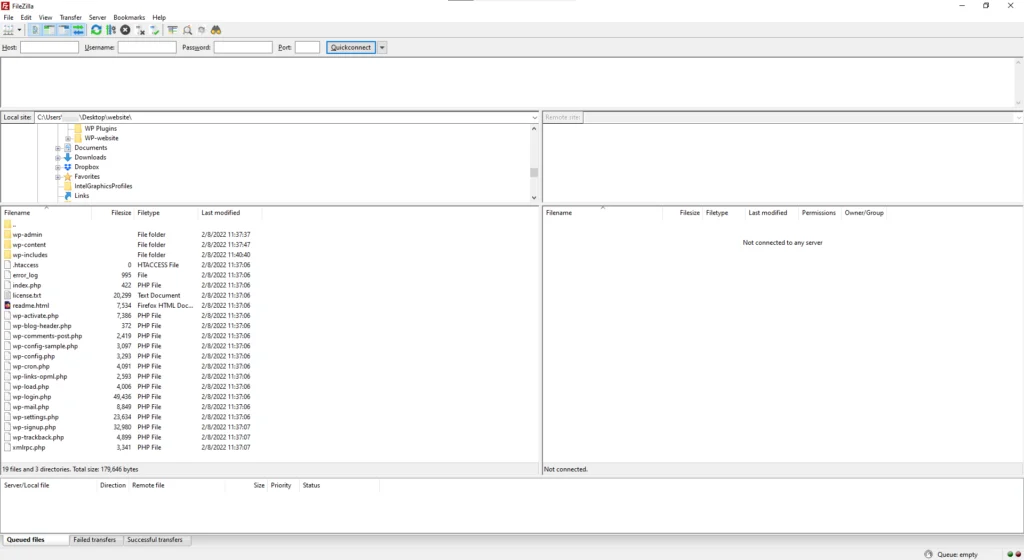
- Launch FileZilla.

- Enter sftp:// before adding the host and fill in the login details.
To establish an SFTP connection, you need to specify the protocol before you enter the domain name or the server’s IP. In the Username and Password fields, you need to enter the login credentials you use to sign into your control panel.

- Enter the correct port and click Quickconnect.
The final field asks you for the networking port. If you leave it blank, FileZilla will try to establish a connection through Port 22 (the default SSH port). If your host uses a different port, you’ll need to enter it. Otherwise, you won’t be able to establish an SSH connection.
If you had established a successful connection, your Server directory listing would be displayed.
Now, you should be able to drag and drop files to upload or download them.
You can also carry out other multipurpose file-sharing actions using Filezilla.
Conclusion
Well done! If you followed through with the steps listed above you should have successfully set up an SFTP connection using Filezilla. That was a piece of cake, wasn’t it?
If you encounter any issues along the line, do leave us a comment or reach out to our happy-to-help support team.