Subdomains allow you to set up easily accessible sections of your website. By establishing your company blog under blog.example.com and putting your online shop under shop.example.com, you can diversify your content and make your website easier to navigate around. Let’s see how a subdomain works and how you can create one on your ScalaHosting account.
How subdomains work
Every domain that points to your account has a document root folder. When you type your site’s domain into your browser’s address bar, the web server fetches the homepage from the document root and serves it back to you.
A subdomain works in a pretty much identical fashion. Once again, you have a document root that hosts the content you see when you navigate to the subdomain. Inside it, you can have a fresh
WordPress installation or a messaging board where your visitors discuss topics and share opinions. The content under the subdomain exists pretty much independently from the primary site. However, the subdomain itself is not independent of the main domain.
If the main domain expires, all your subdomains become unavailable. Similarly, if you point your domain to a different account, your subdomains will stop working unless you recreate them on the new server.
Creating subdomains on your ScalaHosting account
Both cPanel and SPanel let you create as many subdomains as you want. The process is simple and takes no more than a couple of minutes. Here are the steps.
cPanel
For cPanel follow these steps :
- Log into cPanel
cPanel’s default login URL is https://domain.com:2083, where domain.com is replaced by your actual domain name. If the domain isn’t pointing to your hosting account, you can also use the server’s IP, though you need to bear in mind that the subdomains won’t work unless you point the domain correctly.
- Go to Subdomains
The subdomains section is accessible via a button in the Domains pane on cPanel’s homepage.

- Pick a subdomain and specify a document root
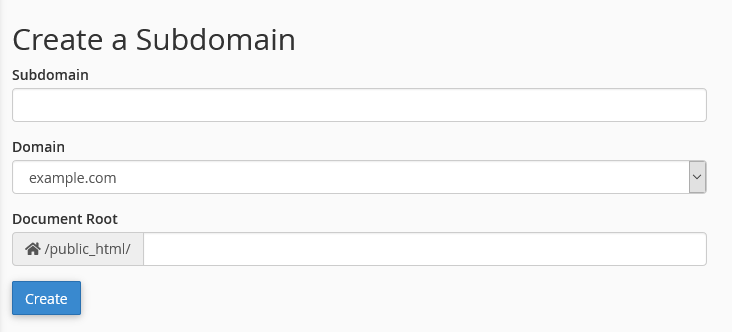
The form that appears asks you to enter your subdomain (the part before .domain.com), pick the relevant domain from the drop-down menu, and specify a document root. By default, subdomains created with cPanel point to folders located inside the public_html directory.

- Set up the subdomain and start using it
After you click Create, cPanel will automatically create the subdomain’s document root folder (if you haven’t picked an existing one) and will set up the subdomain for you. Creating a subdomain doesn’t modify your domain’s DNS settings, so there’s no propagation period.
SPanel
For SPanel follow these steps :
- Log into SPanel’s User Interface
SPanel’s default login URL is https://yourdomain.com/spanel. Once again, you can use your server’s IP if your domain isn’t pointed to the correct hosting account. Be sure to use the login credentials for the relevant SPanel user account.
- Go to Subdomains
SPanel’s tool for managing subdomains is available on the User Interface’s homepage.

- Pick a subdomain and specify a document root folder
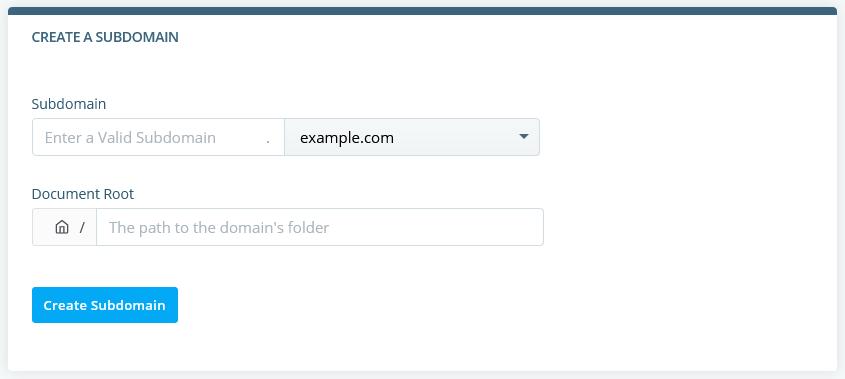
Just like cPanel, SPanel asks you to enter the new subdomain in the first field, choose the main domain from the drop-down menu, and specify a document root folder. Unlike cPanel, SPanel doesn’t put the subdomain’s document root inside the public_html folder.

- Set up the new subdomain
After you click the Create Subdomain button, SPanel will set up the new document root folder (if it’s not an existing one) and will configure the new subdomain to work with it.
How To Point a Domain Name To a Web Hosting Provider
