A CNAME record is a DNS record that turns one domain (usually a subdomain) into an alias for another. To show you how it works, we’ll look at its most common application – mapping the www. subdomain to the primary domain.
First, a user enters www.domain.com into their browser. The browser sends a request to the DNS resolver and is relayed to the Authoritative Name Server that hosts domain.com’s DNS zone file. Then, the server responds with the stored CNAME record.
The browser understands that it needs to look for domain.com and puts together a second DNS request, eventually resolving to the correct IP.
It’s important to make the distinction between a CNAME record and a redirect. A redirect reroutes the traffic to a predetermined destination. The goal of the CNAME is to lead the user to the correct IP address.
You can have a CNAME record for blog.domain.com that points to domain.com, but this doesn’t necessarily mean that the two will display the same content.
If it is configured correctly, blog.domain.com will lead users to the server’s IP address, and the web server will serve them the blog section of your website rather than the homepage. CNAME records can be very useful in many scenarios.
For example, suppose all your subdomains (blog.domain.com, shop.domain.com, mail.domain.com, ftp.domain.com, etc.) are mapped to domain.com, and domain.com has an A record pointing it to the server’s IP.
If you ever need to move the website to a different server, all you’ll need to do is change domain.com’s A record. It will save you a lot of time reconfiguring every individual subdomain one by one.
There are a couple of restrictions you need to bear in mind when setting CNAME records:
- You can’t place a CNAME record at the root domain level (domain.com).
- CNAME records can only point to other domain names and never to IP addresses.
- You can’t place a CNAME record for a hostname with other DNS records like A records, NS records, etc. (with the exception of DNSSEC records).
- It is possible to point one CNAME record to another, but this is not considered a good practice, as it affects performance due to the increased number of DNS requests.
- MX and NS records can’t point to CNAME aliases.
- Domains used for email can’t act as CNAME aliases.
Setting a CNAME record on your ScalaHosting account
After you point your domain to your ScalaHosting account, our servers are responsible for hosting your DNS zone file. Both cPanel and SPanel let you edit it through an easy-to-use Graphical User Interface (GUI). Here are the exact steps.
SPanel
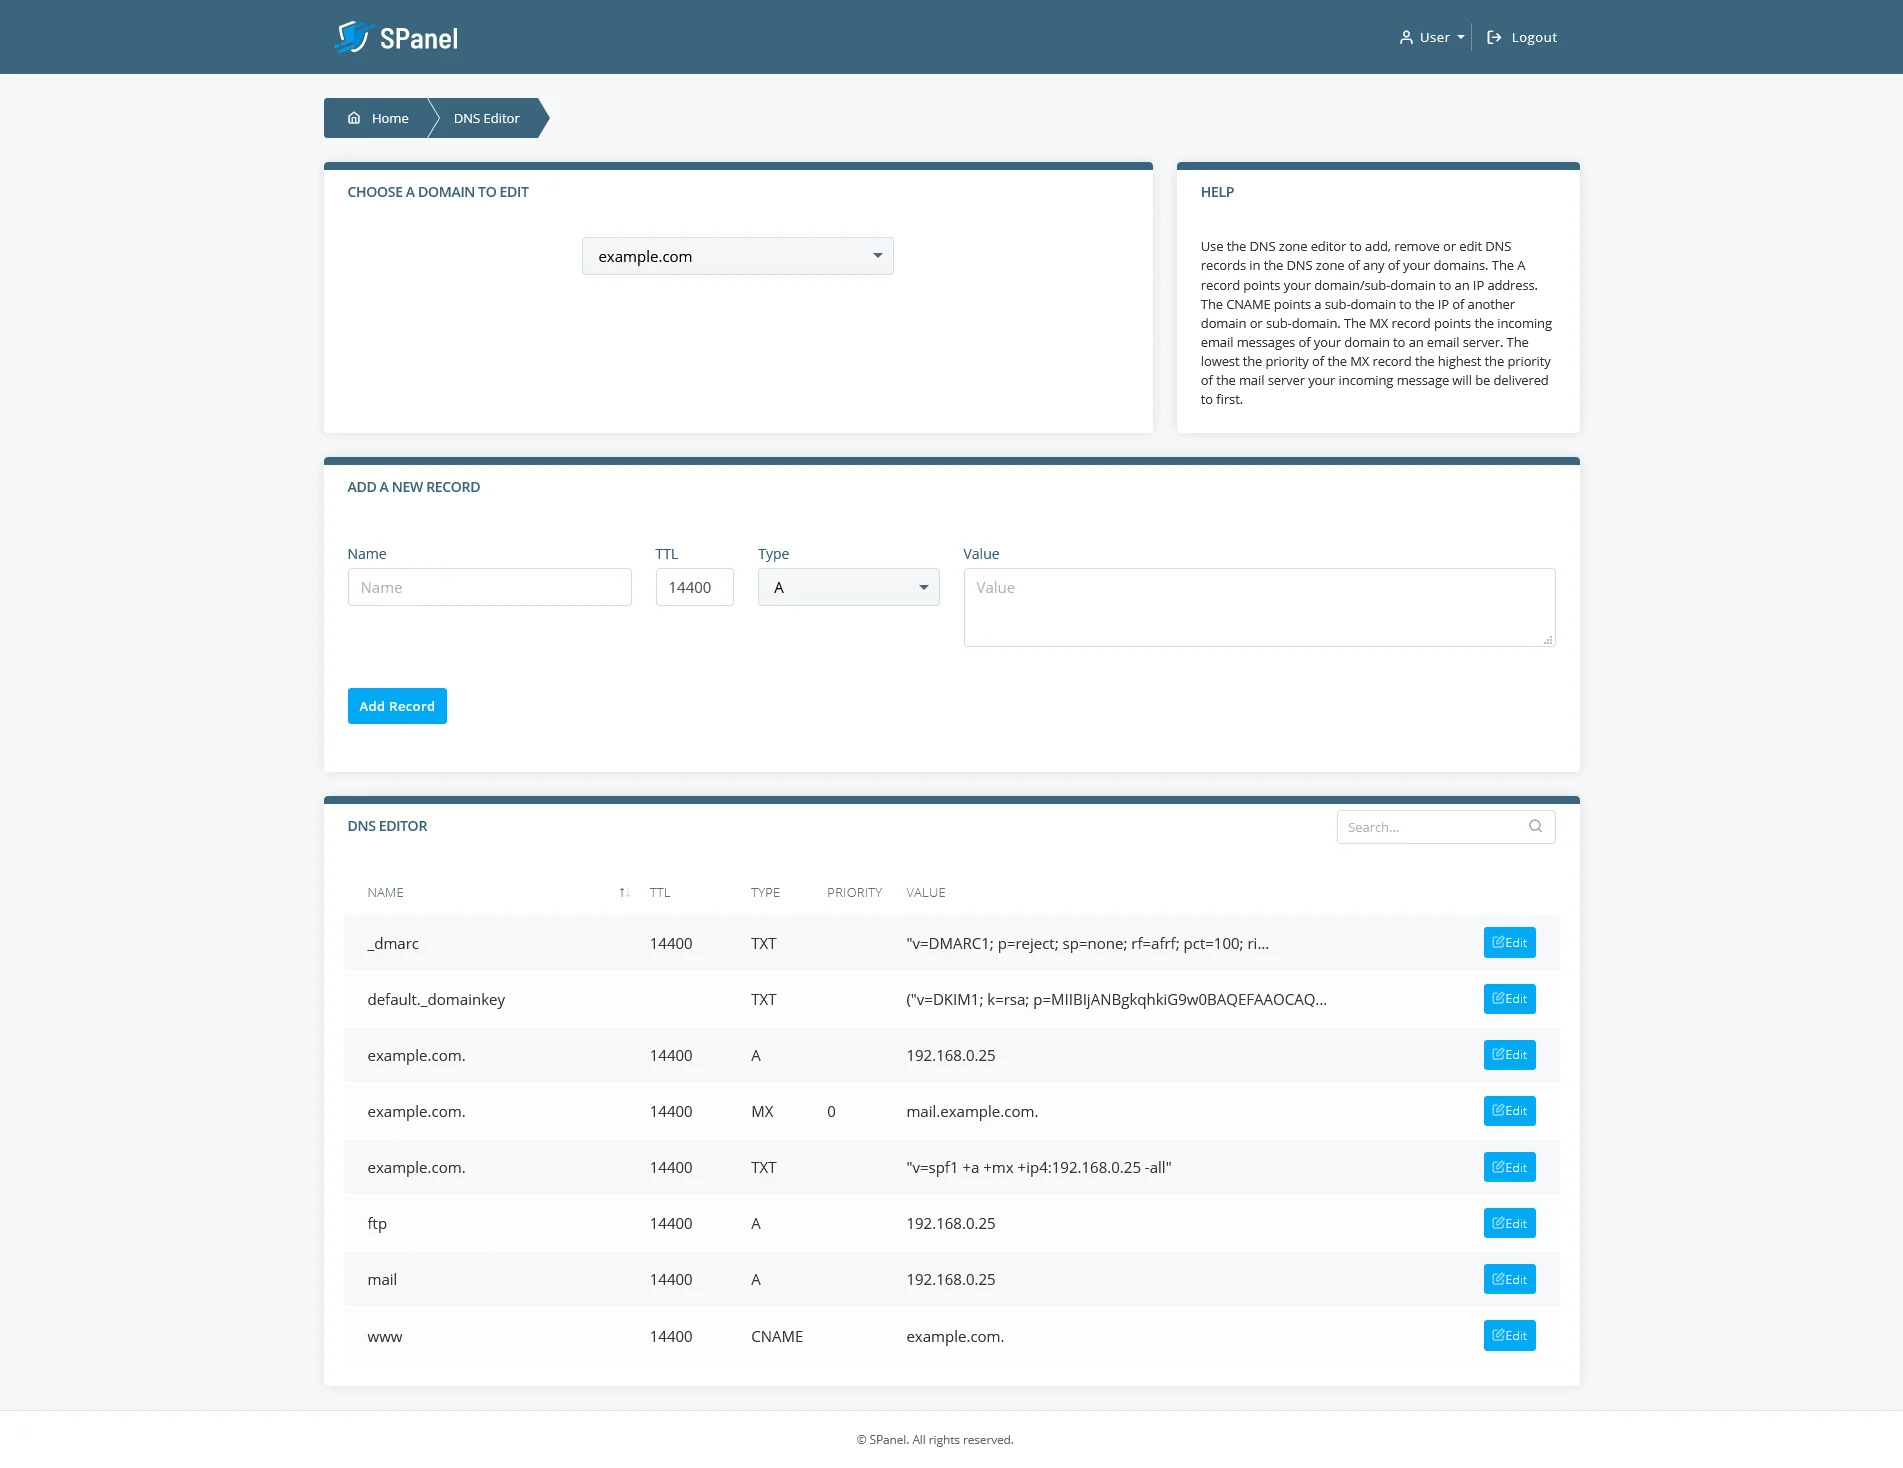
SPanel’s tool for editing your domain’s DNS zone is available on the User Interface homepage.

At the top of the page, you have a drop-down menu from which you can pick the domain you’d like to edit. At the bottom, there’s a list of all the DNS records currently set for the chosen domain.
You should be able to see that there’s already a CNAME record for the www. subdomain that points to your primary website. It’s there by default.

Between the Choose a domain to edit drop-down and the list of existing records, you have the form for adding new DNS records.
To add a new CNAME record, you first need to enter the alias. Bear in mind that if the new alias is a subdomain of the primary domain, you only need to add the first section (i.e., if you want to create a CNAME record for blog.domain.com, you only need to enter blog in the Name field).
TTL is short for Time to Live. It’s a setting that determines how long information on the record will stay in the DNS resolver’s cache before a new request is required. By default, it’s set at 14,400 seconds or 4 hours – a good compromise between quick propagation times and decent performance.
From the Type drop-down, you need to pick CNAME.
Finally, in the Value field, you have to enter where the new CNAME record will be pointing to.

After you’re ready, you can click Add Record to save the new record. Bear in mind that changes to the domain’s DNS settings need some time to propagate throughout the world, so the modifications might not be immediately visible.
cPanel
cPanel’s DNS Zone Editor is available on the control panel’s homepage.

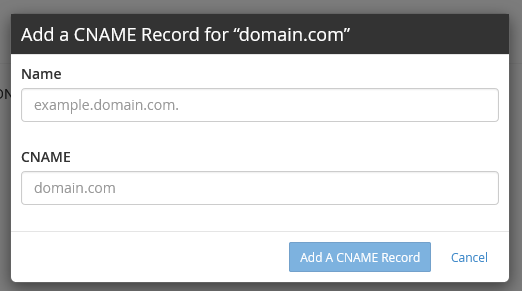
Its interface is a bit different from what SPanel offers. You have the list of all the domains you’ve added to your cPanel account, along with buttons for adding the most common DNS records.

The CNAME Record button opens up a pop-up requesting the CNAME alias and the record’s value.

After you enter the requested information, you need to click Add A CNAME Record to complete the process.