Apple Mail, also known as Mac Mail, or simply Mail, is Apple’s email client. It allows users to add and manage different email accounts in one place.
Adding an email account to your Apple Mail allows you to receive your emails on your mac devices and respond to them on the go, instead of logging online to read or send emails.
This article outlines the steps for adding an email account to the Mail app.
Let’s get to it.
First, here are things you’d need to have handy:
- Your email address
- The email password
- You’d need to decide the incoming email protocol to use (IMAP or POP)
- Your incoming and outgoing server settings
- Your SPanel login credentials (if you don’t have the email server settings)
So, let’s dive in.
Open the Mac Mail.
If you haven’t added any email account to the app, Mac will prompt you to do so the first time you open Apple Mail, taking you straight to choosing a mail account provider.
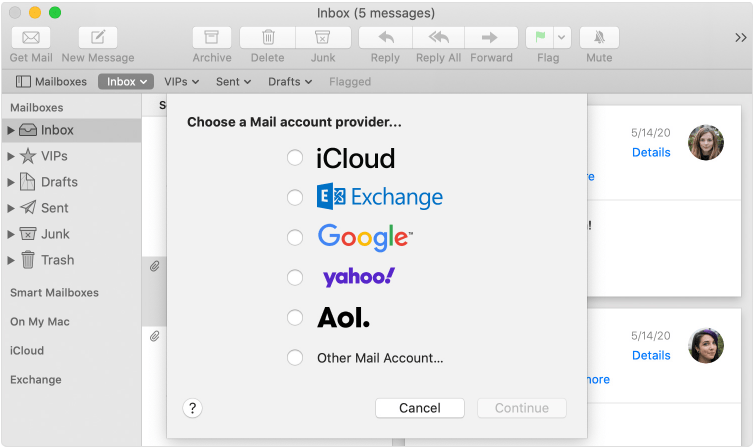
But if you’ve set up an account before and want to add a new email account, click Mail on the menu and then Add Account to get to the ‘Choose a Mail account provider…’ screen.
- Select iCloud if you’re adding an iCloud email account.
- Use Exchange to add a Microsoft Exchange email account
- Selecting Google helps you add a Gmail account to the Apple Mail
- Connect a Yahoo mail account by selecting Yahoo!
- Click Aol to add an Aol Mail account to the app.
- Other Mail Account option enables you to add a workspace email account.
For most of the options (iCloud, Exchange, Google, Yahoo! and Aol), you don’t need to do much; just enter your email address and password following the onscreen instructions, and Mac will take care of the rest.
But following these steps helps you to add a workplace email in a few clicks.
Type your name, your workspace email address, and the password in the respective fields and click Sign In.
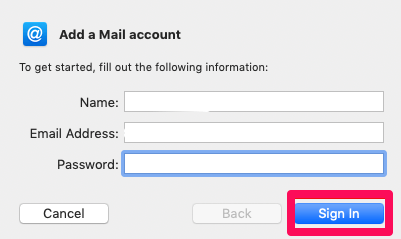
Clicking the button takes you to a new screen, and you might see an error message “Unable to verify account name or password.”
Ignore the error and select the account type.
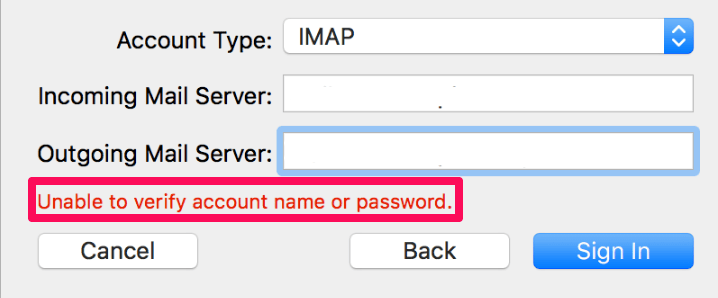
Select IMAP if you want your messages accessible from other devices or POP to access your emails only on the device you are adding it to.
We strongly recommend you connect using IMAP. You could learn more about IMAP and POP here.
Enter your Incoming Mail Server and Outgoing Mail Server and click the Sign In button.
Follow these steps to get your email server settings if you don’t have them.
Log into SPanel‘s User Interface. The default login URL is yourdomain.com/spanel (make sure you substitute yourdomain.com with your actual domain name).

On the homepage, click Email Account under the Email section to access your existing email accounts.
Scroll to the email account you intend to add to Apple Mail, open the Actions drop-down menu, and click Connect device.

SPanel displays a pop-up containing your incoming and outgoing server settings.
After entering your server setting and signing in, select the features you want to use with the account and click Done to complete the setup.
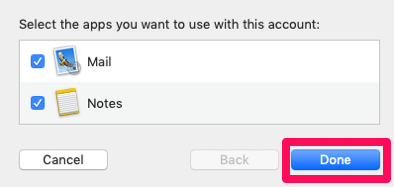
Mac will populate the inbox with your email messages.
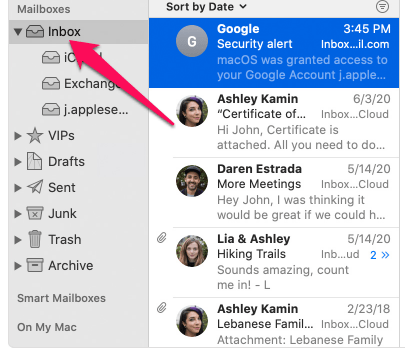
If you’ve added other accounts, click the arrow next to the inbox icon to switch between accounts.
That’s it.
If you run into issues setting up your Apple mail, kindly visit our support team for quick assistance.
