Over 36 percent of global mobile users rely on Apples’ iPhones to stay connected.
Setting up emails on iPhone or iPad helps users send and receive emails anywhere right on their mobile, enabling them to work more efficiently and helping them keep track of their important emails.
It’s convenient and saves users the stress of logging in repeatedly to access their email accounts.
This article quickly guides you on setting up emails on iPhone or iPad, but first, let’s look at the few things you could do with your iPhone Mail app.
5 Things You Could Do With Your iPhone Email
You could do many creative things with your iPhone and iPad; let’s take a quick look at them:
- After you open your inbox, tap and hold the Compose button in the bottom right to see all your drafts.
- Set alerts for important email threads.
- Double-tap in the body of an email when composing a message and tap the right arrow twice to insert a drawing.
- Use Siri (voice command) to find email faster or set up a reminder to finish an email draft later.
- Add multiple email accounts to the device and manage them from one place.
Adding Email to Mail on iPhone or iPad
Now, follow these steps to add your email to your iPhone or iPad.
Unlock your iPhone and go to Settings and tap Mail > Accounts (or Mail > Passwords & Accounts, depending on your iOS version)
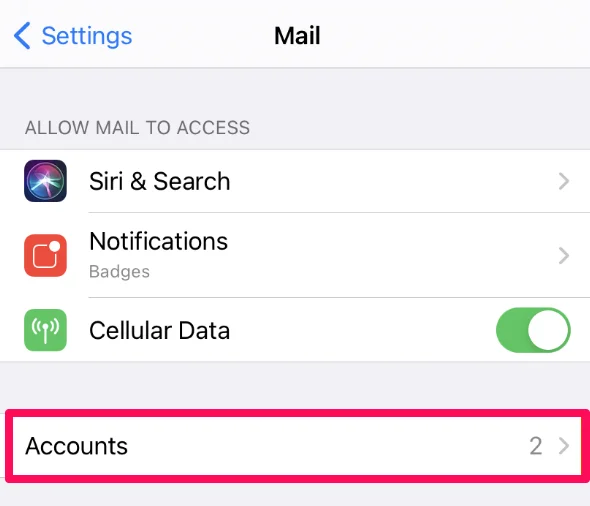
Tap Add Account to add your new email account to the phone.
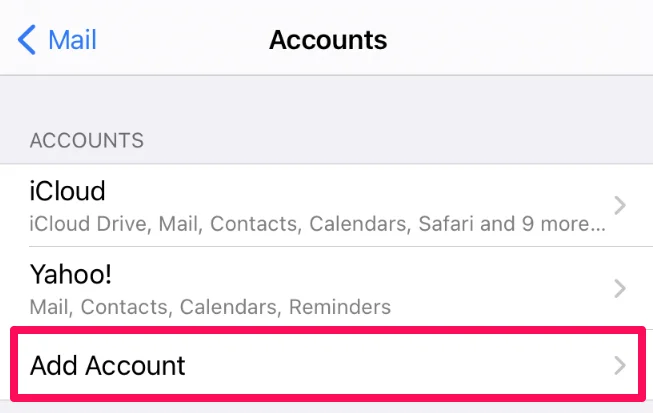
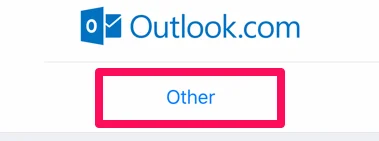
Select the account type on the next screen and follow the intuitive on-screen instructions to get Apple Mail to set up the email account automatically.
If you’re adding a Google Workspace email account, first, enable IMAP or POP settings for the account and create the Workspace account if you don’t have it set up already. This guide should help you out.
But if you’re adding your hosting email account (domain-based email account), select Other as the account type.
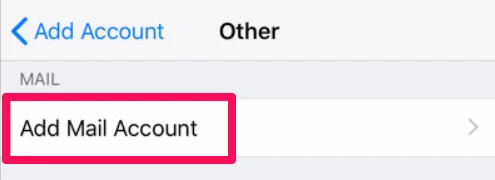
On the next screen, tap Add Mail Account to begin adding your account details.
Now type your account details and tap Next to configure the server settings.
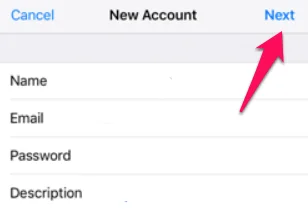
Tap IMAP to enable your email messages accessible from other devices instead of just your iPhone or iPad. POP downloads your emails to your device, deleting the server’s copy, making the message accessible only on that device.
So, we strongly recommend using IMAP to set up emails. But if you’ve any specific reason for using POP3, following the steps here will help get it done. If you want to use IMAP, you can follow the steps below.
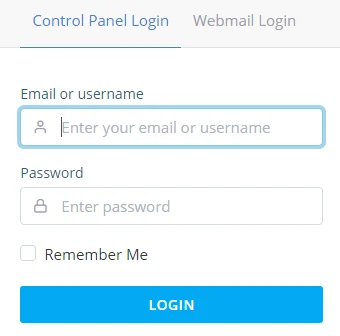
Open your web browser and Log in to the SPanel User Interface.
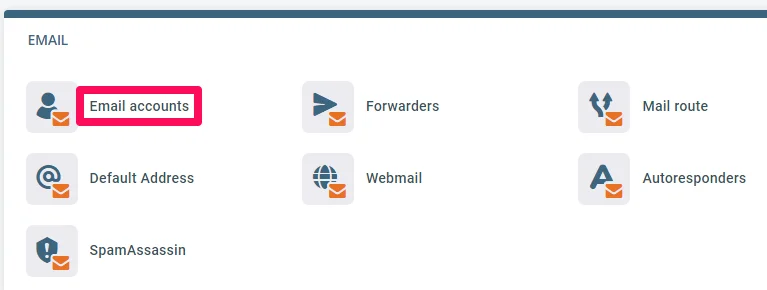
Locate the EMAIL section on the homepage and click Email Account to access your active email accounts.
Scroll to the email account you intend to add to your iPhone or iPad, open the Action drop-down menu and click Connect device.

You’ll see a pop-up containing your incoming and outgoing server settings.
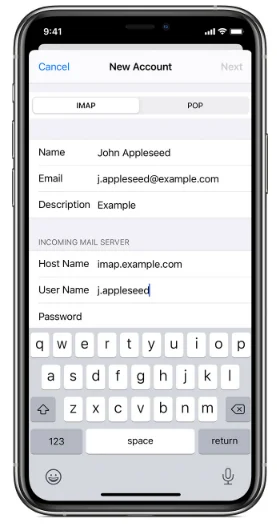
Go back to your iPhone or iPad, and use the server settings to configure your incoming (IMAP) and outgoing (SMTP) server settings.
For the Incoming Server Mail settings:
- Enter your Incoming Server address in the Host Name field.
- Type your email address.
Tap Next to configure the Outgoing Mail Server.
For the Outgoing Server Settings:
- Enter the Outgoing Server address in the Host Name field.
- Type the email address and password.
NOTE: Make sure the SMTP server is configured to require authentication. Otherwise, the email client won’t be able to send messages.
Tap Next to verify the settings and save the setup. If the settings are incorrect, the device will prompt you to edit them.
Wrapping It Up
This article makes setting up email on the iPhone Mail app very easy; just follow the outlined steps to get started and contact support if you need assistance.
You could use ScalaHosting’s dedicated email hosting to host your emails for maximum security, deliverability, and performance.
