Adding your email account to a desktop client means you get quicker, more direct access to your inbox. In addition to the instant notifications whenever you receive a new message, desktop clients also offer a superior interface compared to browser-based applications. You usually get a more powerful word processor to make your messages look more professional, as well as a large number of email management tools and features.
There are hundreds of different desktop email clients, and despite it being on the market for over two decades, Microsoft’s Outlook continues to be one of the most popular ones. With today’s article, we’ll show you the steps you need to take to set up your email account with Outlook 2013.
- Open Outlook
If you are launching Outlook 2013 for the first time, you’ll see the Set Up Your Email screen. If you already have an account, you can add the new one by selecting File > Add Account. - Enter your email account credentials
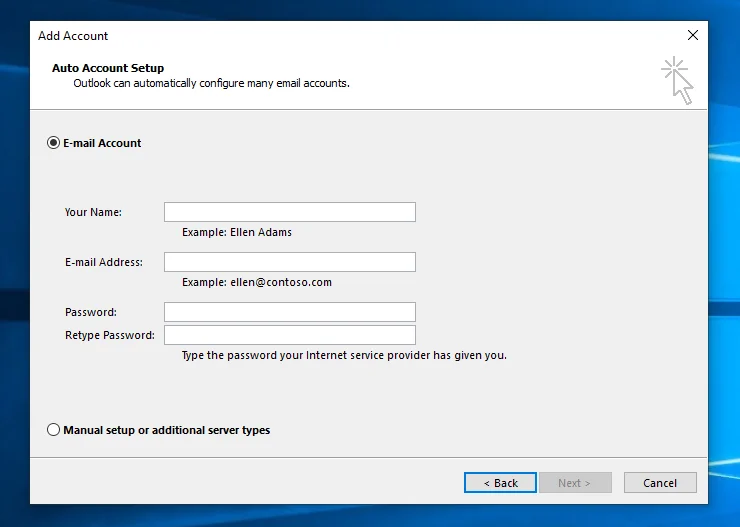
The next screen asks you for the display name that will appear on your messages, your full email address and password. At this point, you have two options:

- Let Outlook automatically set up your account
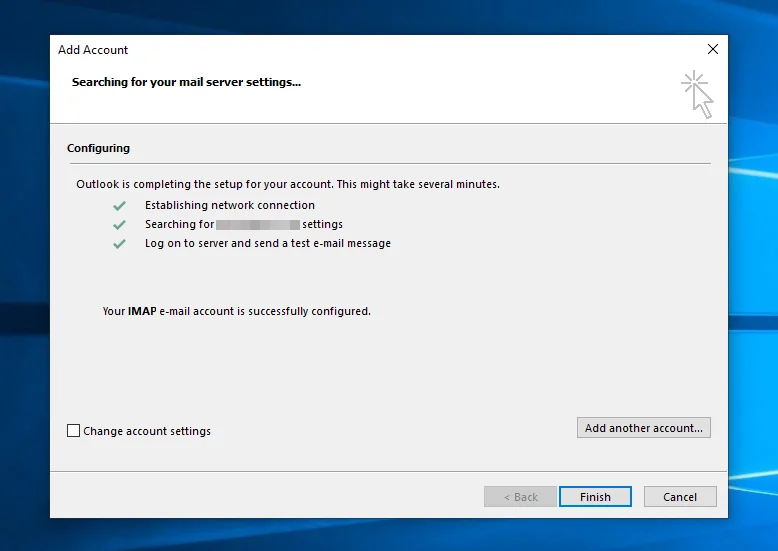
If you enter the correct login details, Outlook will automatically try to connect with the server and set up the inbox on your Windows computer. It will notify you if it’s successful.

- Configure your SMTP/IMAP/POP3 settings manually
On the Add Account Setup screen, you have an option labeled Manual setup or additional server types. Select it if you want to configure your IMAP/POP3 and SMTP settings manually and click Next.
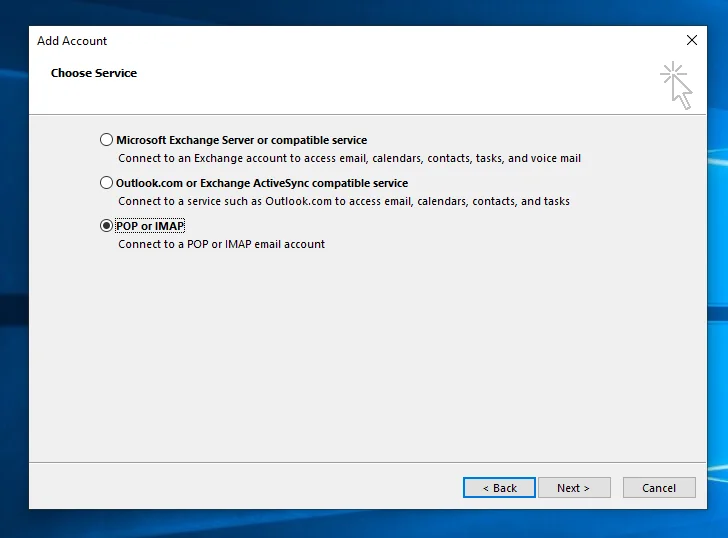
On the next screen, you need to choose the type of account you’re going to set up. POP or IMAP is the option you need to select before clicking Next.

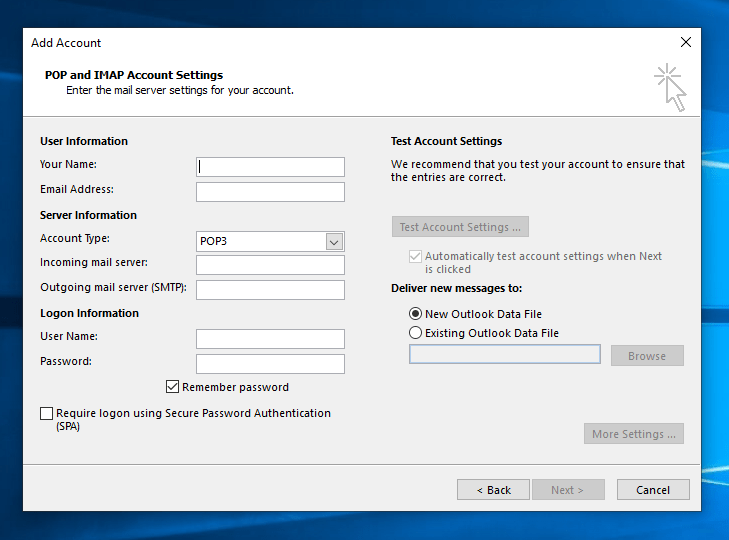
On the next screen, you can configure how Outlook 2013 connects to your email account. In the Server Information section, you first have to pick the protocol (POP3 or IMAP) you’re going to use to set up your account and enter the correct incoming and outgoing mail server settings.
In the More Settings > Advanced section, you can also configure the ports Outlook will use to connect to your account. By default, Outlook uses POP3 and IMAP without encryption, but it’s highly recommended that you change this setting and set up an SSL connection to your email account.

By default, you need to enter mail.yourdomain.com as your incoming and outgoing mail server (make sure you substitute yourdomain.com with your actual domain), and the ports you need to use are 993 for IMAP, 995 for POP3, and 465 for SMTP.
If you have any doubts about the incoming and outgoing mail server settings for your account, you can find all the information you need in your ScalaHosting Welcome Email. It’s available in your Client Area under the My Details > Email History section.
- Click Next to let Outlook test the settings you’ve provided and set up your email account
After you click Next, Outlook will use the settings you’ve provided to log into the incoming mail server and try to send out a test message to ensure the outgoing mail server works correctly. If it’s successful, it will proceed with redirecting you to your inbox.

