The hosts file is a system file that helps map hostnames to their IP addresses. It lets people connect to websites with easy-to-remember domain names instead of their IP addresses. The file resolves domain names locally without querying DNS nameservers.
It lets users set IP addresses for domains on their computers for a faster name resolution. You can also block ads, malicious websites, and tracking sites in the hosts files to prevent your computer from connecting to them. The file also lets users preview or test their website before pointing it to a new server.
You can edit entries in your host file in a couple of steps, and here’s how.
Windows 8 and 10
You can find your system’s hosts file on Notepad.
If you use a Windows computer, take these steps to open the file and make your changes:
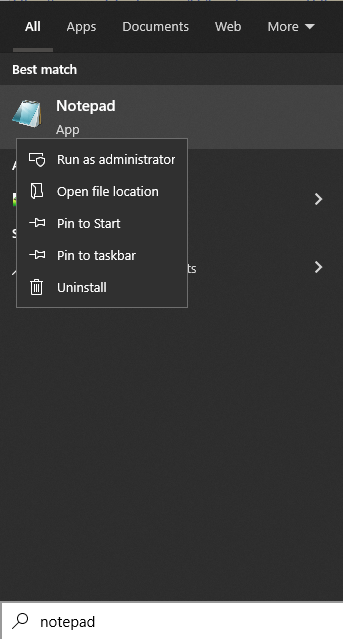
- Find Notepad using the search bar, right-click the app, and select Run as administrator.

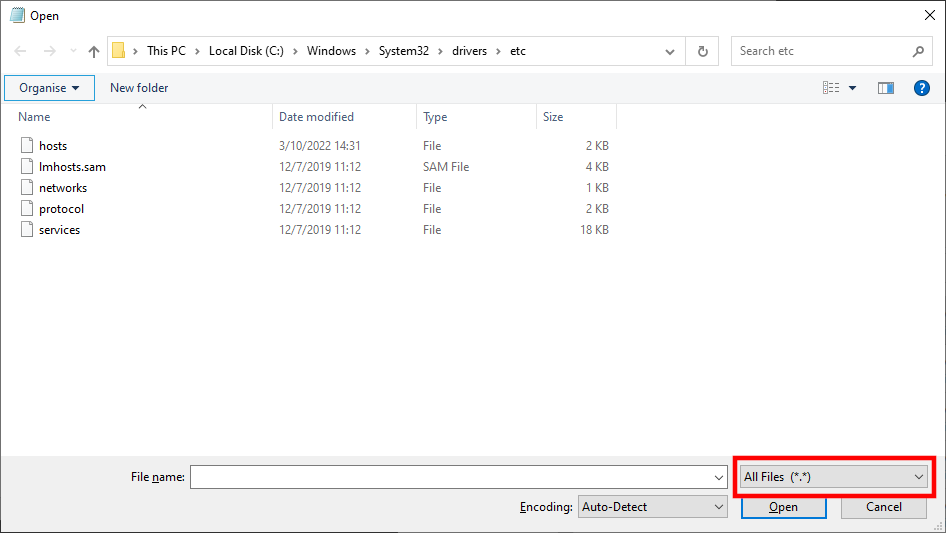
- Click File to launch the app, then choose Open.
- Go to c:\Windows\System32\drivers\etc.
- Switch the file type from “Text Documents (*.txt) to “All Files” and open the hosts file.

- Make your changes in the host file, click Files > Save to apply the changes.
You can disable a line by prefacing it with the hashtag sign (#), for example:
# 216.58.223.228 google.com.
The hashtag makes the hosts file to ignore the line during name resolution, resolving the name via the domain name system (DNS). You could also block access to any domain by replacing its IP address with the loopback IP addresses of 127.0.0.1 for IPv4 addressing or ::1 for IPv6 addressing.
Linux
For Linux computers, follow these steps to change its hosts file.
- Use CTRL + ALT + T on your keyboard to open the Terminal
- Execute this command sudo nano /etc/hosts at the command prompt to open the host file.
- Enter your password if the system asks for it.
- Make your desired changes and save using the Control and X key combination.
Mac OS
Here’s how to edit the hosts file on Mac computers:
- Log in to Mac with admin access—you need administrator privileges to edit Mac’s hosts file.
- Open the Terminal by selecting Applications > Utilities > Terminal.
- Run this command sudo nano /private/etc/hosts to open the hosts file.
- Edit your entries and save using the Control and X key combination plus Y and Enter.
Need Help?
If you have questions regarding editing your local hosts file, reach out to our support. We’re always available and ready to help.