Any teacher will tell you that students must be guided to the right resources at the right time. Unfortunately, this is often tricky, especially online, where information is freely available.
Thankfully, the developers of Moodle, one of the world’s most popular Learning Management Systems (LMS), have implemented several mechanisms to limit access to course materials and help teachers stick to a well-structured curriculum.
Let’s have a look.
Restricting Access to an Entire Course
Moodle is suitable for anything from a small website run by a single school teacher to large e-learning projects with students from all over the world and educators specializing in different subjects. In both scenarios, the website owner needs to know who has access to what.
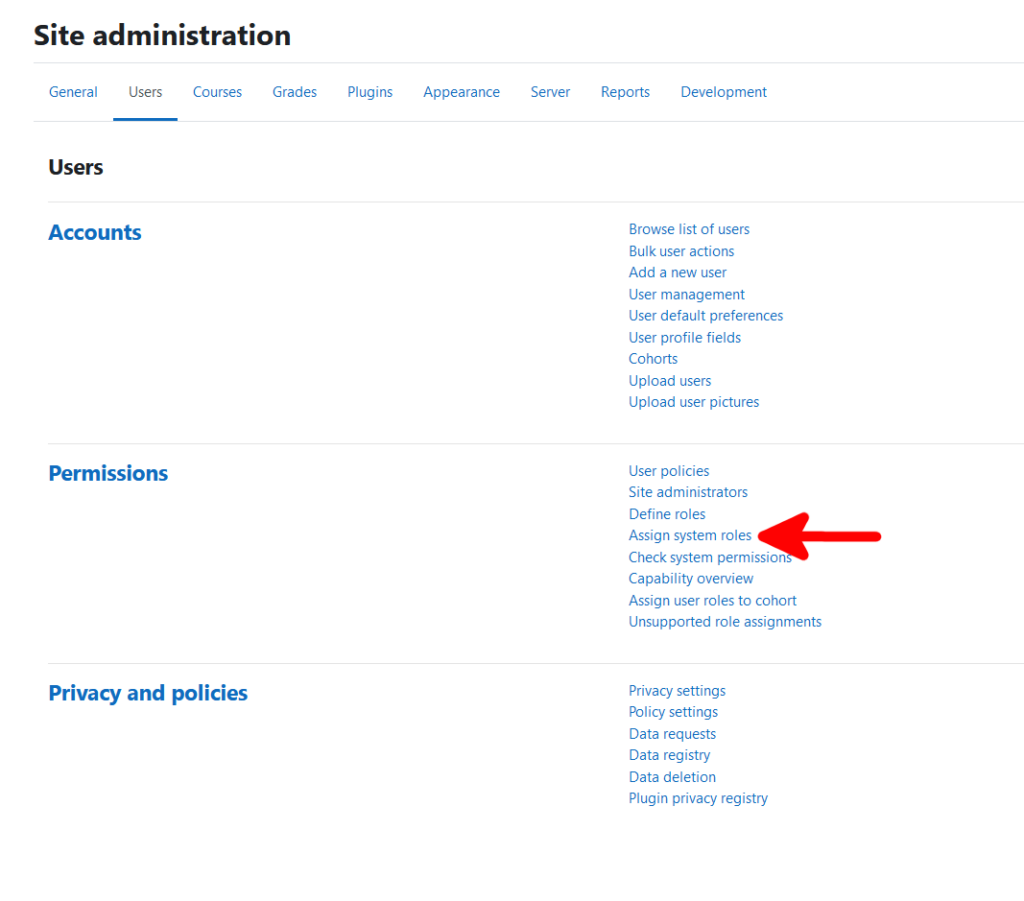
That’s why Moodle has user roles. As an administrator, you can go to Site administration > Users > Assign system roles and turn existing users into Managers and/or Course creators.

Both roles allow users to manage the lessons uploaded to the website. The difference is that while managers can control all courses, course creators can manage only the ones they participate in.
Managers and course creators can enroll users as Teachers, Non-editing teachers, and Students, so ultimately, they are the ones who grant and revoke access to the learning materials.
To enroll a new user in a course, open it (it will be available either on the homepage or in the My courses section) and go to the Participants tab.

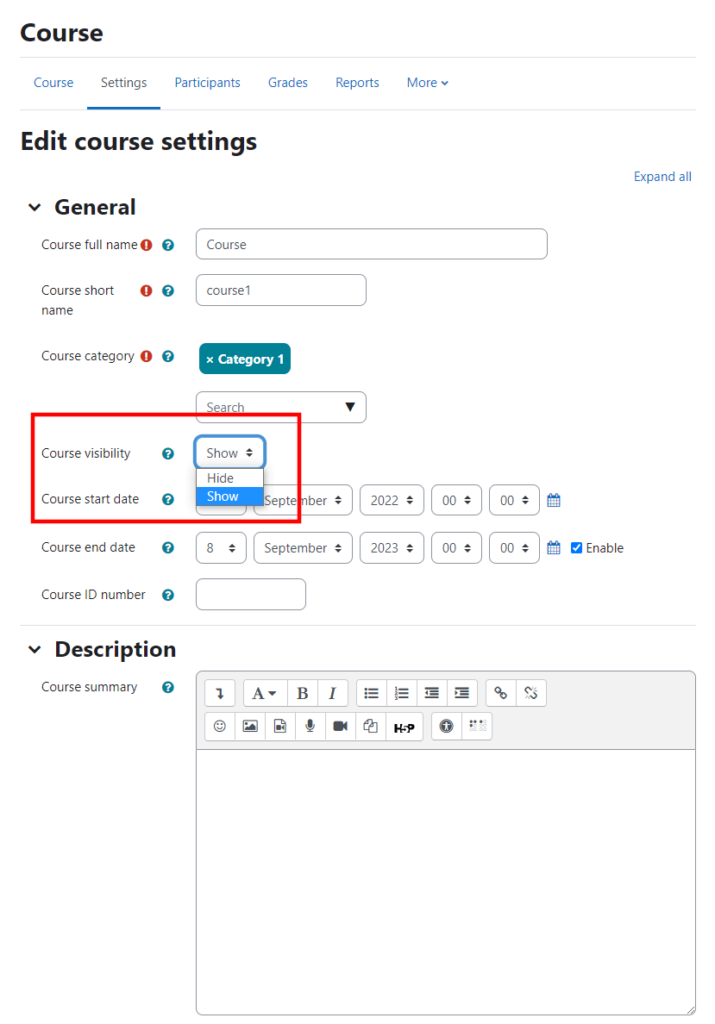
From the Enroll users popup, you need to pick the user or users you’d like to enroll and select a role for them. Only enrolled users can access the materials in the course. However, the course itself remains visible to everyone. If you want to hide it, you can do so via its settings.
The Course visibility option is available during course setup. You can also find it later in the Settings tab.

Hidden courses are still visible to admins, managers, and teachers. However, students can’t access them, regardless of whether or not they’re enrolled. By hiding courses and restricting access to them, you can make a group of students follow a set curriculum. Often, however, you need to be a lot more flexible than that.
Restricting Access to Course Resources and Activities
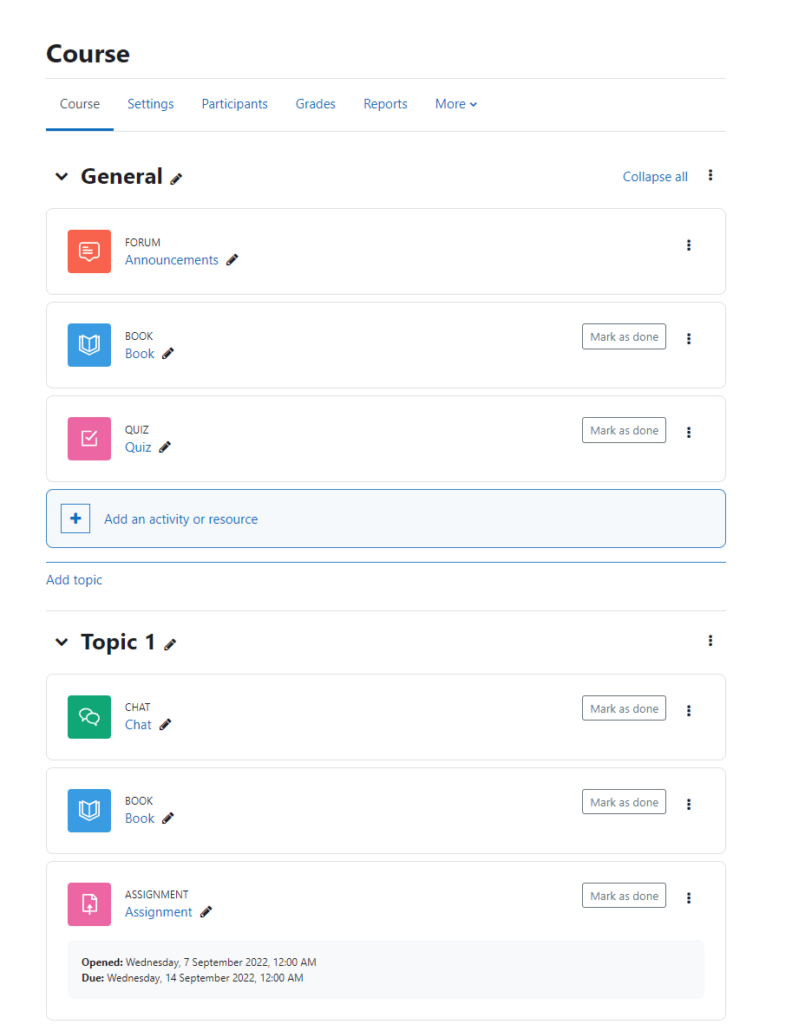
As you probably know, Moodle courses are divided into topics. Course creators and teachers can add two types of materials to each topic – activities (like assignments, quizzes, surveys, etc.) or resources (books, files, pages, etc.).
The idea is to help users acquire new knowledge through the resources and then put it into practice via the activities. Everything has to happen in a set order, and sometimes, you need to grant access to materials according to specific criteria.
If you simply want to temporarily hide a specific course item from your students, you can do it in a couple of clicks. Log in to your account and ensure the Edit mode button in the top-right corner is enabled.

Find the course you want to modify (it’s available on the homepage, and if you’ve set it up yourself, you should also be able to find it under the My courses tab).
Locate the resource or item you’d like to hide, click the three-dot button next to it, and select Hide.

You can follow the exact same steps to unhide the item. If an activity or a resource is hidden, it becomes inaccessible to all students on the course. However, you can be even more flexible.
You may want the item to be visible to users who comply with a set of specific requirements while remaining hidden to everybody else. The resources you want to make available may also depend on the student’s grades. And sometimes, you may want to reveal a particular resource or activity at a specific date.
All these options (and more) are available in Moodle.
Only users with permission to edit the course can restrict access to resources and activities, so you need to be assigned as a manager, course creator, or teacher. Log in to your account and make sure Edit mode is enabled.

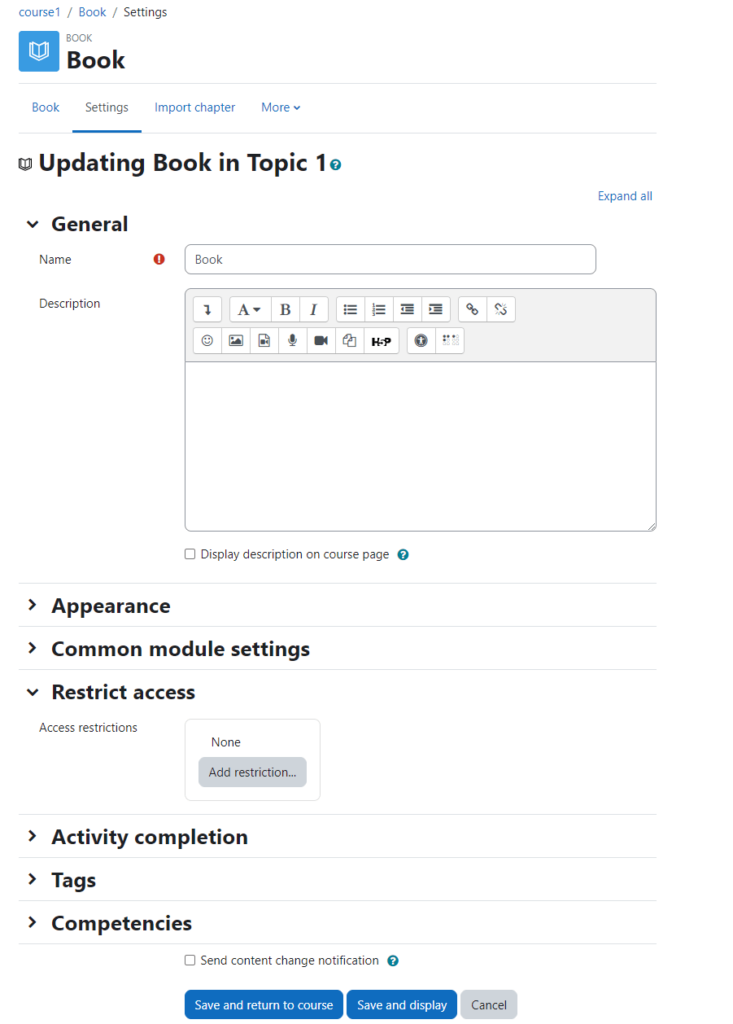
Go to the course you want to modify and locate the item you’d like to restrict. Click on its name to edit the activity or resource.

You need to open the Settings tab. Toward the bottom, you’ll find the Restrict access menu. Expand it and click Add restriction… to specify your criteria.

You’ll see five buttons giving you a range of options:
- Activity completion – You can make the item appear only after a student has completed a specific activity. Its visibility may also depend on whether or not the student has received a passing grade.
- Date – You can make the item appear on a predetermined date.
- Grade – The students will have to receive a specific grade (either for an assignment or for the entire course) before they see the item.
- User profile – You can make the item visible for a group of students only (e.g., based on their nationality).
- Restriction set – You can specify a set of nested criteria that need to be fulfilled if the item is to become visible (e.g., it will be available only to US-based students that have above-average course total grades).

After setting the restrictions, you need to scroll down to the bottom of the page and save the changes. A checkbox also lets you notify all course participants with access to the item about the modification.
