Gmail has over 1 billion active users, so it’s fair to say that many people know very well how to work with it. Quite a few are probably wondering if they can use the familiar Gmail interface for their custom email addresses, as well.
It is possible, and we’ll now show you how.
Setting up my custom email address through Gmail
Google gives you the option of checking and sending emails hosted under your domain via Gmail’s interface. You will effectively use Gmail as an email client that uses POP3 to retrieve your incoming messages from your mail server and SMTP to process your outgoing communication.
Here are the steps:
- Log into your Gmail account
The settings for adding more email addresses to your account are only available in Gmail’s browser interface, so you’ll need a desktop or a laptop computer to complete the process.
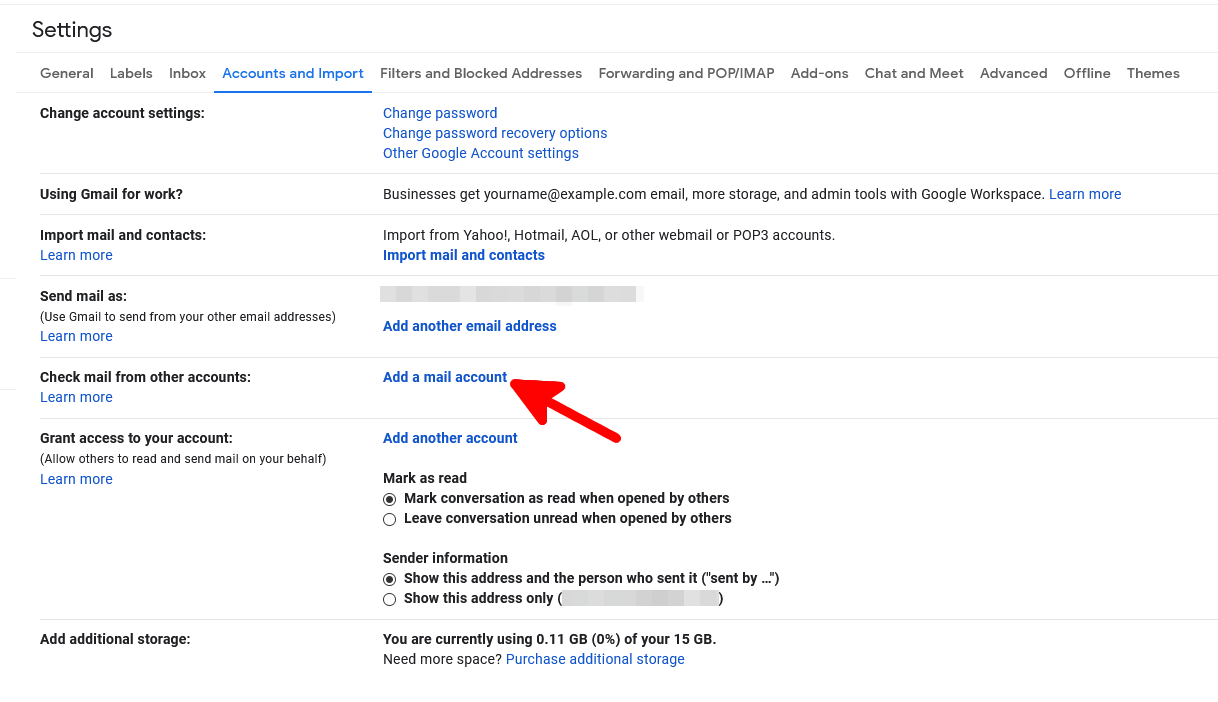
- Go to Settings > Accounts and Import > Add a mail account
Click the Gear icon in the top-right corner, select See all settings, and open the Accounts and Import tab. Under the Check mail from other accounts section, click Add a mail account.
- Enter your custom email address
Enter your custom email address in the pop-up that appears and click Next.
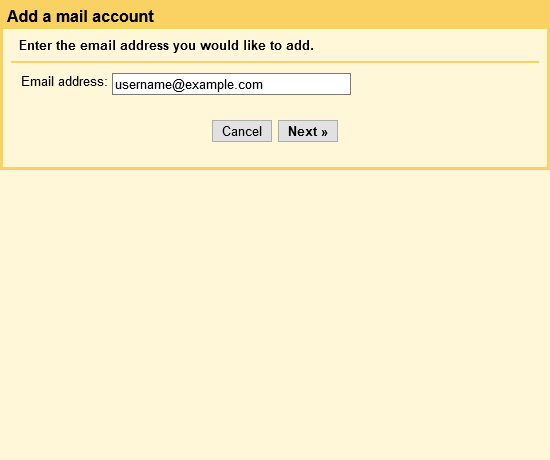
The screen gives you two options regarding how to manage your inbox via Gmail. Select Import emails from my other account (POP3) and click Next.
- Enter your custom email address login credentials
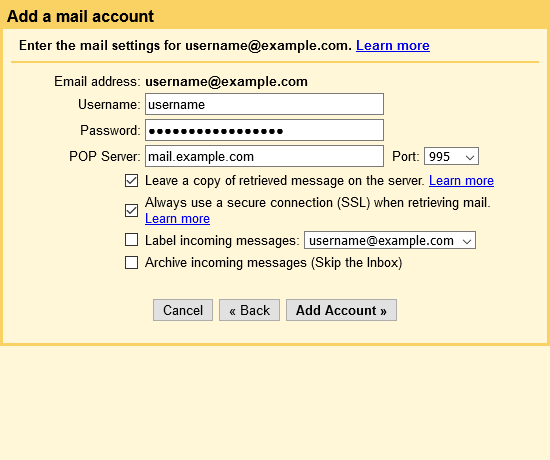
On the next screen, you will configure how Gmail will access your inbox. The first things you need to enter are the username and password you use to check your mail.
Information on your POP server is available in the welcome email you’ve received after creating your ScalaHosting account. You can find a copy of it in the My Details > Email History section of your Client Area.
Use Port 995 and select the Always use a secure connection (SSL) when retrieving the mail checkbox.
With the Leave a copy of retrieved messages on the server option, you can ensure that your incoming communication will be available on your ScalaHosting account. When you’re ready with the configuration, click Add Account to connect your custom email address to Gmail.
- Configure your account’s SMTP settings
By setting up a POP3 connection to your custom email inbox, you can read all your incoming messages via the Gmail interface. The next step is to apply the correct SMTP settings so that you can use Gmail to send messages from your custom email address.
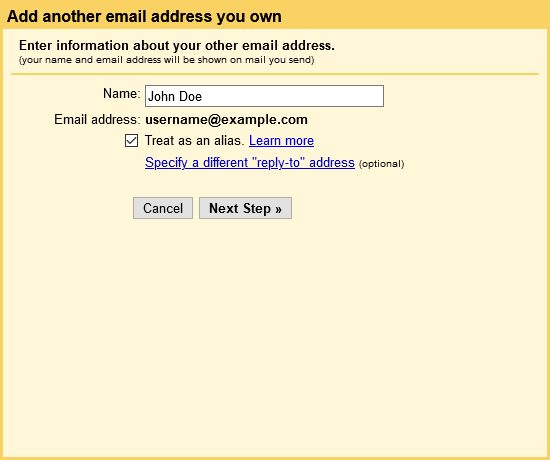
Gmail will ask you if you’d like to do it immediately after you configure the POP3 connection. Select Yes, I want to be able to send mail as [your custom email address] and click Next. You can also do it later by clicking Add another email address in Settings > Accounts and Import.
First, Gmail asks you to enter the display name that will appear on messages sent from your custom email address.
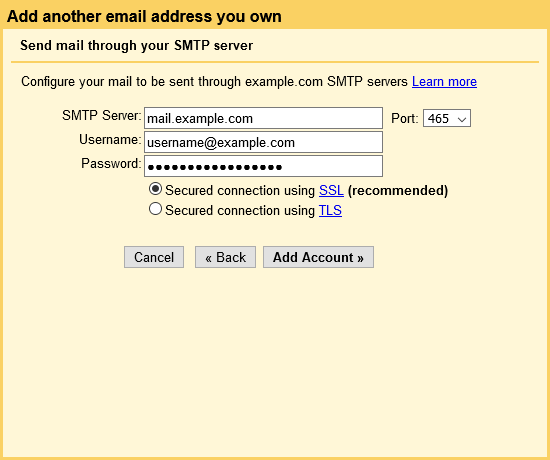
On the next screen, you first have to tell Gmail which SMTP server to use. This information is available in your ScalaHosting Welcome Email. Be sure to select port 465 and the Secured connection using SSL radio button. Finally, enter the login credentials for your custom email address and click Add Account.
- Verify your custom email address
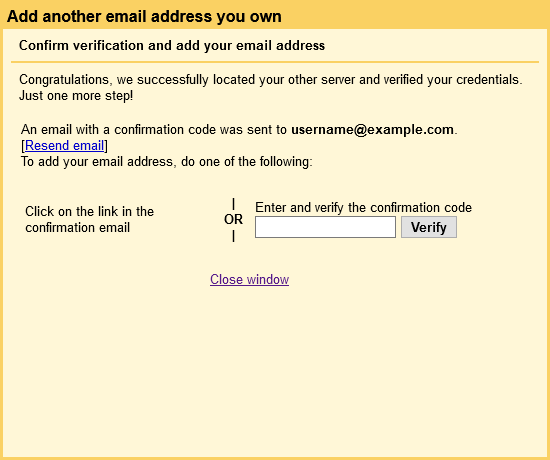
The final step is to verify that you have access to your custom address. Gmail will send you a verification email that has a confirmation code and a link. Click the link or paste the code to verify your email.
With that, you can manage your incoming and outgoing communication through Gmail.
How To Point a Domain Name To a Web Hosting Provider

