The great thing about a managed VPS hosting solution is that you don’t need to worry about installing an operating system, configuring the server’s security, and maintaining its hardware. At the same time, you get a virtual server with guaranteed resources and the ability to run multiple projects on it.
At Scala Hosting, this is made possible by SPanel, our in-house developed management platform that lets you control your VPS through an easy-to-use graphic interface. When we were in the process of developing it, we had to make quite a few decisions, including whether to let users manage all the different projects from a single panel.
While this may seem like the most user-friendly approach, we decided that ultimately, it wouldn’t be particularly practical in all scenarios and could lead to confusion. If different people are in charge of the different websites hosted on the VPS, for example, this system wouldn’t work at all, and the distribution of resources among the projects would be more difficult.
That’s why we decided that individual projects should have separate user accounts with their own sets of management tools. A new project starts with the creation of a new user account through SPanel’s admin interface.
Creating a new user account in SPanel
The whole point of SPanel is to simplify the process of starting a new website. That’s why, creating a new SPanel user account takes no more than a couple of minutes. Here are the steps:
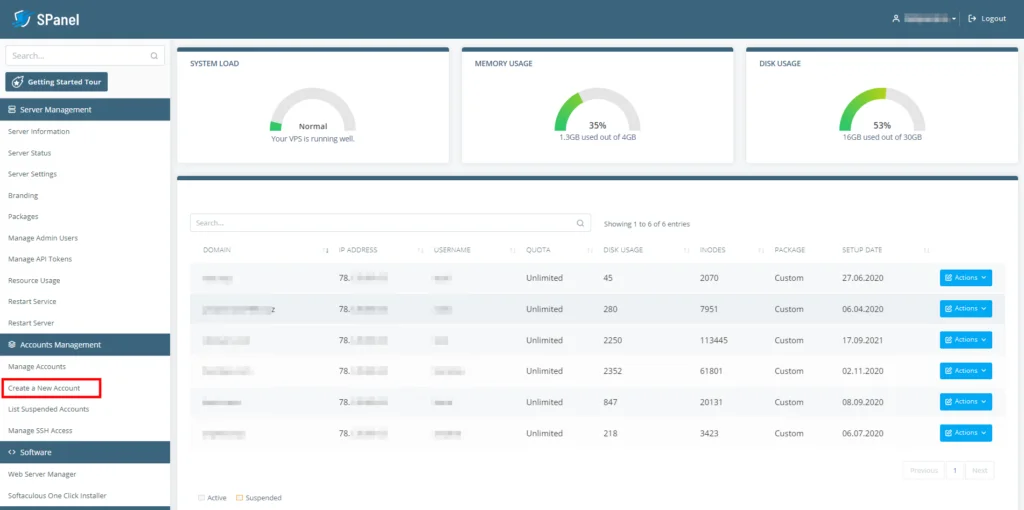
- Log into SPanel’s Admin Interface and click Create a new account.
The default login URL for SPanel’s Admin Interface is https://[your server’s IP]/spanel. On the homepage, you’ll see a list of all existing SPanel user accounts, and to the left of them, you can see the Create a new account button.

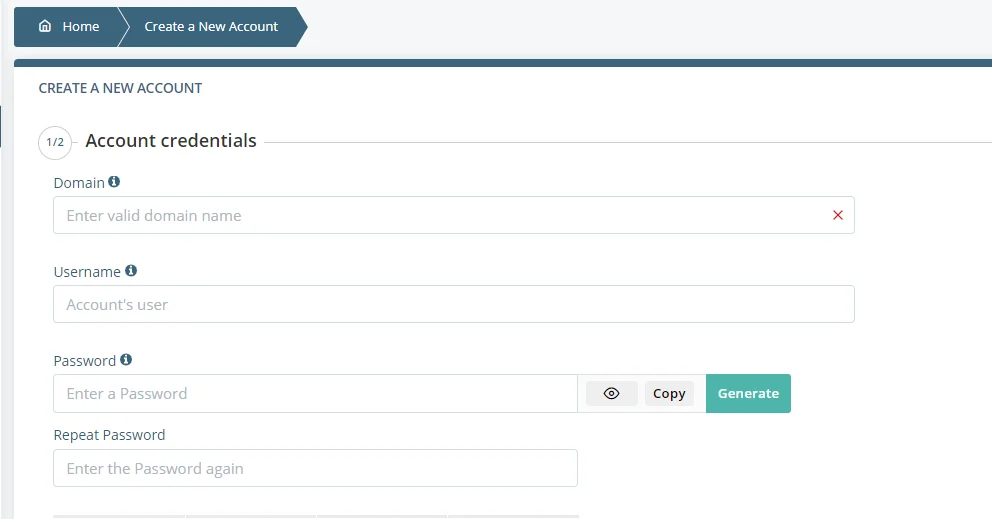
- Enter the account’s domain and login credentials.
In the first field, you need to enter the new account’s main domain. Below it, you can choose the username and password for accessing SPanel’s User Interface. The password needs to be at least 8 characters long, and it will ideally include uppercase and lowercase letters, numbers, and special characters. You can use the built-in password generator to create a truly strong password.

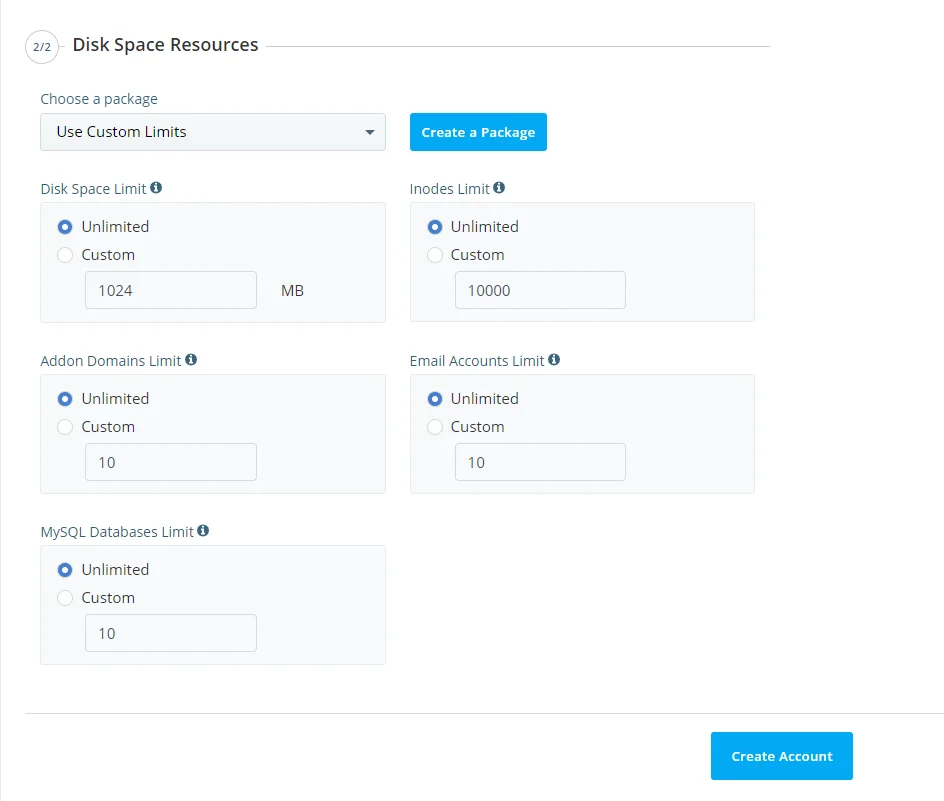
- Set limits on the account.
By default, accounts aren’t limit when it comes to hardware resource and the number of FTP and email accounts or databases they can set up. However, to ensure the smooth performance of your server, you can set quotas for individual accounts. You can either use a pre-built package or create custom limits and set them via the section below the account’s login credentials. When you’re done, click Create Account to complete the process.

How to Create a New Account