WordPress is the most popular CMS solution, with hundreds of millions of websites created with the software. Today, we are going to learn how to make a WordPress website ourselves, from registering a hosting account all the way to the essential steps involved in our site building.
Let’s begin!
SECTION 1
What is a WordPress website?
In order to answer this question, let’s take a step back to understand the core concept of a website.
What Is a Website?
A website is a collection of web pages that can be accessed by typing a domain name (ex: yourname.com). They can have any kind of content – text, images, videos, audio players, photo gallery, forms, and so on.
As the internet evolved, so did the way websites are structured. The usual process of downloading your web page, editing it on your computer, and then uploading it back online, became too inefficient.
A new approach for managing website content was needed and Content Management Systems (CMSs) came to the stage.
What Is a Content Management System?
The web page you are currently reading, is what came known as the public-facing side of a website – the front end. And just as every theater needs a stage, the front end is where the show happens on any website. Meanwhile, behind that stage, there is a whole crew making the magic happen. In website lingo, this is known as the backend.
The backend provides website authors and editors with the tools they need to manage the content of their pages. To do that, they often utilize all-in-one web building tools, known as Content Management Systems. It allows for changes submitted on the backend to appear on the frontend so your visitors can see the finished product.
Content Management Systems vary in their purpose and underlying technologies. WordPress, for example, is a general-purpose CMS based on PHP and MySQL.
So, what have we learned so far:
A WordPress website is a collection of web pages that are being managed by the content management system of the same name.
SECTION 2
Why Choose WordPress as Your Website Platform?
When we’re looking to pick a tool, we naturally lean toward something popular and battle-tested as those are good signs of reliability. In that essence, WordPress is often regarded as the king of CMS, having more than a third of websites on the internet running with its help.
How Many Websites Use WordPress?
According to a survey by w3techs.com WordPress is being used in 63.6% of websites that run on a known CMS and a grand 37.6% of all the websites on the internet. As you might have already thought – that’s a lot!
And there is a good reason for the mainstream adoption.
Benefits of Using WordPress
1. Short Learning Curve
The learning curve is considered one of the shortest when it comes to understanding how to create a successful website using WordPress.
2. No Coding Skills Required
Unless you want to heavily customize the tiniest details, there is absolutely no need for you to know programming code. The WordPress functionality can easily be extended with plugins and the looks of your website – changed completely with a wide variety of beautiful themes. Everything here is plug-and-play.
3. Loved by Search Engines
The WordPress code has been written with all the best practices in mind, thus improving the user experience of your visitors. And this is just the kind of thing search engines like Google want to prioritize in their search results.
Of course, just using WordPress is not going to magically rank you #1 on Google. But is a great starting point for your SEO efforts and brings great potential for increasing your traffic.
4. Reliable
When it comes to software, there is always a (small) possibility that something might go wrong. Instead of searching for a platform with zero points of failure (which is practically non-existent), it’s much more productive to choose a platform that has a huge user base and an active community that is always ready to help.
5. Free
Aside from web hosting and domain expenses, WordPress is a free website platform thanks to the open-source code under the GNU General Public License. This is a software license under which WordPress is distributed, that allows you to own a copy completely for free and modify it in any way you see fit.
6. Countless Customization Options
Using the world’s most popular platform draws in another benefit – a ton of WordPress website themes and plugins, readily available and completely for free via a one-click installation process.
At the time of writing, there are 7,544 themes and 56,995 plugins available.
Recently, WordPress devs have also introduced Commercial Themes. These are WordPress website themes and just like the others, can be used or customized however you see fit. But this specific template type includes paid support services by the teams and organizations behind them. If you would like to have someone providing you with support exclusively for your project – this is easily the option for you.
Bottom line: With the right tools, you can be running a completely custom WordPress website in a matter of hours.
7. Start With a Blog, Grow Into Anything
Put enough effort into anything and you can make a business out of it. When the time comes to start your WordPress business website, make sure there are enough plugins available to meet your specific needs and business model.
Whether you want to enable your visitors to be booking events, compare products, or search through your content – odds are there is a plugin for it. You just have to dig a little.
WordPress Website Examples
WordPress is the go-to solution for many types of websites – blogs, magazines, business pages, online shops, news outlets. Its versatility allows for the core app to be customized so heavily, that it would take a detective to find out what the site is built with.
Here are some examples of notable brands that decided to trust WordPress for their online presence:
1. Sony Music


3. Beyonce



These websites can easily be considered among some of the best WordPress websites on the Internet. And while some of them have had a lot of customization and development work done, you would be surprised as to how easy some changes can be made even without any technical experience.
SECTION 3
How to Pick a Website Name and Buy a Domain and Hosting
Before we go into how to create a WordPress website, we need to make sure you have three essential components:
- A brand or website name
- Registering that name as a domain
- Ordering web hosting
Brand or Website Name
First things first – your new home on the internet needs a name to go by. This should be relevant to your project and your business name as well. If this is a hobby or personal project, the name can be practically anything, your creativity is the limit.
Whatever project and name you decide to go with, remember you can always register a different one later on and have your website tied to this new domain.
What Is a Domain?
The contents of the internet are stored on a vast network of computers. In order for anyone to access this content – the address of this computer must be specified. Every computer operates under its own unique, numeric address, known as an internet protocol (IP) address.
An IP address looks like this:
173.237.190.136
Can you imagine having to remember the addresses of your favorite websites in such a way? Thankfully, that’s where domain names come in!
A domain name is the human-readable name that is assigned to a computer’s address on the internet. For example, if you open up your browser and in the address bar type scalahosting.com you will actually be going to 173.237.190.136.
Domain names also include a domain extension. Let’s say we’re registering “yourname.com.” In this example, “yourname” will be the name of the domain, and “.com” is the extension.
Based on the extension, domain names can generally be:
- generic (.com, .net, .org, .info, .biz)
- country-specific (.es, .de, .jp)
All domain names and IP addresses are regulated by the Internet Corporation for Assigned Names and Numbers – ICANN.
Due to the large number of registered domain names, several years ago ICANN introduced additional generic domain name extensions such as .club, .site, .xyz, and many others. Still, the most sought-after are the “classic” extensions such as .com, .net, .org as they have the biggest recognition among the general public.
What is Web Hosting?
Just as a domain will give people easy access to your content, you need a computer to store that content as well.
That’s where web hosting companies come in.
Hosts basically store your content on their robust computers (called servers) in exchange for a yearly or monthly fee. Configuring a web server manually requires a myriad of settings, so the fee is often an investment well spent.
Web hosts are also responsible for the “health” and performance of the server, so your website can be up and running and loading quickly at all times.
With your web hosting package you also get an ever-growing list of tools and services. Such include email services, spam protection, website usage statistics, app installation, and quite a few others.
What is a Web Hosting Plan?
Every web hosting company breaks down its services into plans. These packages cover different performance options and tools so they can better serve different business models.
Generally speaking, the types of web hosting can be:
- Shared web hosting – Renting a small portion of a very powerful server, which you share with many other website owners.
- VPS hosting – Renting a virtual private server is the closest to owning your own dedicated machine. The VPS technology allows you and a few others to share the same machine, but in a much more efficient and secure manner, providing considerably higher performance.
The virtual server can either be managed by the hosting company or operated by you (self-managed). The managed services include constant maintenance, optimization, monitoring, software installation, issue resolution, and more. - Dedicated servers – As the name implies, this is an entire server, dedicated to you and your project. Completely managed by yourself and fully customizable, this solution definitely tales some technical skills to master.
Choosing The Web Hosting Plan For You
When starting out, it’s perfectly okay to purchase the most basic web hosting plan and as your website grows – to upgrade accordingly. Most of the time, moving up the ladder is seamless, and you don’t risk having your WordPress website going offline during the process.
When choosing your new hosting provider, consider your specific needs and the requirements of your chosen software.
In fact, this rule applies to any website platform you might be using. Different software requires different server settings, so it’s only beneficial to pick a hosting plan specifically optimized for it.
How to Buy Hosting and Register a Domain Name
We’re now getting to the first essential step of setting up a WordPress website! Here is how to register your WP hosting plan and get a domain name for 1 year completely free of charge:
Stage 1 – Pick a WordPress Web Hosting Plan
1. Head over to ScalaHosting.com/wordpress-hosting.html and pick your desired WordPress website hosting plan.
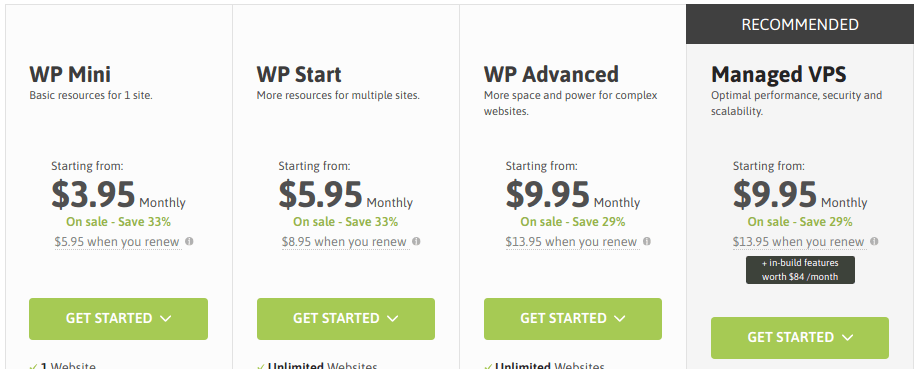

2. Once you have selected a web hosting plan and a period for it, you will be redirected to the domain registration page.
Stage 2 – Register a Domain Name

1. Use the field on that page to enter a desired name and click the blue Check button to see its availability. You can also experiment with different domain name extensions in this step.

2. Once you click the Check button, if the domain name is already taken, you will be presented with alternatives based on your query.
3. Once you have picked a domain name, click Continue at the bottom of the page to proceed.

Note: Always check your spelling when registering a domain. Once registered, the name cannot be edited.
Stage 3 – Create Your Account and Complete Checkout

1. If you are already a customer, use the blue button at the top right corner of the page Already Registered? to log in and have the name associated with your existing account.
If you’re just starting out, you can either sign up with Facebook or Google, or fill out the fields in the Personal Information section and have your account created with those details.

Take your time and make sure to pick a password with a strength of at least 50%. Write it down to a safe place. A good practice is to use a two-word phrase that has capital letters and features a number or a special symbol (!!@#$%^&*) after each word.
2. In the Domain Registrant Information section make sure you enter valid information. The registrant information is your ID card on the internet and is required by ICANN to be valid at all times. Failure to do so can lead to many problems with potential domain transfers or ownership cases.

3. Below is the Order Summary section. Double-check your order to make sure the spelling of your domain is right. Once registered, it cannot be changed.
You can pay for your new hosting plan by either:
- Credit or debit card
- PayPal
- Bank transfer

4. Before clicking the blue Complete Order button at the bottom of the page, make sure to read the Terms of Service (link opens in a new window) and check the associated checkbox as a confirmation.
5. Check the email you specified for the order with a sales receipt. Once your payment has been processed, you will receive a Welcome email with more information on how to log in to your web hosting control panel.
SECTION 4
How to Install WordPress
In this section of the tutorial, we will go over the steps on how to set up a WordPress website and how to create backups for it.
Install WordPress on VPS Hosting
On ScalaHosting the VPS Hosting Plan is managed through SPanel. This is our free and lightweight alternative to the popular web management solution – cPanel.
In order to begin setting up WordPress, refer to the email you received from Scala when your account has been created.
1. Follow the link to SPanel. It should be something like this: https://yourdomain.com/spanel
2. Log in with your email and password. They should be available in the Welcome email as well.
3. The SPanel dashboard features a number of tools, menus, and indicators. What we are looking for is the Create an Account link.
You will find it first thing in the Quick Links section or in the vertical main menu under Accounts Management.


Creating a VPS Account
4. This page features four fields that are required to continue:
- The Domain name field is the name of your website. Enter it in the format: yoursite.com
- In the Username field, specify any name that makes sense to you.
- The Password and Repeat Password fields are next. Refer to the strength meter below the fields to choose a strong passkey that contains upper and lowercase letters, numbers, and special symbols.
- The last two fields of the page – Disk Space Limit and Inodes Limit – are a bit more advanced options. It’s easier to just leave the default values. Modify them only if you’re sure what you’re doing
5. Click the Create Account button to finish the account creation process.

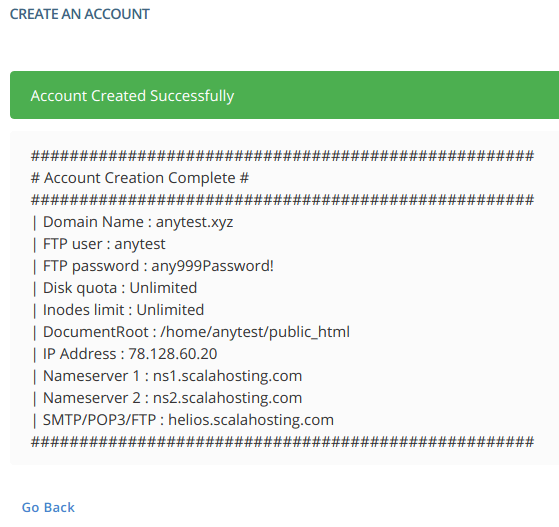
6. As a confirmation of the account creation, you will be presented with something similar to the following:
Logging into your VPS Account
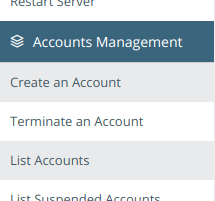
7. To access the newly created account, locate the Accounts Management section in the vertical main menu to the left side of the page. Select the List Accounts option.
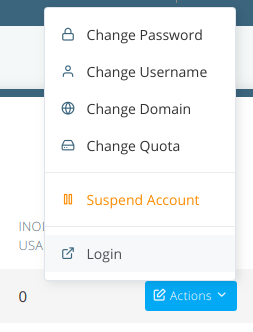
8. On the next page, you should see a table with the accounts created on your VPS host. To the right end of the table row, there is a blue Actions button. Click on it and select Login from the menu that appears.

9. You are now logged into the account we previously created. Scroll to the bottom of the page and locate the Tools section. Click on the SWordPress Manager icon located within that section.

Installing WordPress via SWordPress Manager
SWordPress Manager is another one of ScalaHosting’s in-house developed tools. Its purpose is to simplify many of the essential actions related to building a website with the world’s most popular CMS.
Within the SWordPress Manager, we are presented with a very straightforward interface comprised of two sections:
1) Install New WordPress Site
2) Existing WordPress Installations
Let’s begin the installation by focusing on the first field – Install New WordPress Site:
10. Since we are working with a single domain name, leave the Domain/Path field as is.
11. The following fields in this section – username, password, password confirmation, and email address – are for creating the administrative user with which you will use to manage your new WordPress website. Fill them out accordingly and click on the Install WordPress button to continue.
Note: The email address you specify here is used for admin notifications from the website (new comments, updates, password resets, etc.)
Also note: The Install WordPress button will remain gray until all fields are properly filled out.

12. Once you click the blue Install WordPress button, allow a moment for the installation to complete in the background.
13. Upon the successful end of the process, a confirmation message will appear.

Managing Existing WordPress Installations
Before navigating away from the SWordPress Manager, let’s take a moment to review what you can do within the Existing WordPress Installations section.

This section is basically a table, listing your active WordPress installations, one website per row.

There are two On/Off buttons to the right of the row.
The Security Lock feature is used to prevent any changes to your website done by third parties. Once no one would be able to “write” code to your website as its contents will be “read-only”. Be advised that this protects the website from any changes, and this includes You! While this feature is active, you won’t be able to make theme modifications, plugin installations, and any updates.
The Auto Updates feature is used as an easy way to enable or disable updates for your website, including the WordPress core, themes, and plugins. It’s best to keep your Auto Updates options to On unless you’re having custom work done to your website. In that case, consult with your web developer about what will be the best approach.
The blue Actions button to the far right of each row will open a new menu for you.
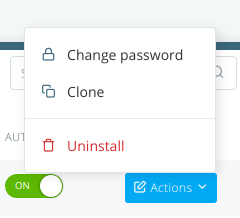
The menu contains:
- Change password – change the WordPress admin password
- Clone – clone your entire website to a new folder
- Uninstall – remove the corresponding WordPress website
Logging in
For further instructions, please refer to the section below, titled: WordPress Initial Setup
Steps for Installing WordPress on a Shared Web Hosting Account
1. To log in to your shared web hosting cPanel refer to the Welcome email for instructions or type your domain name in your browser and add a /cpanel after that.
Note: If you have just recently pointed your domain to your nameservers, accessing the control panel via the domain won’t work until the changes propagate globally. In such cases, refer to the welcome email for more instructions.
Your screen should look like that:
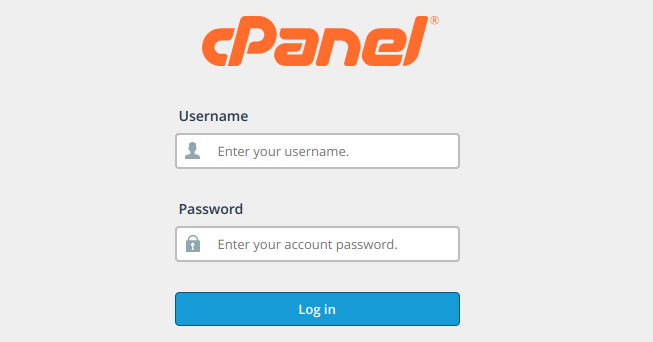
2. Type in your account username and password.
3. Upon successful login, you will see the main page for your cPanel. It is loaded with apps and various options.
4. Scroll down, to the very bottom of the dashboard and look for a section titled Softaculous Apps Installer.
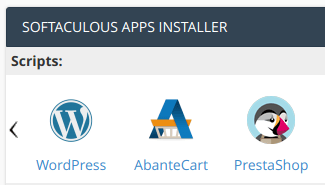
5. Now that we’re in, all you need to do is click on the WordPress icon to enter the setup wizard.
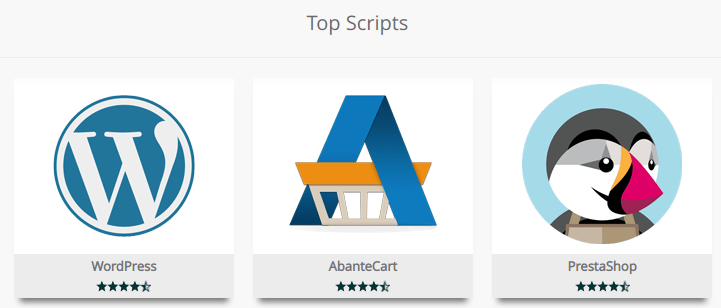
6. On the WordPress Installer page, please locate the horizontal menu right under the WordPress logo.
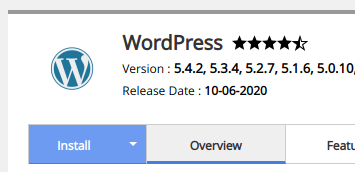
7. On the blue Install button, click the triangle pointing downwards to open up the additional menus.
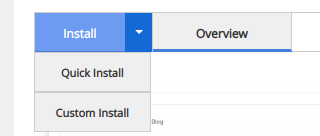
8. Select Quick Install from the menu.
The next page requires just a few fields to set up for the installation.
9. By default, the installer sets WordPress to a sub-folder called wp. If you wish to install the CMS in the root folder of your domain name – leave this field blank.

10. In the Admin Account section, enter the desired username and password for your admin user. As a rule of thumb, make sure your password is at least at 50% difficulty.

11. In the Admin Email field, type in the email where you would like to receive notifications on updates, comments, and other events related to your website.
12. There are two additional sections here – Select Plugin(s) and Select Theme where you can add a desired template and add-ons to include in the installation.
13. Scroll down to the bottom of the page. You can enter the same email, you used for the Admin user in the field below the blue Install button.

14. Press the blue Install button to initiate the installation. You will be presented with a progress bar to monitor how the installation is going. Please allow a couple of minutes for it to complete.
Once your WordPress setup is completed, you will receive an email with your login credentials and website address.
Logging in
For further instructions please refer to the section below, titled: WordPress Initial Setup
SECTION 5
WordPress Initial Setup
Now that your WordPress website is up and running, it’s time to customize it and make it your own.
In this section, we’re going to work with some of the core adjustments for your website, its search engine visibility, page settings, and so on.
WordPress is designed to cater to people from any skill level and, for this reason, the administrative area includes both advanced and beginner settings.
Let’s check them out so you can get started with creating your content as soon as possible.
Logging Into the WordPress Admin
1. To enter your WordPress dashboard, just type your domain name followed by a /wp-admin at the end. The full address should look something like this: https://yoursite.com/wp-admin
2. Now, enter the username and password you specified in the WordPress setup wizard and hit the Enter button on your keyboard.
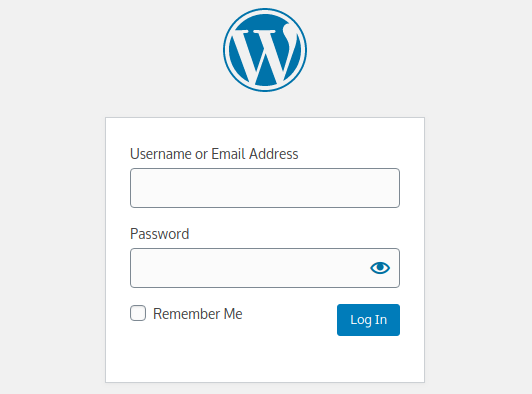
3. Upon successful login you will be redirected to the dashboard – the place where you’ll be building your website. Welcome to WordPress!
Site Title and Tagline
1. Now that you are at the dashboard, locate the Settings link at the bottom of the main menu on the left hand side of the screen.
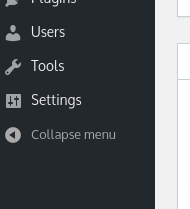
2. Clicking the Settings link will redirect you to the first sub-page of this menu – General Settings. This is where you will set the name and tagline (catchphrase) of your website.
Note: Different designs for your website, also known as Themes, might display the tagline differently or hide it altogether.
3. At the bottom of every settings page in the admin there is a blue Save Changes button that you must always click whenever you change anything.

Timezone
1. On the same General Settings page, you can scroll down to the Timezone drop-down. It looks like this:

2. Use it to pick the appropriate timezone for your location. This is an important setting related to tasks like post scheduling.
3. Remember to save your changes once you’re set.
To Search Engine or Not to Search Engine?
Since you are just starting out with your website, it’s important to keep search engines in mind from the very beginning and design your pages in a way that will complement your SEO efforts.
So, before you are fully ready to publish your project online, it’s best to discourage them from displaying your pages in the search results. To do this:
1. Locate the Settings menu to the left and click the Reading sub-page.
2. At the bottom of the page, there is a Search Engine Visibility checkbox.

To prevent search engines from indexing your site, make sure this checkbox is checked.
3. Click the Save Changes button.
4. Make sure to put a note somewhere that your site is currently not indexed and you should change that as soon as you’re ready to go live.
Allowing and Disallowing Comments
Comments on posts can be of great value to your blog, but can also be an unnecessary distraction or an easy gateway for spam. In WordPress, comments are enabled by default. To set up your commenting options:
1. Go to Settings and then Discussions on the left-side menu.
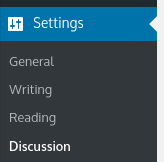
2. The first option here is the Default Post Settings which includes all the basic settings for the WordPress commenting system:

- Attempt to notify any blogs linked to from the post
When you write a post and you place a link within your text, that leads to another post on another WordPress site, the “recipient” will also receive a notification that you have linked to their blog post. This is known as Pingbacks. - Allow link notifications from other blogs (pingbacks and trackbacks) on new posts
If you leave this setting On, a notification will automatically appear in your blog post whenever someone links to it. - Allow people to submit comments on new posts
Toggle this to enable or disable comments on your blog posts. Note that this setting can be overridden by the comments setting on your individual blog posts.
3. Click the blue Save Changes button to confirm your settings.
Permalinks
Permalinks are the bread and butter of your website’s structure. Every post and page on your WordPress website has a web address, also known as a URL. Permalinks define the structure of your URL.
To access Permalinks settings:
1. Click on the Permalinks link located near the bottom of your Settings menu.
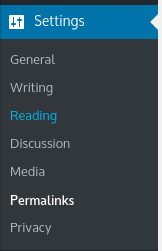
2. There are quite a few options to pick from here and all of them are intended for different types of WordPress websites. If you are unsure how they work, avoid leaving the Plain setting on. Day and name and Post name are the most common ones.
3. To select a Permalink scheme, simply click on the name or the radio button on the left.

4. Scroll to the bottom of the page and click on the Save Changes button to confirm your permalink changes.
Note: Permalinks practically change the addresses of your posts and pages, so it’s best to avoid changing them often. Once you change the structure of your permalinks, the old URLs will become invalid.
Viewing the Website as a Visitor
As we discussed at the beginning of this WordPress tutorial, visitors view content in the front end and administrators manage it on the backend.
From this point on, you will be making lots of changes that will affect the front end, so you will need a fast and easy way to alternate between the user and admin parts of your website.
1. Have a look at the top left corner of the WordPress admin dashboard.

2. There is a button with your website name (My Blog in our case) with a house icon next to it. Click on it.
3. You are now transported to the front end. Notice how the icon changed. It is now showing a gauge.

4. Click on the gauge icon to return to the WordPress admin (a.k.a. the backend).
SECTION 6
Working With Content
Types of Content in WordPress
The content of your website is divided into six major types:
- Posts
– appear as content displayed within a Category or a Tag on your blog;
– can also be displayed as links on your website menus and sidebars; - Pages
– appear as links on your website menus and sidebars;
– unlike posts, can only be organized into pages and sub-pages; - Files
– appear as download links in the content of your site;
– inserted into posts and pages as a gallery of images; - Categories
– used to group posts together;
– can also contain other sub-categories, filled with their own posts;
– each post must belong to at least one category;
– posts can belong to multiple categories; - Tags
– are used as a more fine-grained method for grouping posts together;
– cannot contain items other than posts;
– are optional for grouping posts, unlike categories;
– posts can have multiple tags; - Comments
– appear under posts as content submitted by your website visitors;
– like files, comments do not have categories, tags, and parents.
Creating and Managing Content
Posts
To begin working with your content, click on the Posts option in the main menu.

When working with the other content types you will notice that the screens for Posts and Pages are very much alike, the same way it is for Categories and Tags.

Creating a Post
1. To start creating a post, click on the Add New button, located right next to the Posts title of the page.

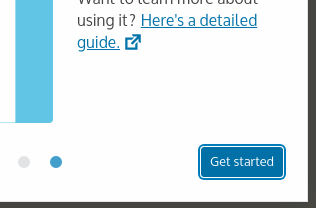
2. Welcome to the Post Edit screen. You will see a welcome screen that tells you more about the Block Editor.
You can start the tutorial by clicking on the blue Get Started button or simply check it at a later point.
3. We can focus on adding text content by simply selecting one of the blocks and typing in it.
4. On the right-hand sidebar you will see two tabs: Document and Block. Whenever you click on a block to add text, the sidebar will switch to the Block tab. Analogically, the global post settings are in the Document tab. For our current needs, we need to navigate to the latter.

5. Adding the post to a category is important for your website structure. You can assign any post by clicking on the Categories drop-down.

6. When the drop-down expands you will see there is only one category – Uncategorized. This is the default category where all posts without an assigned category go automatically.
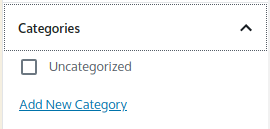
7. Click on the Add New Category link to create a more specific category.
This will expand the section with two new fields:
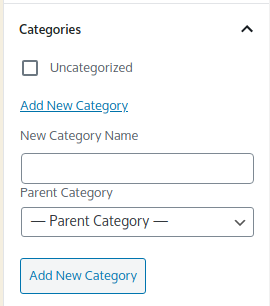
8. Under the New Category Name label, type the name of your new category.
9. Click the Add New Category button to apply the changes. Our new category is now created and we have assigned our post to it.
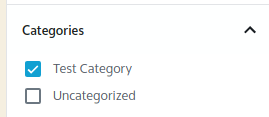
10. Adding a tag to a post is even more straightforward. Click on the Tags drop-down, located right under the Categories section.
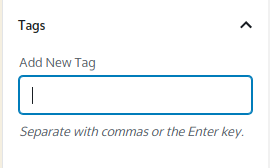
11. If you want to include multiple tags, you can separate them with commas. Hit Enter once you are done adding tags.
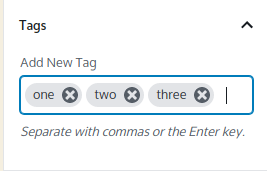
Note: When you are entering the name of a tag that already exists, WordPress will auto-complete it for you based on the first three characters you have entered.
12. When you are done creating your post, click on the Publish button at the top right corner of the page.

13. Once you choose to publish, you will need to confirm your choice. Make sure you are okay with the changes you’ve done on the post and press the blue Publish button once again.
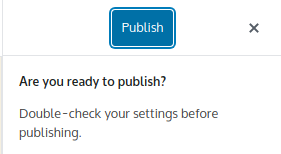
14. The post is published and you can leave the Block Editor by clicking on the black and white WordPress-themed button.

15. Clicking on it will redirect you back to the Posts screen.
Updating a Post
Updating a post uses the very same mechanics we’ve been through in the previous section with the only difference that we will be addressing an existing post.
1. In the Posts screen locate the post you just created and move your mouse over its row.
2. Four links appear below its title. Click on Edit

3. You are now back at the Block Editor. Notice the top right corner where the blue Publish button was? It is now replaced by Update.
4. To test, make any minor change to trigger the Update button. It will turn dark blue once active.
5. Click on the Update button. A notification will appear in the bottom left corner of the page.

6. You can either click on the View Post link or move back to the WordPress Admin by clicking on the black and white WordPress logo, located at the top left corner.
Deleting a Post
Deleting a post is quite easy through the Posts screen. You can remove posts in two ways:
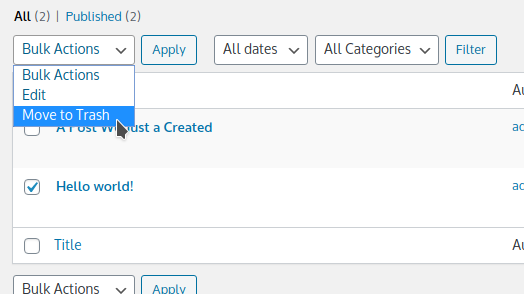
1. Deleting a single post is done by pointing at its row and clicking on the red Trash icon.

2. If you want to delete multiple posts, click on the associated checkbox and select Move to Trash from the Bulk Actions drop-down.
Managing The Trash
Once a post is deleted, it goes to the Trash bin where you can either restore the post or delete it forever (just like the Trash on your personal computer). It is accessible only when there are posts or pages in it.
To visit the trash once you have deleted a post, refer to the corresponding link that is now visible under the title on the Posts screen.

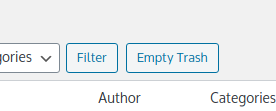
The Trash screen uses the same mechanics to manage posts as the Posts section with the only exception of the Empty Trash button. The option is visible right above the posts list. Use it to empty the entire trash.
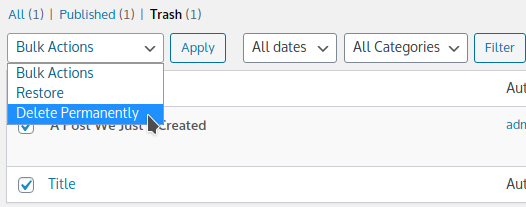
You can also remove single posts by clicking on the checkbox at the beginning of each row or delete them in bulk from the Bulk Actions drop-down.

Categories
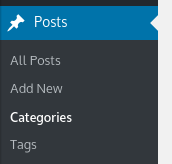
The Categories screen can be accessed by clicking on Posts from the left-side menu and then following the corresponding option.
The post edit screen is comprised of two parts:
- Add New Category section to the left
- Existing Categories list to the right
Note: The Categories list is identical to the posts list and works in the same way when it comes to editing and deleting existing categories.
Adding a New Category
1. In the Add New Category section, type in the desired name of your category in the blank text field, labeled Name.
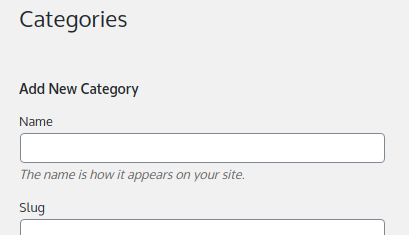
2. You can skip the Slug text field – this one is populated automatically.
3. Use the Parent Category drop-down if you would like to turn the category you are creating into a sub-category of another one.
4. The Description field is usually skipped as well – it is utilized by the WordPress themes for displaying a category description on the frontend but many templates don’t show this information anyway.
5. Once you are done filling out the text fields for the new category, click the blue Add New Category button at the bottom of the page.

Editing Categories
1. You can edit a category by moving the mouse cursor over its row and clicking Edit.

2. You are now at the Edit Category screen
3. Once you are done making any edits to the contents of the fields, click the blue Update button.

Deleting Categories
Just like your posts, categories are deleted either by hovering over their row in the Categories screen and clicking Delete or by using checkboxes and the Bulk Actions drop-down.
There is one difference, though.
Categories and tags do not have a Trash. They are permanently deleted.
Tags
The Tags screen is accessible by clicking on Posts → Tags.
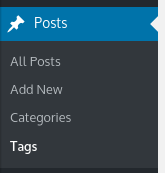
Tags are managed the same way as categories. When creating a new tag, you will see fewer fields as tags are not hierarchical like categories.
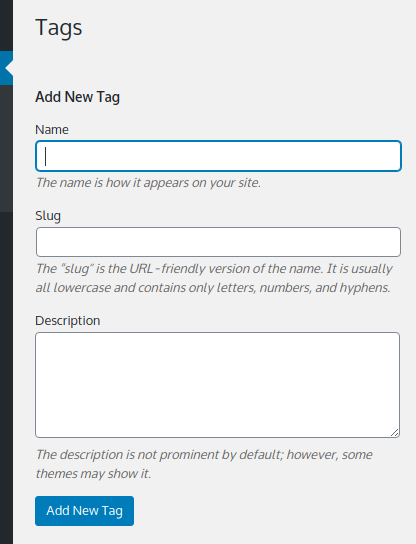
It’s also worth pointing out that tags are best created when adding them to a post, in the Post Edit screen.
Files
To keep things beginner-friendly, we will only go through the process of attaching an image to a post and then removing it – both from the post and your file library.
Attaching image to a post
1. Start a new post by going to the main menu → Posts → Add New
2. In the block editor, note the two lines of text. The first one is the title of the post and the second one is the first block of the content. Click on the second line that says: “start writing or type / to choose a block”
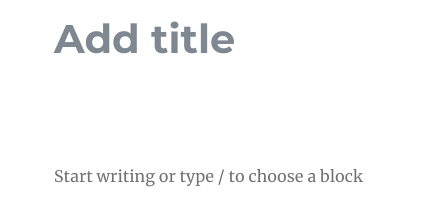
3. The blinking text cursor will replace the text. Click on the circular button with a plus on it, to the right of the blinking text cursor.

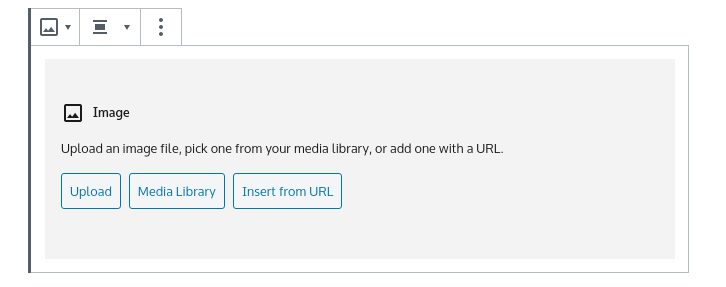
4. The block menu will appear. Click on the Image icon.
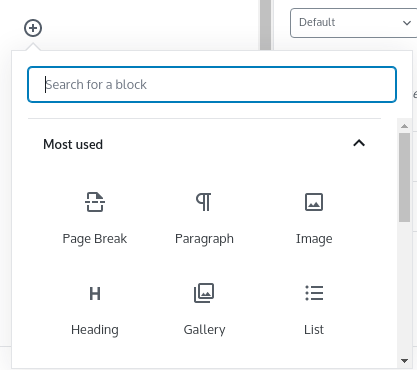
5. The block in the post content now displays the image uploader. Pick an image from your computer by clicking the Upload button.
Removing Image From a Post
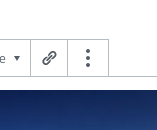
1. To remove the image block, click on the image and choose the option with 3 vertical dots.
2. Another menu will expand. Press the Remove Block button located at the bottom of the menu.
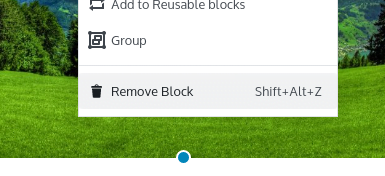
The block is now removed. Keep in mind the actual image remains stored on your website.
Removing Image From the File Library
1. Click on the main menu → Media

2. This will display the Media Library screen. You can switch to the content view by clicking the first button from the horizontal bar located under the title of the screen.
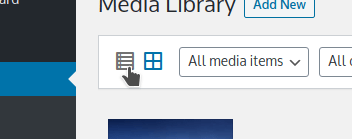
3. Now that we switched to a familiar interface (resembling the Posts screen), point to the row of the uploaded image and click on the red Delete Permanently link that appears underneath.

4. Upon clicking the link, a pop-up requesting your confirmation will appear. Click the Okay button to confirm the removal.
Pages
Pages are created, updated, and deleted the same way as posts.
To start working with them, click on the Pages link, located in the left-side menu. Once you are redirected to the next screen, you will notice everything is pretty much identical to what we’ve seen in Posts.
The main difference is that instead of setting category and tags, you can set an optional page parent.
SECTION 7
Changing the Structure of Your Custom WordPress Site
Setting the Homepage and Posts Page
By default, your WordPress website lists the last 10 posts on its front page.
In this section, we are going to take a look at a popular alternative – a static front page and a separate Blog page that lists the latest posts.
1. Click on Pages in the main menu.
2. Select the Add New option.
3. In the Add Title field enter the desired slogan for your page. You can change it or add content later on.
4. Expand the Page Attributes drop-down, located at the bottom right corner of the screen.

5. From the Template drop-down, select Cover Template.
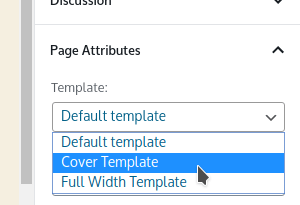
6. Click the blue Publish button in the top right corner. Then, hit the Publish button once again to confirm the changes.
7. Once the post has been published online, go back to the Pages screen.
8. Repeat the previous steps to create a second new page, titled Blog, but don’t select a template for it.
9. Next, click on Settings at the bottom of the main menu.
10. From the expanded menu, select Reading.
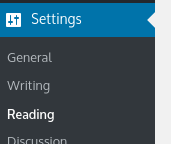
11. The first option on this page is Your Homepage Displays. Switch the radio button from Your Latest Posts to A Static Page (select below).
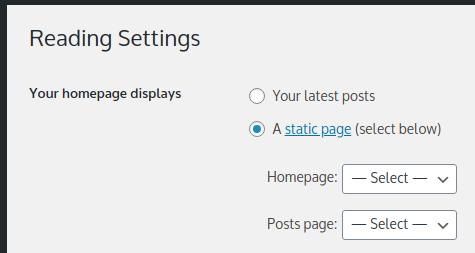
12. Use the Homepage drop-down menu to select the slogan we created earlier.
13. Use the Posts page drop-down to select Blog from the list.
14. Click on the blue Save Changes button at the bottom of the page.
15. View the results of your work by switching over to the front-end – click the button with a house icon at the top left corner of the screen.

Please switch over to the WordPress admin before continuing to the next section of this tutorial.
Working With Menus
The Menus screen is accessed by clicking on Appearance → Menus.
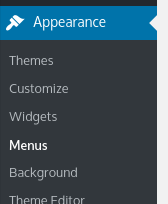
The screen consists of two columns – Add menu items (for pages, posts, and other items) and Menu structure.
1. By default your website has no menus created. Start by entering a name and then click on the blue Create Menu button on the right.

2. Now that we created Main Menu, note that the Add menu items column turned active and Menu Settings appeared near the bottom.
3. Let’s start by adding a page to the menu. From the Add menu items column, click on the checkbox labeled Sample Page.
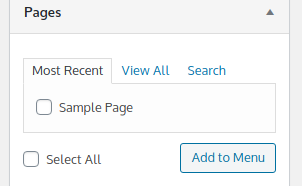
4. Now, click the Add to Menu button to confirm your choice.
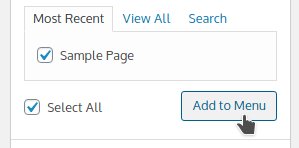
5. The page titled Sample Page is now present in both the Menu Structure column and the Main Menu.
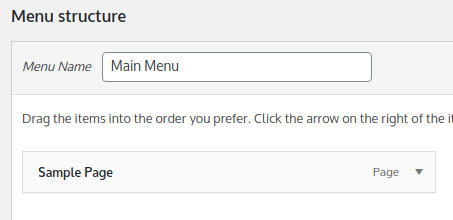
Make sure to click Save Menu after making any changes or they will be lost.

6. In order for the menu to appear on the front end, it needs to be assigned to a display location. Similar to sidebars, display locations are areas around your site that can have a specific type of content assigned to them, in this case – menus.
Click the checkbox labeled Desktop Horizontal Menu to assign the Main Menu to this location.

7. Click the Save Menu button again to confirm your changes.
8. Switch over to the front end.
9. Take note of the newly added link located in the top right corner of the page.
Working With Sidebars and Widgets
Sidebars are areas where Widgets are displayed. Widgets are pieces of content that can be pretty much anything – from your top 10 most commented posts, a search field, an email subscription form, or a calendar with dates when you posted.
The majority of themes use sidebars. When you visit the Appearance → Widgets page,
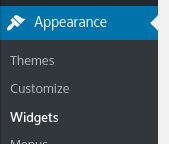
you will see a list of available widgets to the left and one or more sidebars to the right.
In the example below, these sidebars are called Footer #1 and Footer #2.
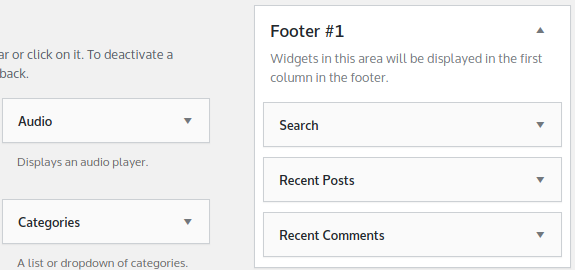
Every WordPress theme includes:
- a top section called a Header.
- a bottom section called a Footer.
- in some cases, there is a vertical section to the side, known as a Sidebar.
Assigning a Widget to a Sidebar
There are two very easy ways to assign a widget to a sidebar, both with their own use cases.
The first option is via drag-and-drop:
1. Just click and hold the left mouse button on a widget you choose.
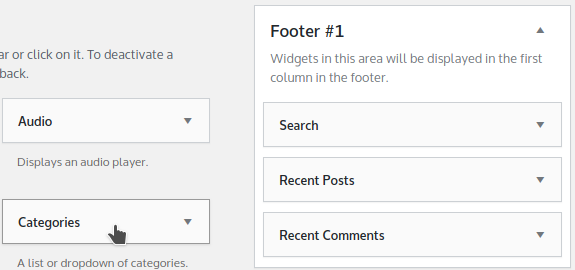
2. Then, drag it over the chosen sidebar and rearrange the widgets there. A dotted line will appear to point out the location where the widget will be added once you release the mouse button.
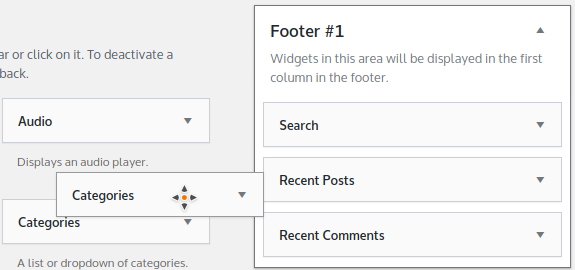
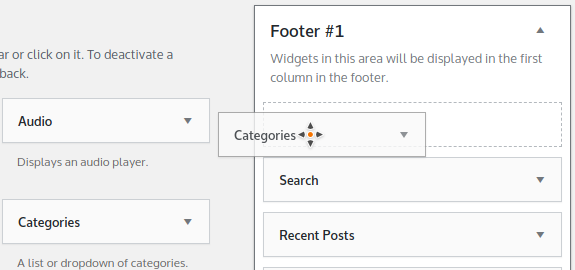
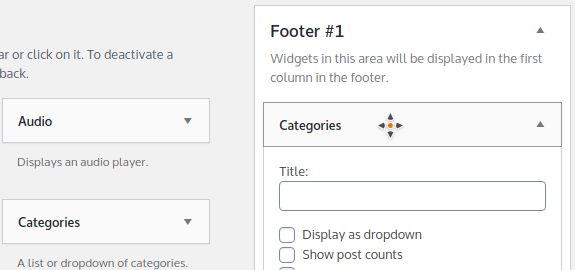
3. Unlike most settings pages, rearranging widgets does not require you to save the changes manually.
If you are not a fan of the drag-and-drop functionality, you can try a different approach with widgets:
1. Just click on the widget of choice. It will expand with a list of the available sidebars, marking the first one by default.
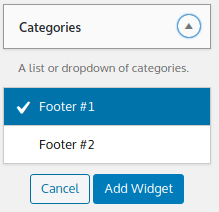
2. Click on the sidebar name where you want the widget to appear.
3. Click the blue Add Widget button to confirm your choice.

4. The widget will now appear in the desired sidebar.
Common Widgets
As you can see there is a variety of widgets available out of the box that you can expand with an ever-growing amount of WordPress plugins. All widgets apply to different use cases and scenarios, so it’s up to you to test them out and decide for yourself.
A common approach for WordPress websites is having a Categories widget at the top of the sidebar, complemented by a Search widget at the bottom. The idea is that when a user looks through the entire sidebar and doesn’t find what they are looking for – they reach the search bar at the bottom.
SECTION 9
Backups and How to Backup a WordPress Website
Now that we are about to venture into a bit more technical part of the tutorial, let’s take a moment to talk about backups.
Data backups are an essential precaution when doing changes to your website, especially when you’re not 100% sure of the outcome. Nearly every time you install a new theme or plugin, you install different pieces of code, written by different people. This can sometimes create conflicts and cause things to break
For example, adding complex plugins to an existing WordPress website with more than 10 active add-ons, can easily cause a conflict in the database and break everything. Same goes for testing out different themes.
There’s also the security aspect. If a hacker gains access to your website and makes a mess – you are completely lost without a previous working version of your pages in another location.
That’s why you have to make a habit of backing up all your data regularly. If you are working on a live site, keep a recent backup file ready to restore at a moment’s notice.
Backups are available through plugins you can get for free from the WordPress plugin repository. Note that you need to refer to the plugin documentation for the specifics on how to backup and restore your website.
SECTION 10
How to Choose a WordPress Website Theme
A big part of the process of how to make a WordPress website is focused on the theme. And there is a good reason for that.
What Are WordPress Themes?
Themes or templates, are WordPress website designs intended to be easily customizable. They provide a consistent change of the look and feel across your entire site. While it’s worth noting that not all themes are equally aesthetical and functional, with more than 7500 themes available in the WordPress theme catalog alone, it’s safe to say you can easily find something suitable for your needs.
Finding a WordPress Theme
As we mentioned at the beginning of this tutorial, the WordPress developer community is huge. There are dozens, if not hundreds of new website templates uploaded every day.
There are also plenty of places to browse WordPress website themes, both Paid and Free. You can start with the popular themes on WordPress.org.
Various studios that focus on WP site development, entered this space and along with them – even bigger platforms were created, known as marketplaces.
Types of Theme Licenses
Free
Free themes are usually shared under a type of GNU General Public License (GPL). This is a free software license that is intended to serve such open-source products without a proprietary owner.
Usually, software solutions with a GNU GPL license are free to edit and used either for commercial or personal purposes.
As can be expected, there is no exclusive support, but some developers and agencies actively maintain forums and groups intended for troubleshooting. A good resource for free themes is the various collections with free WordPress website templates in web design blogs such as ThemeForest and TemplateMonster.
Premium
Paid themes usually feature an online demo and a free trial. They have become an economy of their own and many places online offer visually stunning designs for WordPress websites.
First, there are the marketplaces – Theme Forest, which is currently the largest, and some of its alternatives – Mojo Marketplace and Creative Market.
Then there are web design agencies that have put out their own theme as a flagship product.
Such themes are:
- Astra (900,000+ users)

- Divi (700,000+ users)

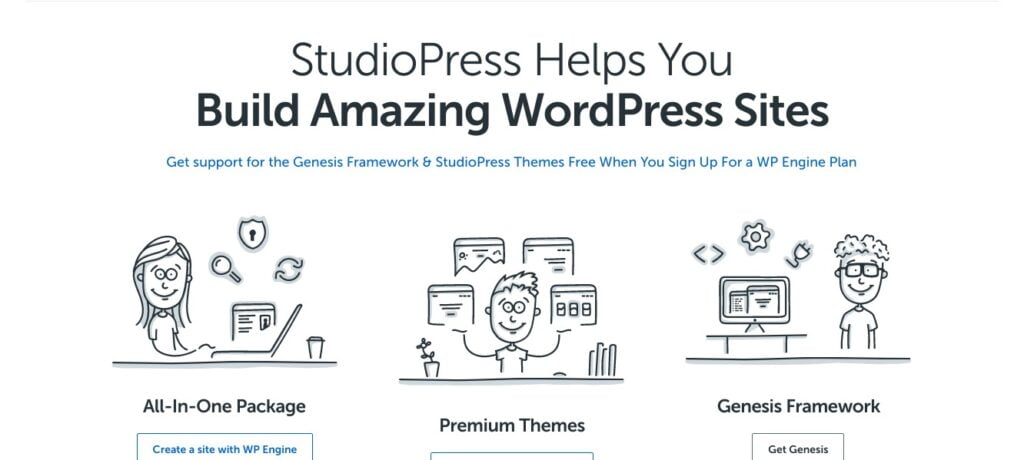
- StudioPress (500,000+ users)
It’s worth mentioning that the price for a theme includes technical support from its creators. If you encounter a compatibility issue, it’s good to have someone to turn to instead of googling for a possible solution.
Freemium
The freemium business model allows users to download a premium WordPress theme with part of it’s features cut out. Practically a fully functioning demo version of a WordPress theme.
In order to have the complete package, website owners are required to make a license purchase. Freemium themes are usually the highest quality in the “free” category as developers want to impress their users in order to drive a sale.
As for the support, you can most likely rely on online forums and groups for extra assistance. There is a chance they might be moderated by the theme creators since your feedback improves their product.
It’s a win-win. And, of course, if you become a paying customer – you can expect exclusive support.
Installing a Theme Through the WordPress Themes Catalogue
1. From the WordPress Admin screen, head on to the main menu → Appearance → Themes
2. Similar to creating a post, click on the Add New button located near the title of the screen.

3. On the next page, you are presented with several ways of filtering themes. Head over to the search bar and type in Twenty Sixteen as this will be the theme we will use for this exercise.

4. Move the mouse cursor to the desired result and the blue Install button will appear.
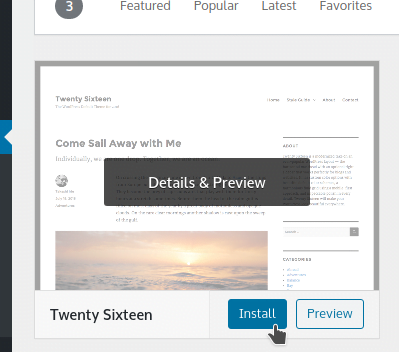
5. Clicking the button will trigger the configuration process. Wait for it to finish.

6. A blue Activate button should have appeared in place of the Install button. Click it to finish the installation.
Customizing Your New Theme
You can customize your new theme using the Theme Customizer.
The Theme Customizer is the first thing you need when you are wondering how to design a WordPress template yourself.
Access it by clicking on Appearance → Customizer in the main menu.
You will be redirected to the following screen:
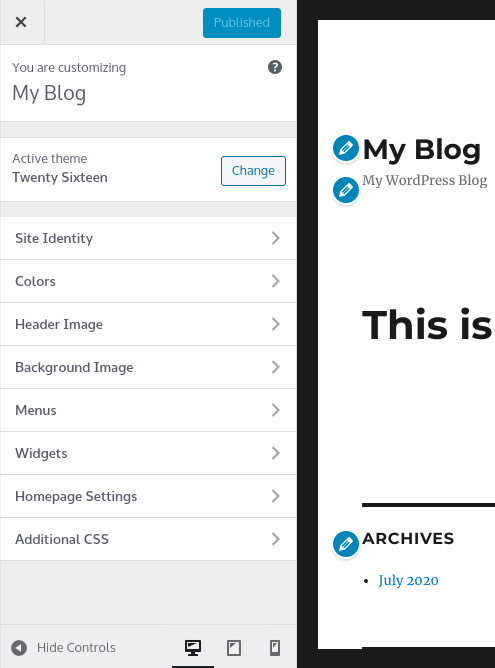
When you create a WordPress website, the Customizer is a go-to tool as it allows adjusting the settings of the design and layout side by side, displaying the front-end of your website. This means that you get to see how every change looks without having to switch between the admin and the front end.
The only downside of the Theme Customizer is that it rarely includes all the options needed to fully customize the website.
As an example of how the Customizer works, we will update the description on your site:
1. At the Customizer screen, click on Site Identity. The column will slide left, revealing a new one. You can always return to the previous column by clicking the back arrow near the title.
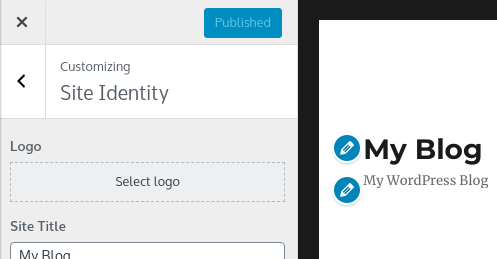
2. Change the content of the Tagline field to anything you like.
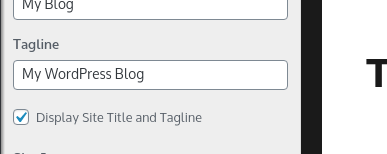
3. Once you are done editing the field, take note of how your website description changes in the left-hand part of the screen.
4. Save the changes by clicking the blue Publish button, located at the top of the column.
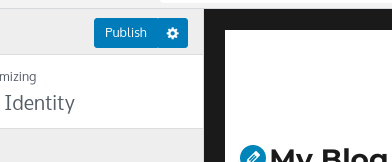
You can also click the X button at the top left corner of the Customizer column to return to the WordPress admin.

Security Considerations
The most important thing you need to know as a WordPress website owner is that every time you add a theme or a plugin to your website – a new piece of code is applied and hackers love to exploit code for their own malicious purposes.
Therefore it’s a good security practice to delete themes you are no longer using. Same goes for your plugins and any third-party products you are not actively utilizing
SECTION 11
Working With WordPress Plugins
What are Plugins?
Imagine you’ve written a piece of code for your site that turns the background color to black every time there is a Black Friday. Now, you want to make it available to everyone running a WordPress project.
Plugins are just that – add-ons you can apply to your WP site and change some of its underlying functionalities.
It’s worth mentioning that when major online retailers decide to release an official plugin offering integration between your site and theirs – WordPress is often first on the list.
Common Roles for WordPress Plugins
There are more than 56,000 plugins available in the WordPress plugin repository alone. With numbers like that, you can make a safe guess that whatever you need to add – there are tools for the job a couple of clicks away.
To give you a general idea of what you can expect, we’ll mention some of the more common areas where plugins are often employed:
- Content Design and Layout
– Give your content a captivating and interactive look with sliders, multi-column layouts, drag-and-drop functionalities, and much, much more. - System and Administrative Tasks
– Make your website faster, set up automatic backups, protect your site from hacker attacks and spam, etc. - E-Commerce
– Serve customers and charge them for whatever goods or services you are offering regardless of their geolocation. - Marketing
– Collect email subscriptions, optimize for search engines (SEO), increase leads through your store, and track visitor activity.
Website Performance Considerations
Many plugins are built using software frameworks. Roughly speaking, those are collections of tools and components that save a lot of time and hassle when building software. They are usually bundled in a single package that is required for the software to run.
In the WordPress context, that means if you download a plugin built with Framework A and later encounter a different one that uses the same solution but a different version – the software framework will be loaded twice on your site in order to function. This causes redundancies in the size of your website and causes it to slow down and consume more resources than it normally would.
All you need to remember is that even if the add-ons are free – you are still paying for them with the performance of your site.
A good practice when adding plugins is to always look for a more advanced solution that combines multiple functionalities instead of installing an extra tool for each.
Plugin Licenses
Just like themes, plugins have free, premium and freemium licensing.
Support goes the same way as with WordPress themes:
- forums and groups for free plugins
- exclusive email or ticket support for paid ones
- both if you are a paying customer of a freemium plugin.
Needless to say, these vary a bit, case by case.
Free
It can easily be said that most of the WordPress plugins are free. Whether someone is gaining experience as a developer or a studio is making a name for themselves – free add-ons are available to serve nearly any purpose. Just make sure the plugin you choose is actively updated and has a high user rating and you should be good.
Paid
Premium plugins usually offer an entire suite for your website or a service you can make money from, designed professionally and with exclusive ticket or email support.
Freemium
There a lot of advanced plugins. Examples includes plugins that allow you to run a fully-featured real estate agency on your site or a page builder that gives you a thousand templates and components to pick from.
Such plugins often offer a base package that is free and allow you to buy separate extensions to complement the specific needs of your project.
Finding the Right WordPress Plugins
When we talk about distribution, WordPress plugins and themes can often be found in the same place.
You can start off with the one-stop-shop for all your needs – the WordPress plugins catalog for free and freemium plugins.
You can then explore marketplaces such as CodeCanyon, which is currently the biggest marketplace for premium plugins on the web.
An alternative that’s been around since the early days of the internet is HotScripts.com. HotScripts offers a good collection of free and premium plugins.
Lastly, a couple of smaller marketplaces that are still gaining traction, but worth checking out – CreativeMarket and MOJO Marketplace.
Installing a Plugin via the WordPress Repository
1. Go to your WordPress dashboard and click on Plugins.

2. On the next screen, click the Add New button.

3. You are now browsing the WordPress plugins catalog. Use the search field on the right to find your desired plugin. For the purpose of this tutorial, let’s type “wordpress importer” into the search field.

4. WordPress Importer enables you to import previously exported content from another website. Click on the Install Now button, at the top right corner to add this plugin.
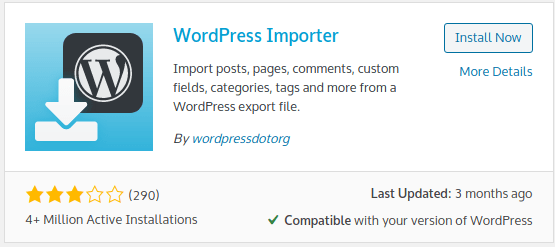
5. Observe the Install button plugin installation. Once configured – it will turn blue and change its name to Activate. You should click the button to successfully add to your WordPress website.

6. You are now back on the Plugins screen with a notification below the page title “Plugin activated.” The installation process is now completed and you can see where in the admin the plugin has registered.
In the main menu, click on Tools → Import and you will see the options for our WordPress Importer at the bottom of the page.
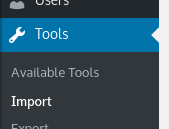

Note: Plugins usually appear in obvious places, such as the Settings menu, or they get their own link for easier management. If you are unsure where to find a plugin – always check the plugin documentation.
Managing Plugins
Now that we learned how to install plugins, let’s see what else can we do.
Deactivation
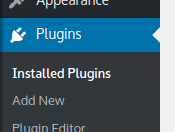
1. Return back to the Plugins screen by clicking main menu → Plugins → Installed Plugins.
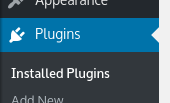
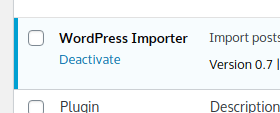
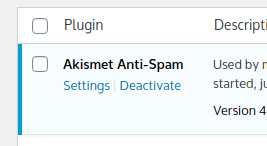
2. On this page, you will find a table with the plugins on your website, both active and inactive. Locate WordPress Importer and click on the Deactivate option below its name.
Removal
1. The page will refresh and the row with WordPress Importer will no longer have blue background. You can now click on the red Delete button if you wish to completely remove it.
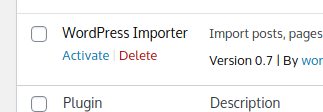
2. A pop-up window will appear as a confirmation. Make sure to click Okay. Once you confirm, the row in the table will display a confirmation message:

Settings
To avoid browsing through countless menus to find where your new plugin has registered, you can use the Plugins screen and directly switch over to its settings page.
- Locate the row where your plugin resides
- Make sure the add-on is active – its row will have a blue background
- Click on the Settings link below the plugin title
Security Considerations
As with WordPress themes, a good security practice is to delete plugins you are not using. If you use some of them occasionally – at least keep them disabled until further needed.
7 WordPress Plugins to Get You Started
Unlike themes, which can be picked simply for the aesthetic appeal, plugins play a variety of roles in your website and we just can’t let you go without some recommendations. Of course, you still need to keep your website lightweight, so pick your add-ons wisely.
1. Elementor Page Builder
Usage: 5+ million active installations
Main Purpose: content editor

Rightfully advertised as “the best FREE WordPress Website Builder”. Page builders provide you with a palette of blocks you can drag and drop on your page to create complex layouts and interactive pages with various menus and animated components. Makes creating home pages and promo pages a piece of cake.
2.Contact Form 7
Usage: 5+ million active installations
Main Purpose: displays contact form to your visitors

A reliable plugin that enables you to create a contact form with custom fields and attributes.
3. WPS Hide Login
Usage: 600,000+ active installations
Main Purpose: hides the WordPress admin login page
The WordPress admin login page is the most commonly attacked part of your WP website. This add-on changes the default address for accessing the admin to anything you like.
You can turn that address into a password of your own. Once active, the original /wp-admin address will bring a Page not Found error message to anyone who tries it.
4. UpdraftPlus WordPress Backup Plugin
Usage: 2+ million active installations
Main Purpose: creates and manages backups

As we discussed, backups are crucial when you are working on a live site and UpdraftPlus is one of the best tools to manage them. You can schedule automatic backups or create archives manually. Make sure to carefully read the plugin documentation on how to create and restore backups.
5. WP Fastest Cache
Usage: 1+ million active installations
Main Purpose: website performance improvements

Every time a visitor loads a page on your site, WordPress needs to load dozens of files and piece them up into a single web page. This process makes visitors wait and wastes precious server resources.
With this simple, yet powerful plugin, you can have your visitors access directly the ‘assembled’ web page, cutting down the page load time dramatically.
Note: Might not work well with JetPack.
6. JetPack
Usage: 5+ million active installations
Main Purpose: easier website management

Created by WordPress themselves, this toolkit is what you need to:
- improve website load times
- protect against spam
- monitor uptime
- visitor analytics
- website monetization with PPC ads
- PayPal button integration
7. Classic Editor
Usage: 5+ million active installations
Main Purpose: text editing

WordPress now works with the Gutenberg block editor we used earlier. Still, if you are one of those people that still isn’t used to the new interface – the Classic Editor is the plugin for you.
Note that if you decide to use page builders such as Elementor – you might need this plugin as well.
SECTION 12
How WordPress E-Commerce Works
Whether you are looking to start your first online business or to supplement your brick-and-mortar store – combining one of the most disruptive technologies ever created with the most popular content management system is certainly a good idea.
Some E-Commerce Basics
Electronic commerce (or e-commerce) is the transaction of goods and services over the internet. Nowadays you can order nearly anything online – from clothes, furniture, and medicine to tickets, consultancy services, and art.
E-commerce websites can be retailers (Amazon) that allow you to order directly from their warehouses or marketplaces (eBay, Etsy) that provide a platform for buyers and sellers to directly connect for a sale.
Types of WordPress E-Commerce Websites
There are quite a few plugins out there that allow you to create a WordPress business website. To give you an idea of the variety, here are a few things you can sell with the appropriate add-on:
- event and travel tickets;
- apartment and office rentals;
- bookings for guided tours and weekend getaways;
- retail products (anything from computer parts to flip-flops);
- appointments for consultancy services;
- software and music (digital products that can be downloaded after purchasing);
- subscriptions for streaming services.
Marketplaces and classified sites are not part of the list above for a good reason. They fall in a bit of a gray area, compared to the standard ecommerce shopping process. They are actually more of an intermediary service where the owner provides a place for buyers and sellers to interact and charges the seller a small fee for each transaction.
The WordPress E-Commerce Process
We can now focus on the transactional process between a happy shopper and the e-commerce website they are visiting. There are some specifics in the e-commerce process for some of the business models we mentioned, but the general gist is that your WordPress shop consists of:
1. A page on your website that serves as a products/services catalog
2. Shopping cart where you add purchased items
3. A checkout processor to calculate delivery and collect customer data
You will also need a payment processor to:
1. Offer different payment methods (ex: debit card, PayPal, Skrill)
2. Deposit the processed payment to your account
3. Redirect the customer to a “Thank You!” page as confirmation for the successful order
All of the above are possible with…you guessed it…the right WP plugin!
7 WordPress Plugins for E-Commerce
WordPress plugins for e-commerce are bit different than the rest. They can range from simple product catalogs to more complex ones that estimate delivery time or manage availability for events and apartment rentals.
Here are 7 e-commerce plugin recommendations, based on the goods and services we mentioned at the beginning of this section. We are including e-commerce-only plugins that allow you to sell your own product or service.
The list excludes business models such as dropshipping and affiliate marketing.
1. WooCommerce

The most widely used WordPress e-commerce plugin. While most similar solutions come as an out-of-the-box product with a singular purpose, WooCommerce has its own developer community and a variety of plugins and themes, specifically designed for it.
It’s like WooCommerce acts as a separate platform within the WordPress platform.
2. BigCommerce

BigCommerce is an enterprise-grade e-commerce platform, powering one of the biggest retailers on the web. Offers integration with WordPress via a free plugin. A lot of your e-store is handled by the BigCommerce servers which allows you to take a load off your WordPress hosting to ensure optimized security and performance.

Free and feature-rich plugin for booking virtual and in-person events. It comes with its own search engine and Google Maps integration. The Events Calendar offers a proprietary library of paid and free extensions that you can use to collect ticket payments via PayPal and start your own community, enabling members to submit to their favorite events and performers.

The Appointment Hour Booking plugin comes with a free and several commercial versions, starting from €5.99 per month. It’s intended for booking consultations, trainings, courses, and similar services over a predefined schedule and calendar. Features add-ons for integrations with popular platforms such as Zoom, reCaptcha, MailChimp, and SalesForce.
Supports a number of payment providers:
- PayPal Standard
- PayPal Pro
- Stripe
- Skrill
- Authorize.net
- TargetPay/iDEAL
- Mollie/iDEAL
- SagePay
- Redsys

An excellent plugin if you are running a WordPress website focusing on member-only content. Paid Member Subscription is advertised as a complete membership solution allowing you to manage members, create subscription and hierarchical plans (ex: Free, Silver, Gold), and restrict access to premium content.
Paid Member Subscriptions collects payments from your members via PayPal and is free to download.

Easy Digital Downloads is a very popular solution for selling downloadable products on WordPress. Features a shopping cart, checkout form, detailed reporting, and a number of thoughtful extensions. One of its best perks is the product file protection, which you can use to prevent unauthorized access.
Supports payments through PayPal Standard and Amazon Payments. Additional 11 payment processors are available as premium extensions.

A freemium plugin intended for real estate agents and agencies. Easy Property Listings features a number of customizations, making it adjustable to the market you operate in. This is the only plugin on the list that doesn’t feature a payment processor.
Easy Property Listings can be used to generate a list of available properties based on your client criteria and offers professionally designed listings, among a number of other features. Extendable with 25 paid extensions.
SECTION 13
Editing the Code of Your WordPress Website
Since this tutorial is for beginners, we’re assuming you are not familiar with things such as HTML, PHP, CSS, and JavaScript.
Editing the code of your website is a technical undertaking and is not recommended for novice users as it can break your website completely. It’s not just about knowing how to edit a WordPress website, but also being familiar with various programming concepts and best practices.
Of course, if you’re feeling adventurous you can do some minor edits such as pasting your Google Analytics code. Just keep in mind the following:
- Changes will be overwritten if your theme is updated.
- Always back up your website before making changes.
- Have your backup ready to be restored at a moment’s notice.
- Always have a single copy of a certain javascript, loaded on your page.
When Do You Need a Developer?
When you hire a developer to work on your site, they will copy your website on a staging area. They will make all the required changes, test, and fix technical issues. Once everything is properly working – the developer copies these changes over to your live site.
This approach allows for complex changes to the code without risking the performance of your online project.
Introduction to the WordPress Theme Editor
This section is provided as a brief introduction on how to edit your WordPress website directly from the admin dashboard. Note that edits you make here will be overwritten by updates.
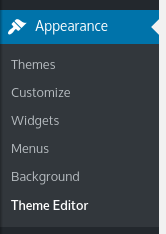
You can find the Theme Editor at the bottom of the Appearance section in the main menu.
When visiting the Theme Editor for the first time, WordPress will display a warning message:
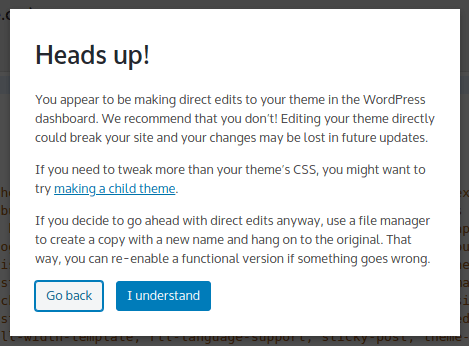
Click the blue I understand button to continue and permanently disable the warning.
The Theme Editor is basically a text editor with a list of files next to it. The main column to the left, titled Selected File Content, is for editing files. You can also use Theme Files to select the desired piece of code.
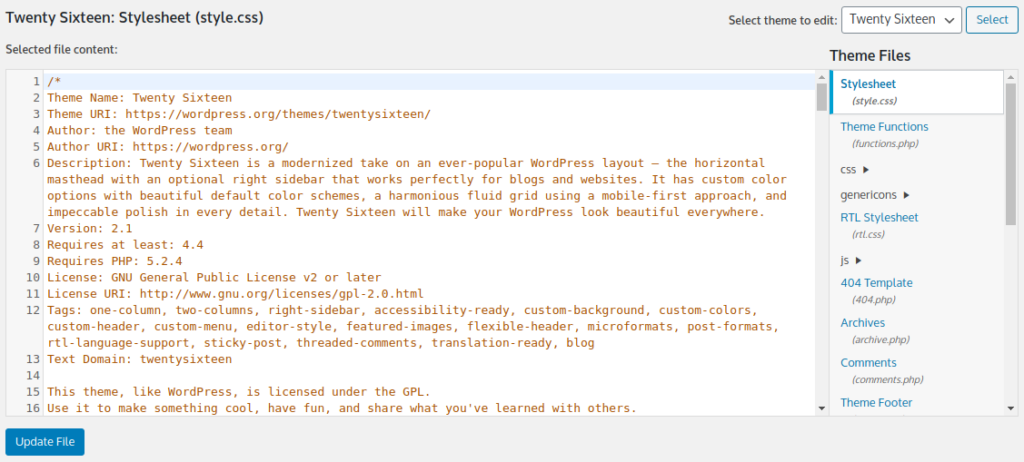
Every time someone visits a page on your website, WordPress takes most files from the Theme Files list and combines them together into one – our web page.
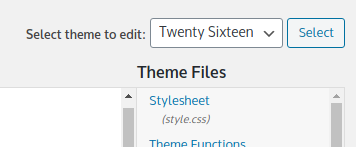
The Theme Editor also displays the currently active theme for your site. If you want to edit another template – use the drop-down menu to the top right of the screen, labeled Select Theme to Edit. Once you have picked another theme, make sure to click the Select button to switch over to it.
Working With JavaScript Tracking Codes
Most commonly, the Theme Editor is used for placing JavaScript code provided by various counters and trackers that website owners utilize. This could be Google Analytics, Google Tag Manager, or any other website analytics or marketing service.
When pasting custom code, always make sure to carefully read the installation instructions beforehand.
Usually, JavaScript code is placed in either:
- the header.php file containing:
- the <head> section of the web page.
- the beginning of the <body> section of the web page
- or the footer, at the very bottom of your page.
The <head> section is at the very top of the web page’s code and contains technical information, such as the page title.
The <body> section is responsible for holding your content together on the screen and making it visible to you and your visitors.
Bear in mind that when we talk about tags and files, we assume that whichever theme you are editing, it is created in accordance with WordPress’ Developer Handbook.
Not all templates are designed the same way, so there is a chance your layout doesn’t have a <head> or <body> tag.
Testing for Editing Capabilities
It’s becoming more and more common for the Theme Editor to be disabled by your web hosting provider for security reasons. After all, anyone who gains access to the admin, can do a ton of damage to your hosting account.
To test if the Editor is enabled just make sure you:
- haven’t done any changes to the code
- are at the Edit Themes screen
Press the blue Update File button located at the bottom left corner of the screen, right below the editor.

If you receive an error message after updating the file, it’s best to contact technical support and request this restriction is lifted for your hosting account.
Working With JavaScript
For the purpose of this exercise, we are providing you with a JavaScript code that will display a small window with an OK button on it upon page load.
Sample JavaScript Code
<script>alert(‘This is JavaScript’);</script>
Note: Most of the HTML page elements have an opening and a closing tag. In the sample below, we are looking at <script> and </script>.
Locating Files In The Theme Editor
By default, you start out with the Stylesheet (style.css) of your selected theme. This file will be selected every time you visit the Theme Editor.
The more important files of any WordPress theme follow a specific naming logic, such as:
- Stylesheet, for the style.css file

- Theme Header, for the header.php file

- Theme Footer, for the footer.php file

Each one of these is present only once in your theme. As you can see, their name is always followed by the filename, in brackets below.
Updating Header.php
If you’re wondering where to place a JavaScript code in the header – it can be either before the closing </head> tag or right after the opening <body> tag.
HTML follows a tree-like structure of indentations, meaning if a tag is contained within another one, in most cases, it will be indented with a few spaces:

Use this knowledge to your advantage and read through the beginning of every line until you locate the closing </head> tag and the opening <body> tag.
To open a new line, simply click in front of the </head> tag and hit Enter on your keyboard.
Now copy the JavaScript sample from this article and paste it in the new line we just opened.
Your code should look something like this:

Previewing Changes in the Front End
Now, press the blue Update button below the text editor and proceed to the front end of your website. Refresh the web page and you will be presented with a pop-up window that features the text This is JavaScript and an OK button.
Depending on your browser and operating system, the pop-up should look something like this:

- Now let’s switch over to the back end and revert the changes.
- Go to Appearance → Theme Editor and load the Theme Header (header.php) file from the list on the right.
- Select the entire line and delete it. Double-check that you haven’t deleted any other characters by accident as this will break your web page.
- Hit the Update File button to save the changes.
- Always test what you’ve done, just to be sure. After heading back to the front end and refreshing the page, there should be no pop-up this time
SECTION 14
Conclusion
We hope you found this guide on how to build a website using WordPress useful. Your WordPress journey is just beginning as is a lot more to be learned.
For more information, check out our growing archive of WordPress articles in the ScalaHosting Blog.