As a web hosting reseller, you need to take every opportunity to blend your brand into the client experience. We already looked at how to customize your cPanel with our own images and unique CSS styling. But another equally important point of contact is the new account default page under your cPanel reseller hosting plan.
The first client impression when they are just getting started on a new account is critical and it sets the tone for future interactions. By default, the new account will open up into an empty directory, leading to a 403 Forbidden error or perhaps a 404 Not Found message. Instead of leaving it to your client to figure out what’s wrong and making them wade through documentation and search engine results, why not place your own custom page on all new accounts, welcoming users into the hosting family?
You can also use this opportunity to provide your visitors with valuable information on how to get started, manage their reseller plan, and many more helpful guides. It doesn’t even have to be just a single page – you can configure an entire application and tailor it to your specific hosting requirements.
For example, if you specialize in WordPress hosting, you can use something known as the Skeleton Directory to create a completely fresh WordPress installation and have it automatically transferred over to every new account. When your client visits their domain for the first time – they will be presented with the setup wizard you configured.
Creating a customized skeleton directory for new users is incredibly easy. Let’s go over the basic process.
Locating your Skeleton Directory
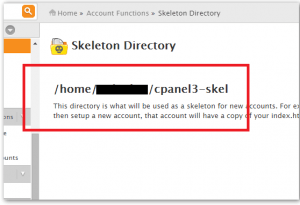
Log into WHM and enter “Skeleton Directory” in the search box.

When you click this, it will tell you in bold letters where your Skeleton Directory is located as shown below.

In our test example, the default location is the subdirectory cpanel3-skel. A short description under the title explains the purpose of the Skeleton Directory and what you can do with it.
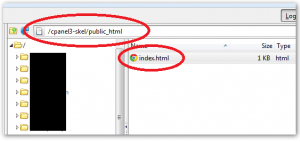
For this basic example, we’ve created a simple HTML file explaining its purpose. Since we have the location, it’s easy to directly FTP to the subdirectory in question and upload the default index.html we want to show our users. Keep in mind the Skeleton Directory is usually located at the very root of your hosting folder and therefore you need an FTP account with root permissions.

As you can see in the screenshot, we’ve navigated to the public_html folder within our default skeleton directory and placed the new index.html file within it. To test it, all we need to do is create a new account in WHM, navigate to the home URL and see what pops up.
Creation and Testing
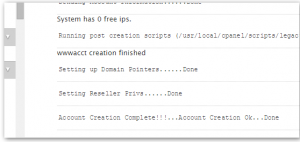
Within the WHM welcome screen, navigate to the Create a New Account section. Here, insert the details of a throwaway domain reserved for testing purposes, create a token username and password, and instruct WHM to complete the process.
Once the server has finished all the steps, you should see something like this on the right-hand side of the WHM split-screen:

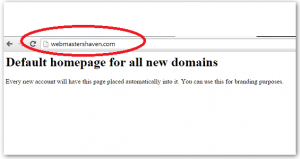
Now simply open a new browser tab and head over to the root URL for which we created a new cPanel account.
You can see below our index.html file has been copied and appears automatically for every new user.

This is, of course, a simple example, but it lays the foundation for a completely customized offering, tailored to your client’s needs. Using the Skeleton Directory, you can further brand your reseller products and present a unique experience to your users to set yourself apart from all the competition.
