Many of you know that installing a theme via the WordPress dashboard is trivially easy. In fact, if you’ve chosen the design beforehand, the whole process takes no more than a couple of minutes.
But what if you need to install a theme manually? Are the steps equally simple? It may not appear so at first, but once you understand how the logic works, you’ll see that it’s actually pretty easy.
When Will I Need to Install a Theme Manually?
Depending on where you get them from, you can divide WordPress themes into two categories – those that come from WP’s official theme repository and those that don’t.
The WP dashboard gives you direct access to the official repository, so if you want a theme from there, the process of installing it is completely automated. You don’t need to upload, copy, or configure anything – WordPress takes care of it all for you.
If your theme isn’t in the official directory, you most likely have it as a ZIP archive containing its files. These files need to make their way to the server.
WordPress gives you the option of uploading the ZIP archive via the dashboard. It can extract the theme’s files and put them where they need to be. In some cases, however, this isn’t an option.
For example, if the ZIP archive exceeds the maximum file upload limit, the WP dashboard will return an error message and fail to install the theme. You may have also configured your dashboard to be accessible only from a limited range of IPs, so if you’re in the office of a programmer hired to add some custom code to a theme, you’ll need to install it manually.
In other words, manually installing WP themes isn’t something you’re likely to do every day. However, it may just be required in some cases. What’s more, being familiar with the process will help you better understand how your website works.
Manually Installing a WordPress Theme
Some people feel a bit anxious about pretty much any process that starts with the word “manual.” However, when it comes to installing WP themes outside the dashboard, there’s nothing too technical or complicated.
In fact, the whole process consists of uploading the theme’s files to a folder of their own created inside one of WP’s system directories. Let’s take a look at the exact steps.
1. Extract the ZIP archive on your computer
This step is required only if you upload your theme via FTP. If you use a browser-based File Manager with built-in functionality to extract ZIP files, you can unzip the archive straight on the server.
If not, extracting the files on your hard drive is your first task. Modern operating systems have archive management tools built into them, so in most cases, unzipping the data will not require any additional applications.
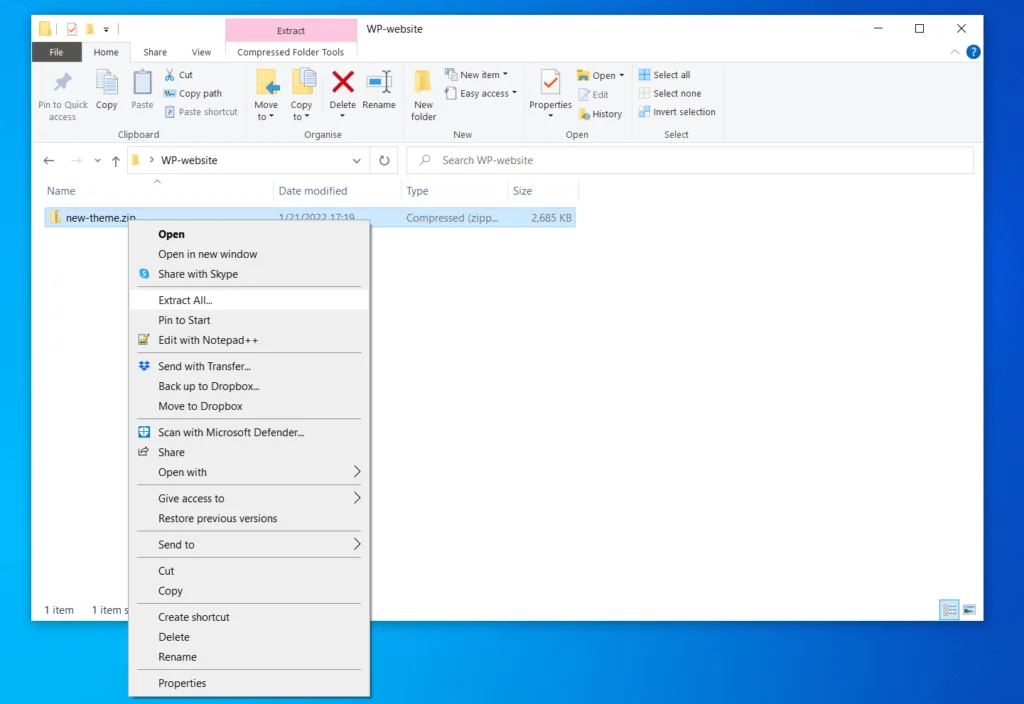
If the theme’s developer has packed it properly, the files should appear in their own folder carrying the theme’s name. If that’s not the case, you need to move them yourself.
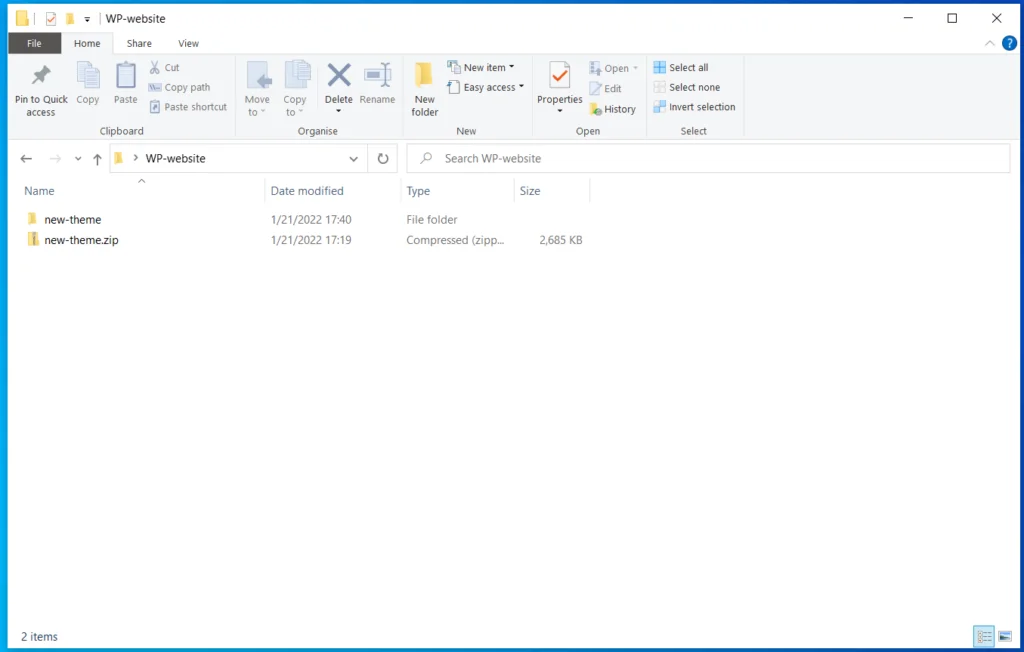
2. Upload the theme’s folder to /wp-content/themes
All your themes are located in the /wp-content/themes folder inside your site’s document root. To set up a new one, the theme’s files need to be situated in their own subdirectory inside /wp-content/themes. You have two main options for doing this – through a File Manager or via FTP.
Via a File Manager
There are quite a few different web hosting control panels, so the options are not always the same. However, if you use a shared or a managed account, you’re pretty much guaranteed to have a File Manager that can unzip files straight on the server.
First, you obviously need to navigate to the /wp-content/themes folder inside your site’s document root. The interface is usually pretty similar to the operating system on your home computer, so navigation shouldn’t be a problem. Here, for example, is what the interface looks like in our proprietary SPanel management platform.
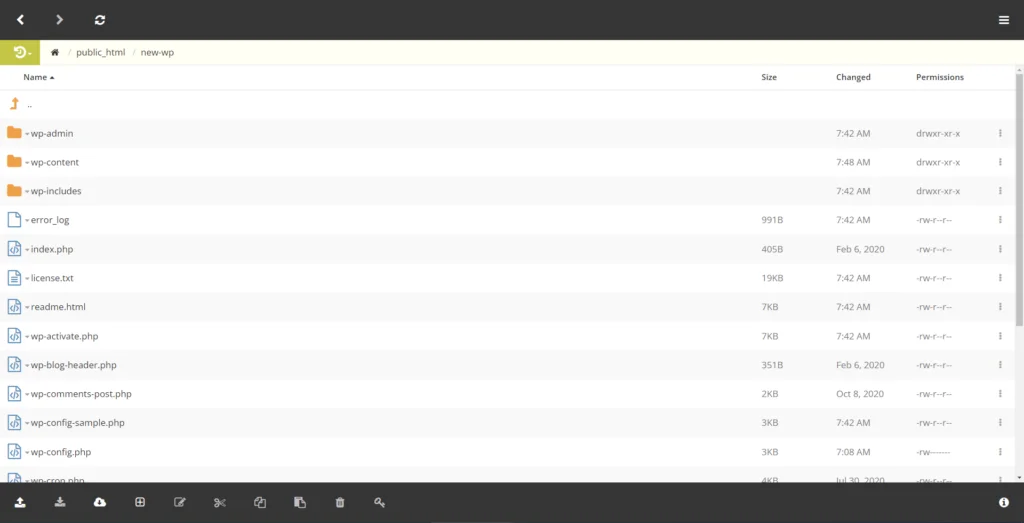
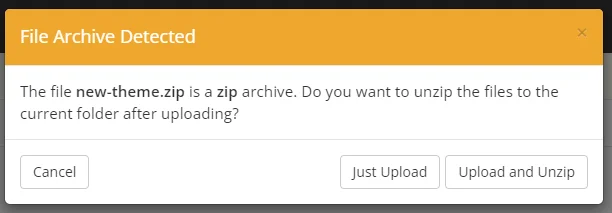
When you get to the correct folder, you have the option to upload and extract the theme’s ZIP file. With SPanel, the Upload button is in the lower-right corner, and in this particular case, you need to choose the Upload Zip option.
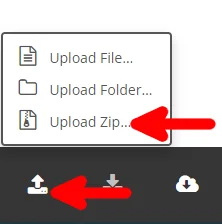
You then need to select the theme’s ZIP file from the window that appears and then confirm that you want to unzip it after the upload is complete.
When the File Manager is ready, you should see the new theme’s folder inside the /wp-content/themes directory.
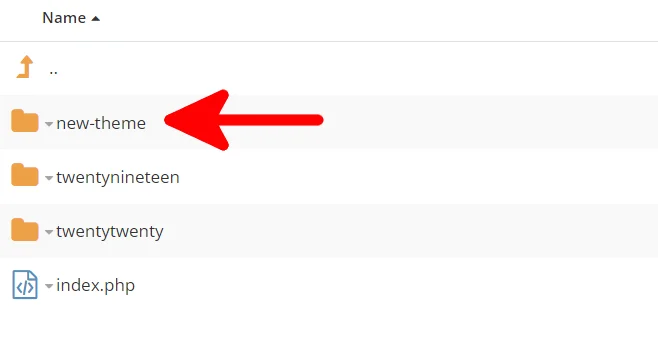
With that, the theme is installed and ready to use.
Via an FTP client
If you don’t have a File Manager or simply find its interface a bit clunky, you can use an FTP client instead. You do need to make sure you’ve unzipped the theme’s archive on your local computer first, though.
The interface you’ll work with differs from client application to client application. However, you usually get two panes – one showing the files on your computer and the other displaying whatever is uploaded to the server. Often, uploading a folder is as easy as dragging it from the first pane to the second one.
Here, for example, is what you’ll see if you use FileZilla – one of the most popular FTP clients.
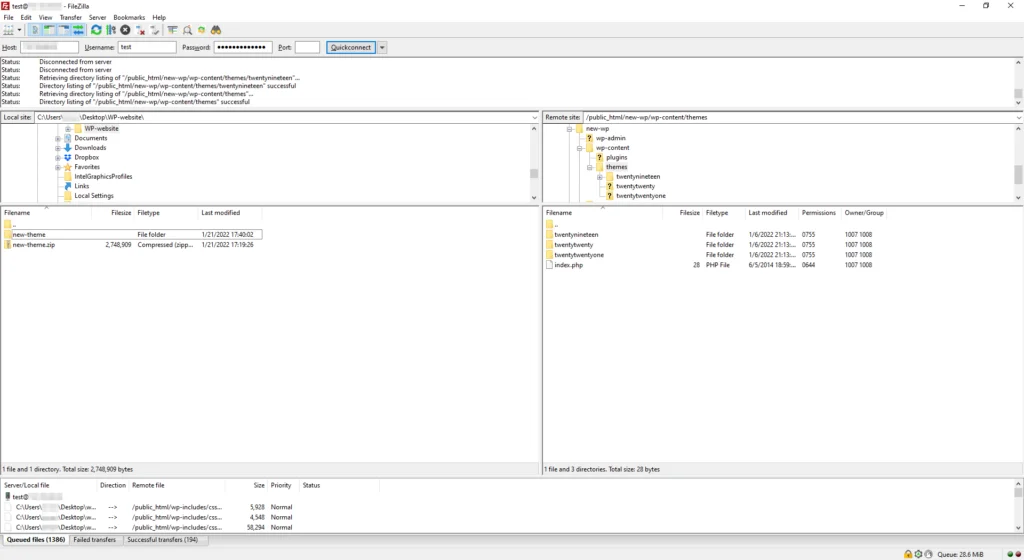
With the folder uploaded, the theme is installed.
3. Activate the theme
Although you have successfully installed the theme, the new design is not applied to your homepage. To do that, you need to activate it.
Once again, you have two options:
Through the WP dashboard
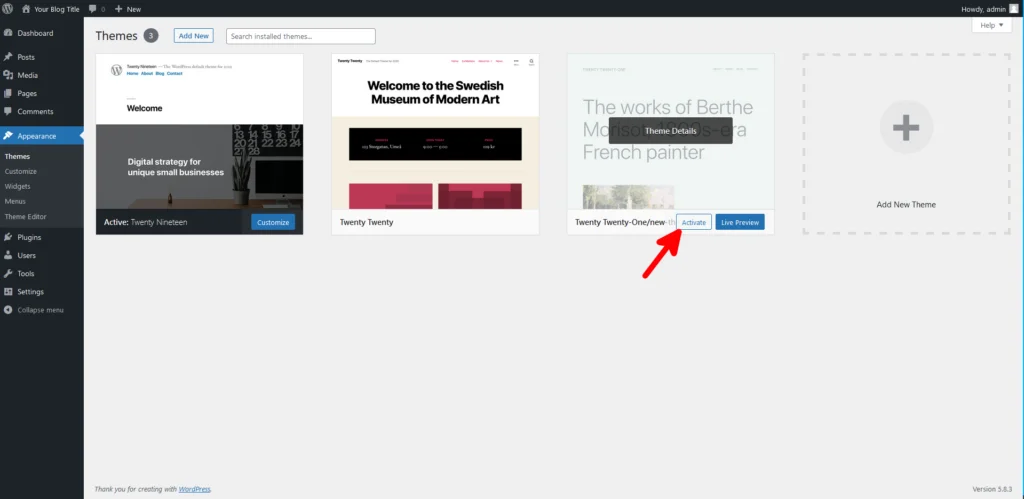
If you have access to the site’s dashboard, activating a theme is a simple matter of logging in, going to Appearance > Themes, and clicking the Activate button that appears when you hover your mouse cursor on top of the new theme.
Via WP-CLI
You can also activate a theme using WP-CLI – a popular WordPress management tool.
You need to remember that WP-CLI is only available via the command-line interface. Although this may seem a bit intimidating to some of the less experienced users, as we’ll find out in a minute, there’s nothing to be scared of.
You first need to log into your hosting account using SSH and navigate to the site’s document root directory. Then, you can use the wp theme list command to see all the themes currently installed on your site.
To activate one of them, you need to enter wp theme activate followed by the name of the theme you’d like to use.

WP-CLI will switch the themes, and you will see the new design on the website itself.
