Outlook 2016 (Windows) is one of the latest versions of Microsoft Outlook—an email client and a personal information manager.
It allows Windows users to manage their email accounts, events, schedules, and calendar in one place. Users can also set up tasks, assign tasks, manage contacts and collaborate with team members.
The app enables businesses to streamline their processes. This article takes a clear look at adding an email account to the app manually.
Let’s get to it.
Adding Email to Outlook 2016 Windows Manually
You can add any email accounts to Outlook 2016 (Windows), including iCloud, Gmail, Yahoo Mail, business email accounts (like info@yourdomain.com), and others. Take these steps to get it done in a few minutes.
Step 1: Open Outlook
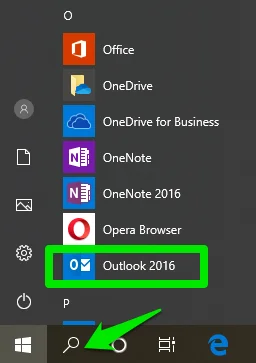
Open the Outlook 2016 app on your Windows computer from the startup menu.

You could use the search bar to find the app quickly. Click File on the menu bar, then Add Account under Account Information.

Choose your account setup method.
Select Manual setup or additional server types and click Next for a manual account setup.

Step 2: Decide Between IMAP and POP
Decide whether to set up an IMAP or POP email account.
POP settings download your email from your server and delete the original server copy, making it impossible to access the same email from another device. The POP is an excellent option if you wish to access your emails from only one device.
- IMAP doesn’t delete the server copies, making it easier for you to access the email from any device.
- POP3, the latest version of POP, saves copies of the emails on the server, allowing users to access them from any device.
So, under Choose Service, select POP or IMAP and click Next.

Step 3: Configure Your Account Settings
Under User Information, type your account name (the name you want your email recipients to see as the sender name) and enter your email address.

Select the incoming email protocol to use from the Account Type drop-down menu.

Use mail.yourdomain.com as your incoming mail server and outgoing mail server (SMTP) addresses.

Replace yourdomain.com with your domain name.
For instance, if your email address is sales@abc.com, use mail.abc.com as both the incoming and outgoing server address.
In the User Name text box, type your email address and enter the email password.

Select Require logon using Secure Password Authentication (SPA) to log into your account via password authentication.
Click More Settings to continue.
Step 4: Configure Internet E-mail Settings
On the next prompt, click the Outgoing Server tab.

Select My outgoing server (SMTP) requires authentication and use the same settings for your incoming server.
Click the Advanced tab to enter your incoming and outgoing servers’ port numbers and set up encryption.

- For the incoming server:
- Use port 995 (for POP3 and wants to connect with SSL)
- Use port 110 (for POP3 and if you don’t want to connect with SSL)
- Use port 993 (for IMAP with SSL)
- Use port 143 (for IMAP without SSL)
- For the outgoing (SMTP) server:
- use port 465 to connect with SSL
- Use port 26, if you’re connecting without SSL
Click the This server requires an encrypted connection (SSL) checkbox and select SSL from the Use the following type of encrypted connection drop-down to use the SSL ports.

Click OK to save the changes, then Next > Finish to complete the setup and exit the window.
Repeat the process to add another account.
Need Support?
If you need support adding your email accounts to Outlook 2016 on Windows, kindly contact our support team, and we’d be glad to help.
