The SSL certificate is important for your web site for a number of reasons. First of all, it will provide security to your web site’s visitors while interacting with the site and it will also help for SEO. Check https://www.scalahosting.com/blog/google-likes-https for more information on that topic. You have multiple options when you are looking to add an SSL certificate to your web site. If you need the encrypted connection just for SEO purposes then you can use a free SSL certificate from Let’s encrypt. We recently activated Let’s encrypt on all web hosting plans including WordPress hosting and reseller hosting. That free SSL is valid for 3 months but our system will automatically renew it before it expires. You can read more about Let’s encrypt to find out about all its great features and advantages.
If you are running an ecommerce web site though selling services or goods then you need a more secure solution. A free SSL certificate is not the best option here. The reasons are many. First of all, visitors will not trust you as much as they would if you had a premium SSL certificate with EV. ScalaHosting offers multiple SSL certificates you can see them at https://www.scalahosting.com/ssl-certificates.html.
But which certificate is best for you? That really depends on your budget. The RapidSSL will work just fine for any ecommerce web site but if you want to build more trust we would recommend using an SSL certificate with EV – True Business ID with EV from GeoTrust or Comodo EV. Both will work and do the job. Keep in mind that you must have an active company in good standing to order such a certificate. There is a verification process included before the SSL is issued by the vendor. You will be contacted via phone and you may be required to send specific documents showing you own the company the SSL is issued for.
Once you have decided which SSL certificate to order it is time to place the order from https://www.scalahosting.com/ssl-certificates.html and pay. If you are a new customer the certificate may be activated instantly as long as your order is not flagged for a manual verification. If you are an existing customer the certificate will be activated immediately and you can start with the configuration.
There are multiple steps that need to be performed to configure your SSL and install it.
Generate the CSR (Certificate Signing Request)
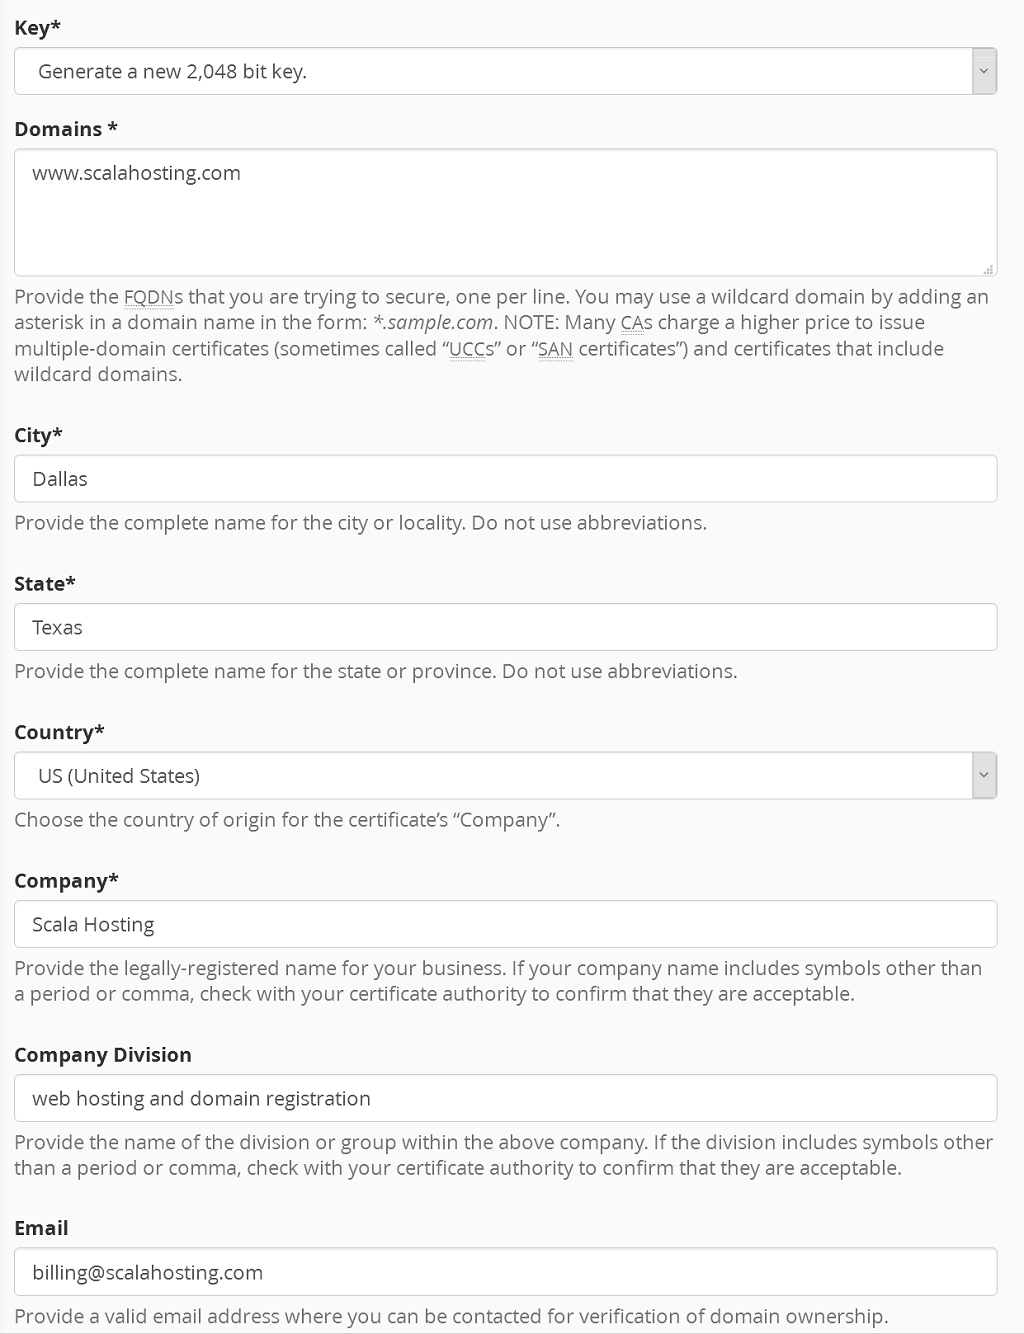
The CSR is a code which contains information about the certificate. It contains information about the domain name the certificate will be issued for, your name, e-mail address, company name, company division. That information will be used by the SSL vendor to generate the actual SSL certificate and send it to you for installation.
To generate the CSR login to cPanel at www.yourdomain.com/cpanel and click on the SSL/TLS icon under the Security category.

Then you will be asked to fill in a form with the required information to issue the SSL certificate. You can see an example below.

Once you have filled in the form click on the Generate button to generate the CSR. Then copy it because you will need it to place the SSL order request. Click on the Return to the SSL manager link at the bottom of the screen that shows the generated CSR.
The process for SPanel users is not too dissimilar.
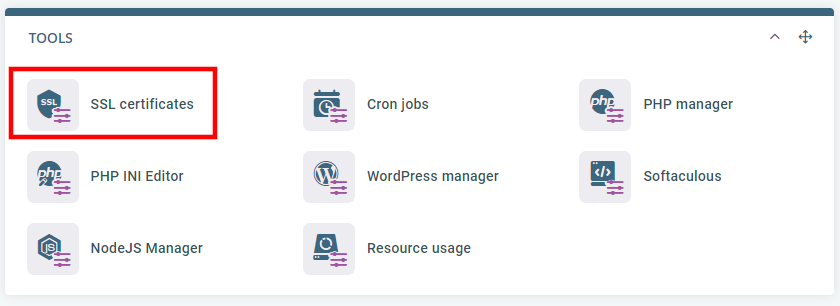
Simply log into SPanel’s User Interface, and click SSL certificates under the Tools section.

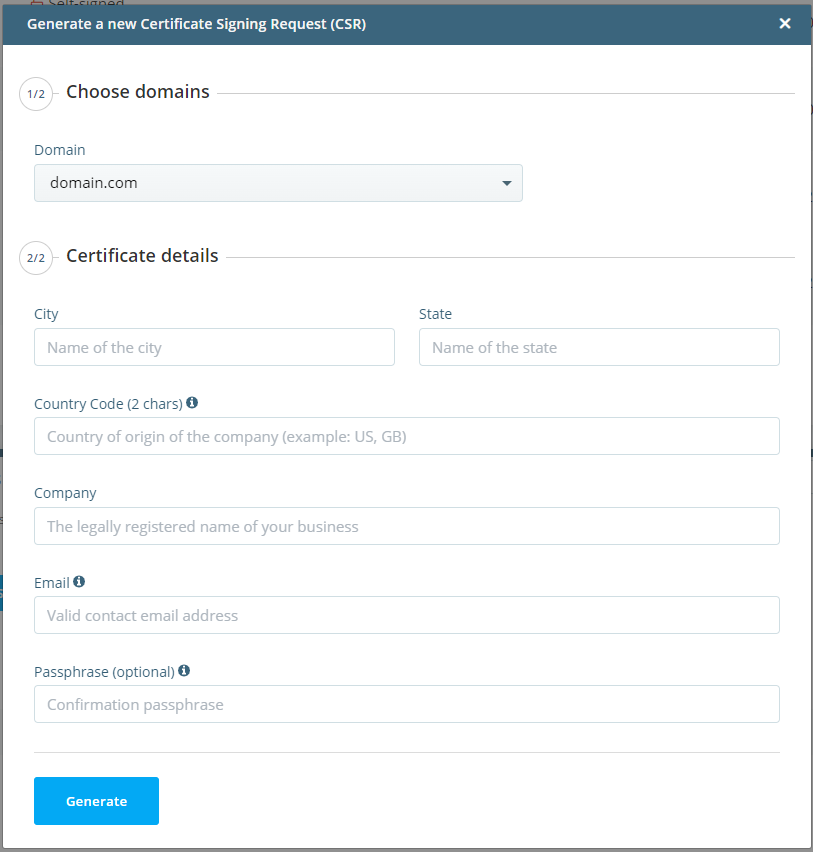
Click the Generate a new Certificate Signing Request (CSR) button and fill in the details.

Configure the SSL certificate from the client area
Login to your ScalaHosting client area at my.scalahosting.com, click on My services -> Manage. Hover the Manage button of the SSL certificate service you ordered and click on View Details.
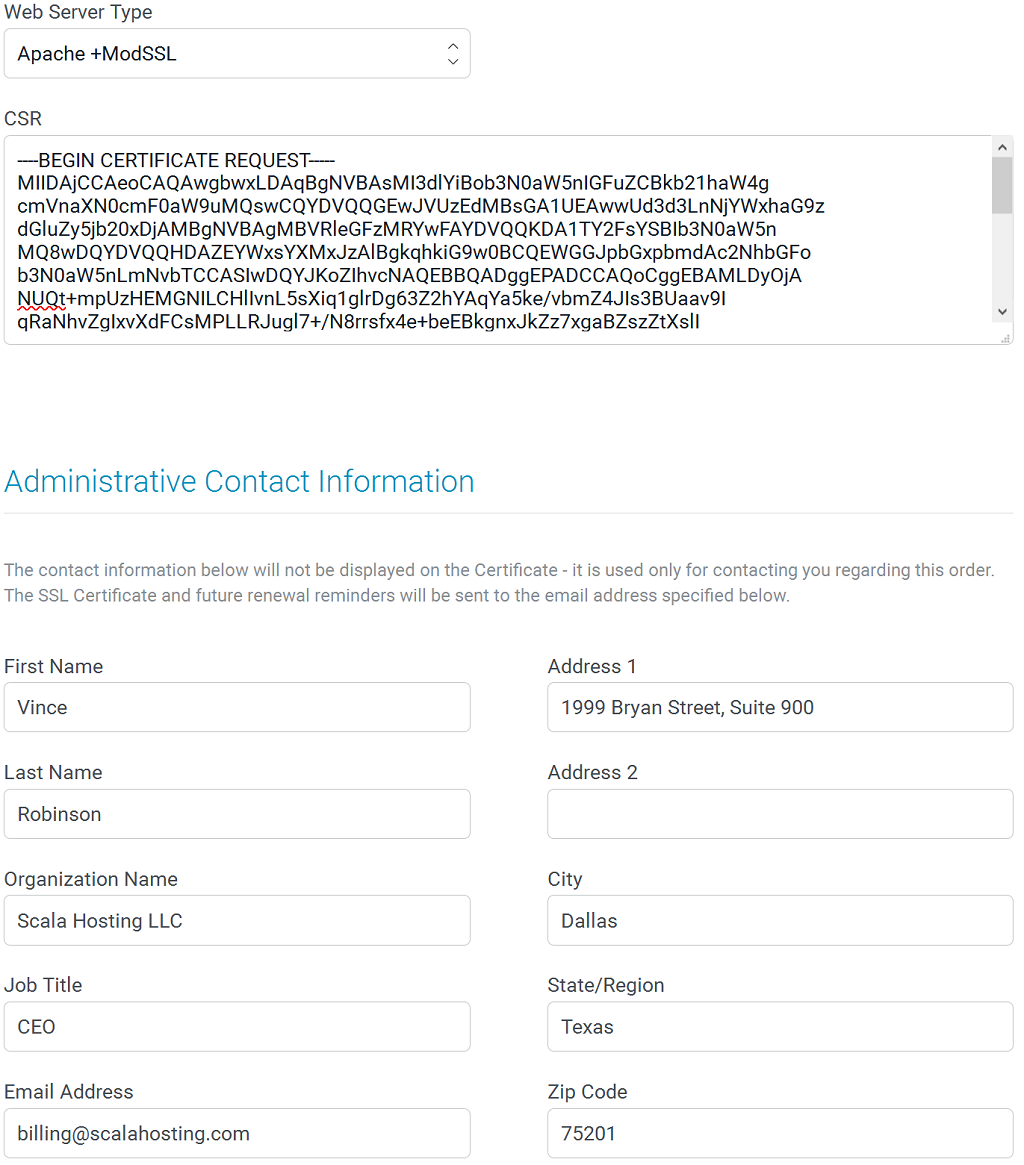
Then click on the Configure Now tab and fill in the form to complete the configuration of your SSL certificate.

Then click on the Click to Continue button to send the request to the SSL vendor. Once the SSL certificate is issued you will receive an e-mail with the certificate and the CA bundle. The CA bundle is required for the installation of the SSL. If you don’t install the CA bundle your web site visitors will see a warning that the certificate is not trusted. Please note that issuing non-EV certificates usually takes a couple of hours. EV certificates may take some days to be issued after the verification is completed. The configuration process of both EV and non-EV certificates is the same though.
Install the SSL certificate
Once you receive the SSL certificate and the CA bundle you can proceed with the installation. To install your SSL certificate you need 3 things.
- The SSL certificate – it was sent to you by the SSL vendor.
- The SSL key – it was generated when you created the CSR via cPanel. You can get the key by logging to cPanel and clicking on SSL/TLS -> Edit -> Key (it is at the bottom of the page).
- The CA bundle – it was sent to you in the email with your SSL certificate.
Once you have the above you can proceed with the installation.
Login to cPanel and click on SSL/TLS -> Manage SSL sites. Choose the domain name you generated the CSR for and fill in the fields below. Enter the certificate in the first field, the SSL key in the second one and the CA bundle in the third field. After that click on the Install Certificate button.
How To Point a Domain Name To a Web Hosting Provider
