An email client helps you take complete control of your inbox.
It enables users to manage multiple email accounts from one device, even if they’re from different email providers, without the need to log in and out of accounts or switch browser tabs.
Incoming email protocols like POP retrieve email messages from mail servers, enabling users to access, read and respond to the messages via email clients like Outlook, Apple Mail, Gmail, Thunderbird, and others.
This article makes adding a Google workspace email to email clients intuitive.
But before diving into that, let’s clear a few things.
What’s POP?
POP, short for Post Office Protocol, is a one-way incoming email protocol that downloads an email message to a computer or device, then deletes it from the server, making the message inaccessible from other devices.
POP servers work by setting up directories for each email account.
It downloads all the mails in the corresponding directory into your device when you try to access the messages through an email client and deletes the messages from the server.
The setting works best for users intending to use only one device to access all their email messages.
POP version 3 (POP3) is the standard version in common use; Port 995 is the default POP3 port for establishing connections with an email server.
Why Does it Matter?
Using POP to set up an email account comes with some benefits, and here are some of them:
- It deletes email messages after downloading to a local computer, which conserves server storage space, making it suitable for people on limited hosting plans.
- POP users can access important messages with a poor internet connection, even while offline.
- The protocol allows users to access email only on one device, helping protect the integrity of confidential email messages.
- It makes controlling access to email a lot easier and straightforward.
Disadvantages of Using POP
Setting up emails with POP has some disadvantages; here’s a quick highlight of some of them:
- POP downloads the email messages on only one device, making cloud and remote access to the messages a pipe dream.
- It lacks flexibility; collaborating across teams is near impossible.
- POP deleting the server’s email copy makes it impractical to retrieve a downloaded email message whenever it’s lost.
Adding Workspace Email To an Email Client
Now, how do you add a Google workspace email to an email client? Let’s find out.
But first, enable POP settings for your workspace account, and here’s how.
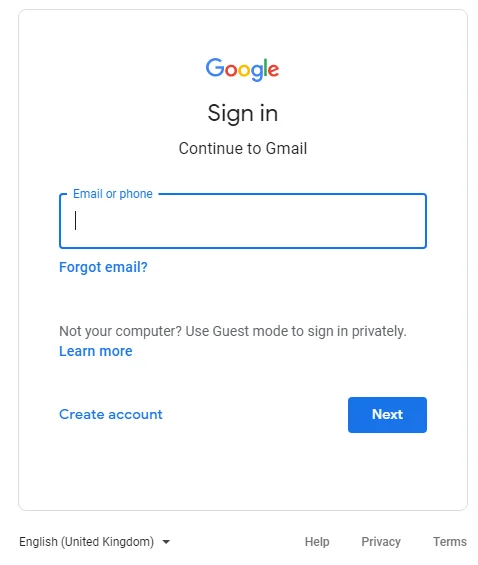
Visit Gmail on your computer and log in to your workspace email account.
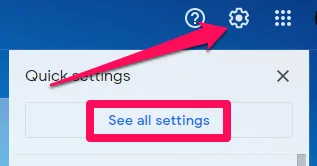
Click the wrench icon at the top corner of the page, then See all settings to open your account settings.
On the Settings page, locate and click the Forwarding and POP/IMAP tab.

In the POP download section, check “Enable POP for all mail” or “ Enable POP for mail that arrives from now on” to enable POP.
Scroll down to save the changes.

With POP enabled for your account, follow these steps to add the workspace email to your email clients.
Mobile Phone
Adding workspace email to your Android device or iPhone enables you to keep up with your emails from anywhere.
Follow the steps here to get it done immediately.
- Install the Gmail app from the Google Play Store for Android devices or the App Store for iPhones.
- Open the Gmail app and navigate to your Settings > Accounts.
- Tap Add account > Personal (IMAP/POP)
- Enter your Google workspace email and tap NEXT.
- Select POP3 as the account type.
- Type your email password and tap NEXT to configure the incoming server settings.
- Confirm your email address and password.
- Use pop.gmail.com and port 995 to configure the incoming mail server, and enable the email client to connect to the mail server via SSL.
- Use this information to configure outgoing server settings:
- Outgoing server: smtp.gmail.com
- Requires SSL: Yes
- Requires TLS: Yes (if available)
- Requires authentication: Yes
- Port: 587
- Tap NEXT to configure Account options and set sync frequency.
- Tap NEXT to complete the Android email setup.
Microsoft Outlook
Follow the steps here to add your workspace email to Microsoft Outlook.
When it gets to configuring POP and IMAP Account Settings:
- Select POP3 as the account type
- Use pop.gmail.com as the incoming mail server
- Type smtp.gmail.com in the outgoing mail server text box
The image below shows the POP configuration for Outlook.
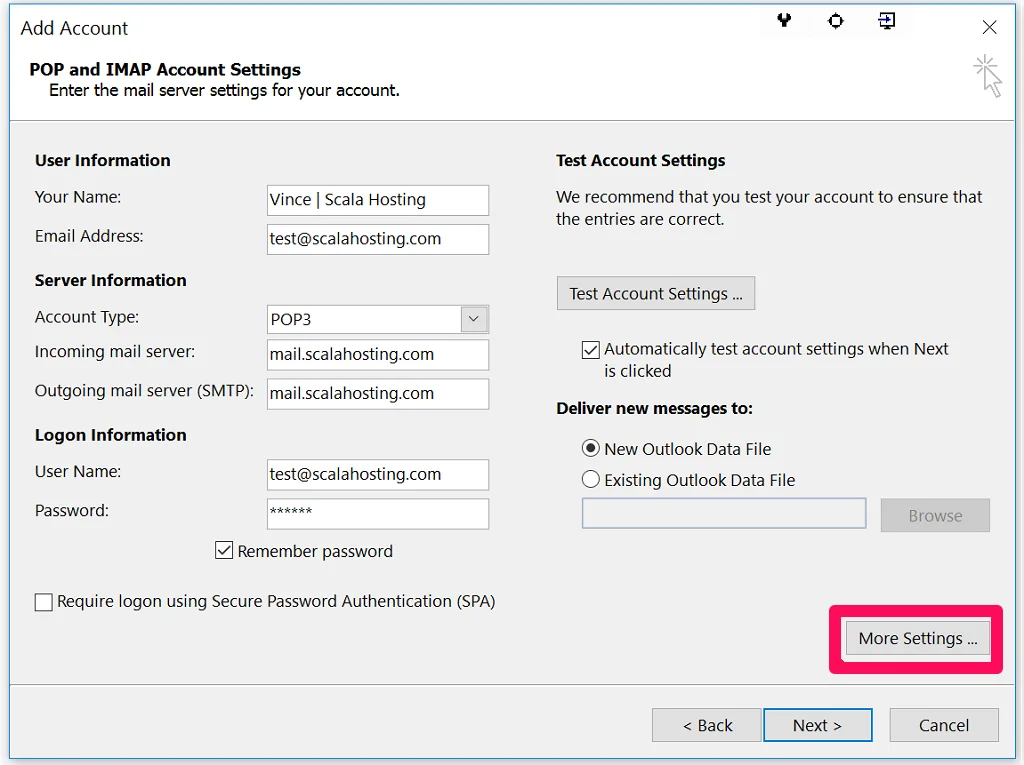
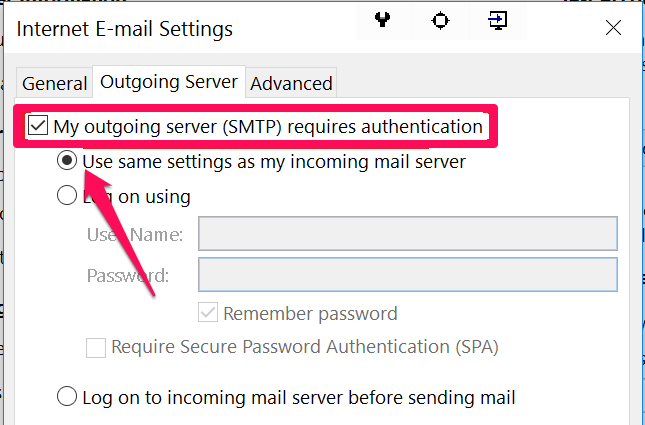
Click More Settings, then the Outgoing Server tab to configure your incoming and outgoing server settings.
Check the My outgoing server (SMTP) requires authentication box to send email messages via Outlook, using the same settings as your incoming mail server.
Click the Advanced tab and use this information to configure the server ports and encryption type:
- Enable This server requires an encrypted connection (SSL)
- Use 995 as the incoming server (POP3) port
- Enter 587 as the outgoing server (SMTP) port
That’s it.
Apple Mail
Adding your Google workspace email to Apple Mail is pretty straightforward; the app does much of the work. Follow these steps to get started.
Open the app on your Mac.
If you haven’t added any email account to your Apple Mail, Mac might prompt you to do so the first time you open the app.
If it does, choose Google as the mail account provider, and click Continue.
Otherwise, click Mail on the menu and then Add Account to get to the ‘Choose a Mail account provider…’ screen, and select Google as your mail account provider and click Continue.
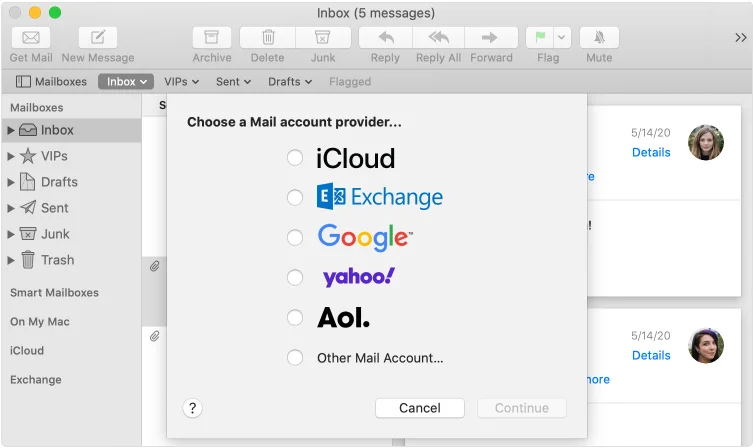
Google might prompt you to click Open Browser to complete the account authentication in your web browser.
Follow the onscreen instruction to complete the account setup. If successful, Apple Mail populates the inbox with your email messages.
Wrapping It Up
This article makes setting up a workspace email account on email clients using POP straightforward. Follow the outlined steps here to get started, and contact support if you need assistance.
Use ScalaHosting’s dedicated email hosting for maximum email security, deliverability, and performance.
