Even with relatively powerful hardware, there are many factors that could slow down a WordPress website in a localhost environment. Let’s take a closer look at how WP works on your local computer and see what you can do to avoid poor performance.
Can I Use WordPress on Localhost?
To install WordPress on your local computer, you’ll need to create the right environment for it, just like your hosting provider does.
There are some variations, but most hosts will install WordPress on top of what is known as the LAMP stack. LAMP stands for:
- Linux
- Apache
- MySQL
- PHP
With Apache, MySQL, and PHP, you will ensure that WordPress functions correctly, communicates with the database, and delivers the requested content. Linux is the operating system most hosting providers choose for their servers.
However, roughly three-quarters of all home computers use Windows, so you’re much more likely to need to install WordPress on a Windows machine.
One of the solutions you can use to set up WP on top of Windows is WampServer.
As its name suggests, WampServer is a solution stack that installs Apache, MySQL, and PHP on a Windows machine. It’s available at https://www.wampserver.com/en/, and it’s free to download and install.
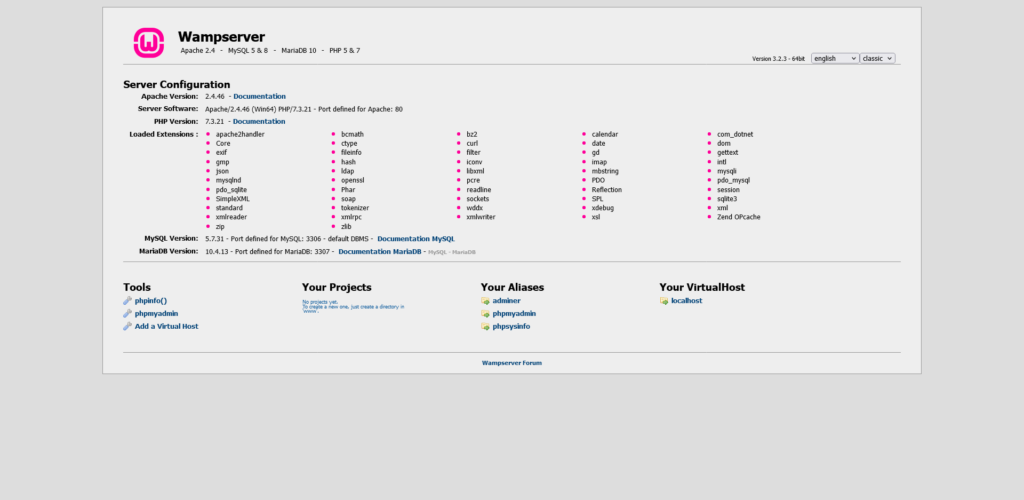
The installation itself is pretty straightforward, and once it’s complete, you can reach the WAMP homepage by opening a browser and entering “localhost” into the address bar.
How to Install WordPress on WAMP?
WampServer doesn’t give you a fully-fledged control panel, so you don’t have a one-click installer. You’ll need to set up WordPress manually, which, fortunately, isn’t too tricky.
1. Create a new project
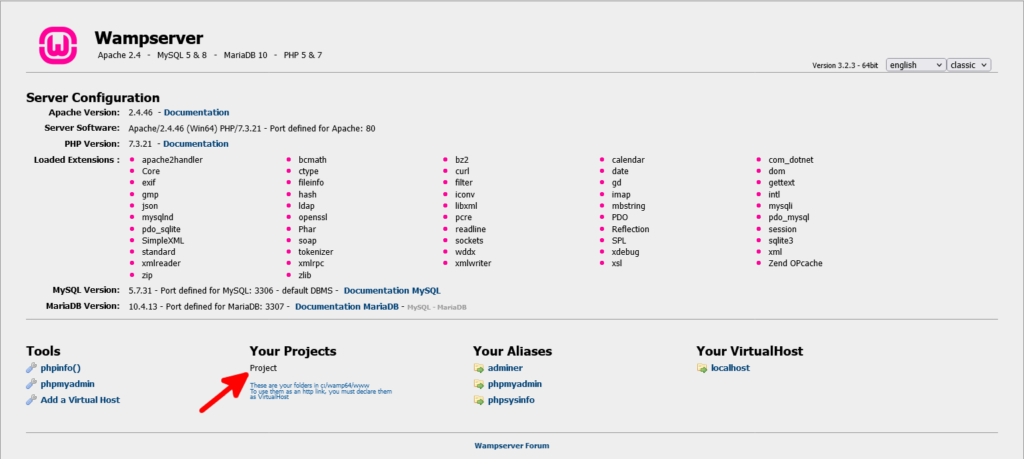
You can use WampServer to run multiple projects at once. To create a new project, you need to set up a new directory inside C:\wamp64\www\ (this assumes that C:\wamp64\ is WampServer’s installation directory).
The new directory’s name (e.g., Project) will appear under the Your Projects section on WampServer’s homepage (after you refresh it).
2. Set up a database
WordPress requires a database and a MySQL user account to operate correctly, so you’ll need to create them via the phpMyAdmin administration tool accessible through WampServer’s homepage. To log in as an administrator, use “root” as a username and no password.
The easiest way to go about the task is to set up a new MySQL user account and have phpMyAdmin automatically create a database associated with it.
Go to the User accounts tab and click Add user account. Fill out the username and password fields and make sure you select the Create database with the same name and grant all privileges checkbox.
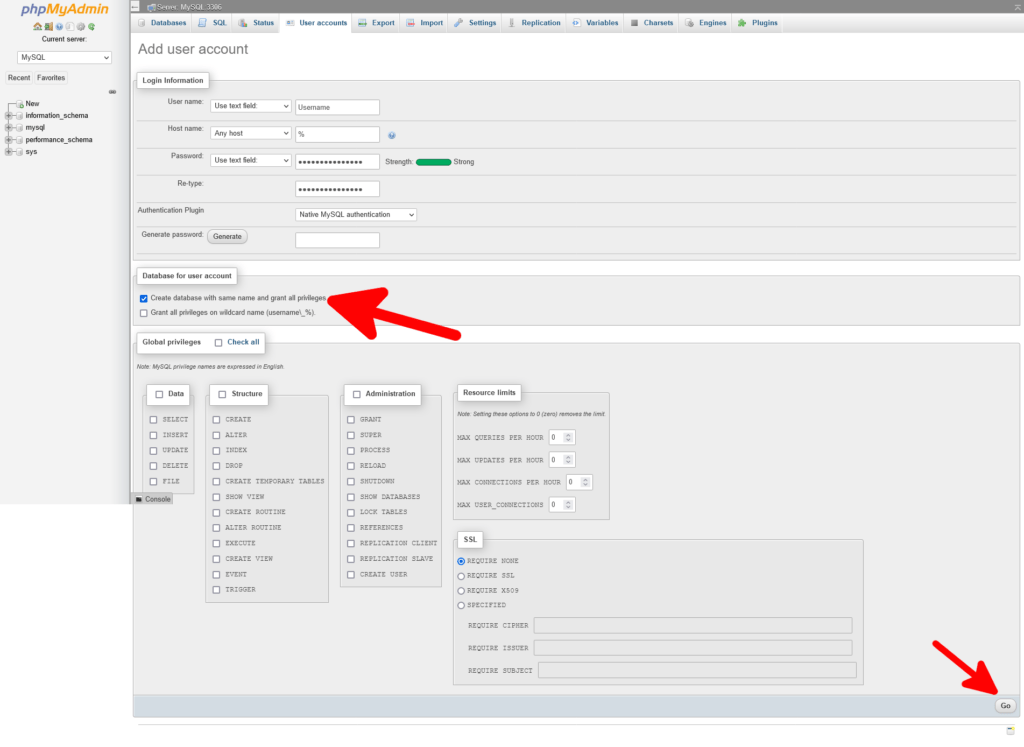
Make sure you memorize the user account’s login credentials because you won’t be able to install WordPress without them. Click Go to finish the process.
3. Download and extract WP’s files in your project’s folder
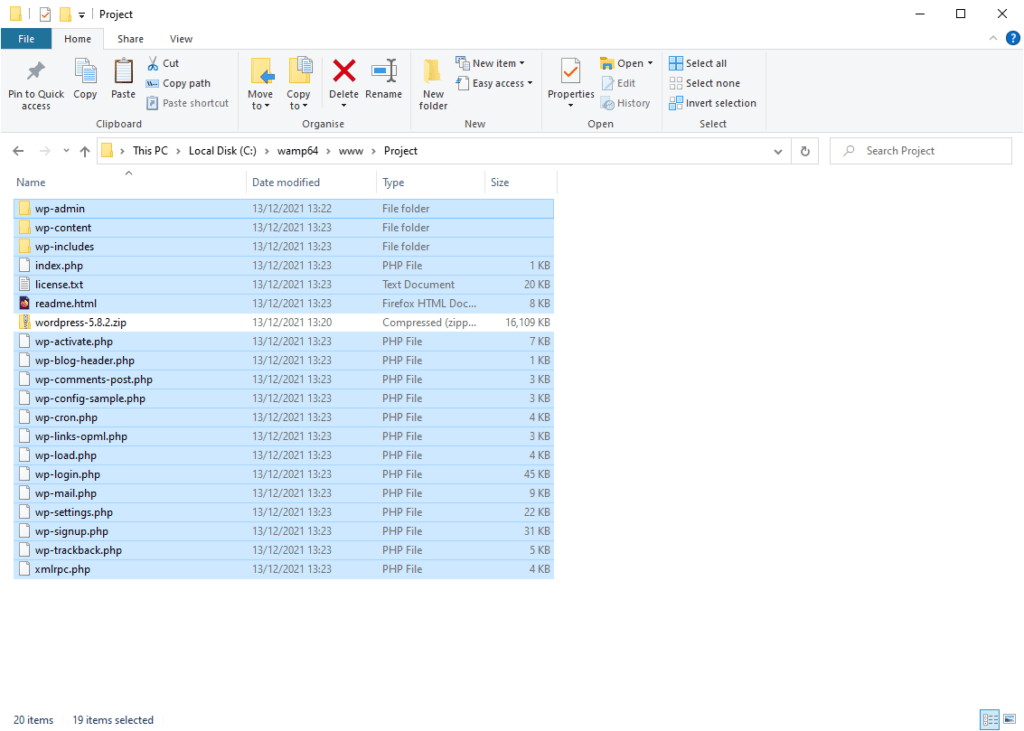
You now need to go to www.wordpress.org and download the WP core. It comes as a ZIP file, which you’ll save on your computer.
You can use Windows Explorer or a third-party program like WinRAR to extract the WP files inside the project’s folder (e.g., C:\wamp64\www\Project\). Depending on the speed of your computer, the process may take a while.
4. Follow the steps in WP’s installation wizard
Finally, you get to set up WordPress via the installation wizard. To access it, open a browser and enter “localhost” followed by a forward slash and the name of your project’s folder (e.g., if your project’s folder is C:\wamp64\www\project\, you need to enter “localhost/project“).
First, you get to select the language you’ll use, after which you’ll need to connect WordPress to the database you created during the previous step. The database’s name and the user account’s username coincide (that’s how we set them up in phpMyAdmin). After you enter the user account’s password, you can click Submit.
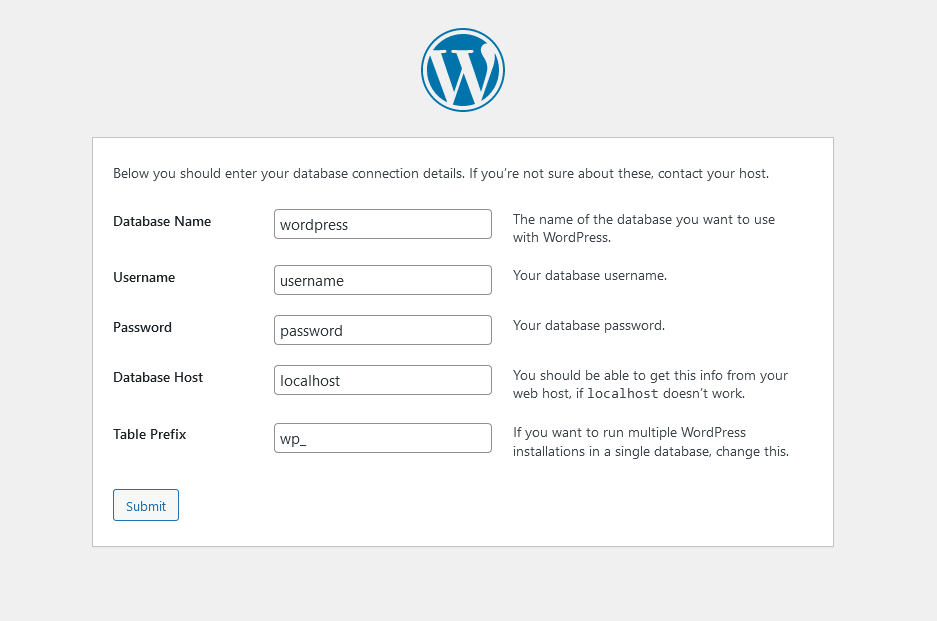
During the next step, you’ll pick your site’s title and set up your WP admin account. With that, you’re ready to go.
How Do I Speed up My Local WordPress Website?
The hardware load is the first thing you need to look at when investigating the reasons for a slow local website. WordPress is by no means a particularly resource-intensive application. According to the official minimum requirements, you don’t need more than 1GB of disk space, 512MB of RAM, and a CPU running at 1GHz to power a basic WP website.
The average WordPress website is estimated to have around 20 plugins. All these plugins put additional load on the host, and they could easily use up the resources of a less powerful computer. The WampServer stack is not exactly lightweight, either, so older machines could easily experience performance issues.
If the lack of hardware power isn’t a problem, there are a few other things you can try out. Here they are:
Disabling Apache’s Cgi_module
Apache’s CGI module executes CGI (Common Gateway Interface) scripts – small programs that retrieve the requested information from the database. CGI scripts rely on outdated technology, and there are now much faster alternatives.
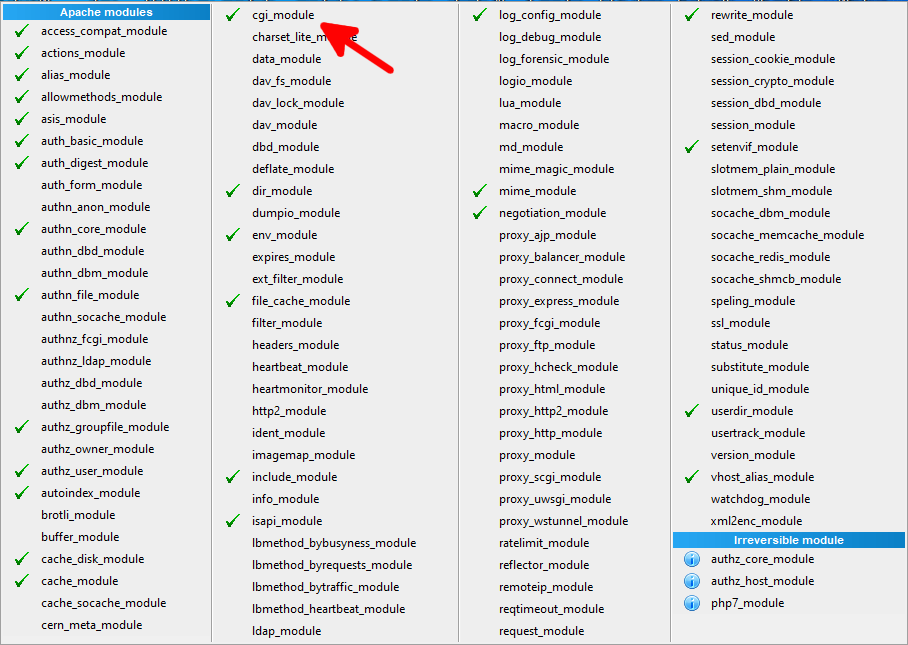
Many experts confirm that turning off the CGI module could improve the performance of everything hosted on the WAMP stack. To do that, left-click on WAMP’s tray icon, go to Apache > Apache modules.
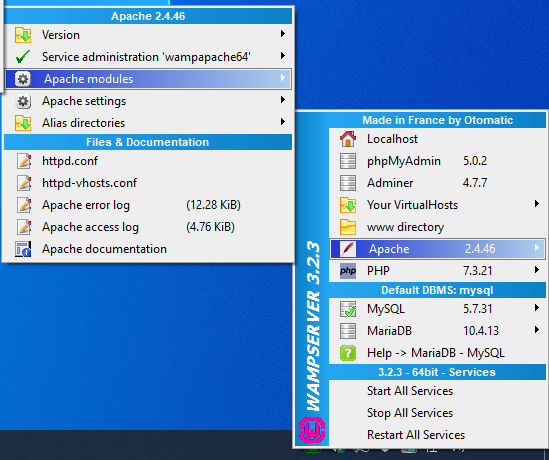
Find the cgi_module and click on it.
If WampServer doesn’t restart the services automatically, make sure you do it yourself by clicking on its tray icon and selecting Restart All Services.
Disabling PHP’s Xdebug extension
Xdebug is a PHP extension that helps with debugging and profiling code. It’s not installed on all versions of PHP, but it’s known to cause issues sometimes, particularly on WAMP hosts. To disable it, you need to edit your php.ini file.
It’s located in the C:\wamp64\bin\php\php[the version you’re using]\ folder, but it’s easier to open it by clicking WAMP’s tray icon and selecting PHP > php.ini. Because you’ll be editing PHP’s main configuration file, it might not be a bad idea to create a backup before you continue.
Search for “xdebug” and after you find the relevant section, add the following lines:
xdebug.remote_autostart=0
xdebug.remote_enable=0
xdebug.profiler_enable=0
Save the changes and restart the WAMP’s services to finish the process.
Editing the wp-config.php file
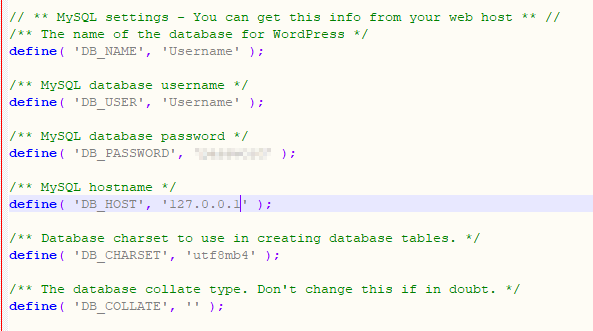
Because there are certain differences between the way Linux and Windows hosts communicate with the internet, WP’s default configuration might cause delays on WAMP servers. You can eliminate them by editing the wp-config.php file.
It’s located in your project’s folder, and you can open it with your favorite text editor. Remember, however, that you are fiddling with your site’s main configuration file, so a backup might not be a bad idea.
The line you’re looking for is:
define(‘DB_HOST’, ‘localhost’);
And you need to replace it with:
define(‘DB_HOST’, ‘127.0.0.1’);
If the suggestions above make no difference to your site’s performance, you might want to consider setting up WordPress on a hosting account rather than on a local machine. You stand to get a more reliable and heavily optimized environment suitable for any WP-based project.